Walking poles are very useful for hiking and trekking on long trails, or for harsher terrains. They give you support and balance and can be extremely useful when you climb downhill and you need additional support with steeper slopes. If you don’t have walking poles in these situations you can easily hurt your knees or push yourself too much – your legs will have to support your entire weight, while having poles, your weight is more evenly distributed among both your legs and your pair of poles.
[the_ad_placement id=”in-text-1-type-r”]In this article we will help you get used to using walking poles and you will also learn how to more efficiently use them. It is true that they are very effective during a hiking trip, but it also matters how you use them.

If you don’t use them properly their positive effects will be zero, and you may even hurt yourself of misuse. So, follow our advice in this article and learn the proper way of using walking poles.
How to properly use hiking poles
So, hiking poles are used to propel you ahead in addition to offering more balance and strain your less slightly less. So, first of all you need to adjust the length of your hiking pole. While some walking poles don’t offer that option we advise you to purchase hiking poles, which can offer you the freedom to adjust the length according to yours.

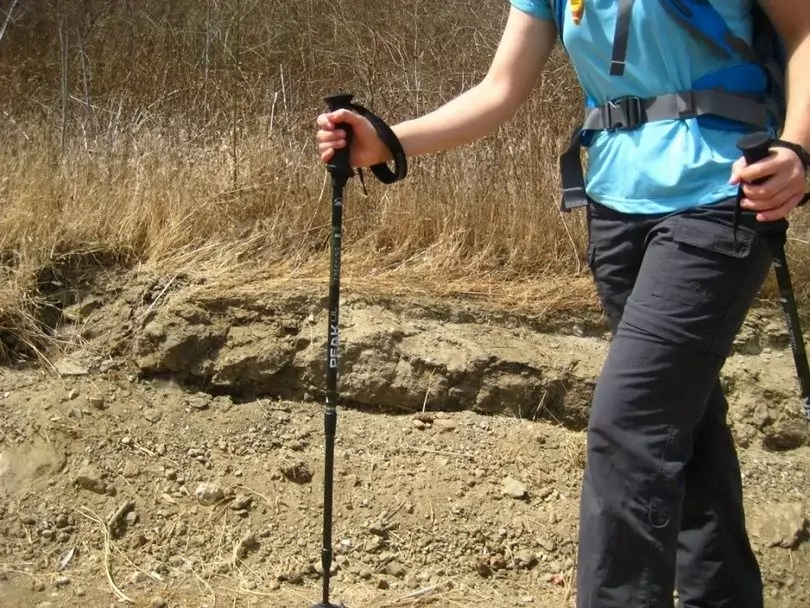
To be sure you set the correct height of your walking poles, grab one of them and air at a 90-degree angle at your elbow. For example, if that angle is sharper, then your trekking pole is too long for you. You need to shorten it slightly. This advice is applicable for flat terrain. If you are descending, your poles may be much longer than the usual length because they need to give you even support while you’re climbing down a steep slope.
And vice versa – if you’re climbing up, it’s best that your hiking poles are shorter than usual. The slope compensates for the short poles. Of course, it is always a good idea to test what feels good to you in particular.
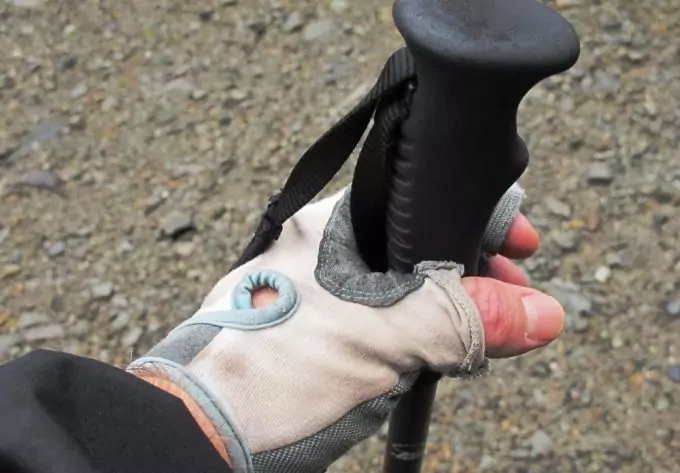
Next, open the strap which is located right at the handle. Put your hand through the strap and grab the handle of the pole with your wrist into the loop. The strap should look like a wrist-watch on your hand, while you’re holding onto the handle. If anything happens to you while you’re trekking, and you lose your grip over the handle, the strap will prevent the pole from falling entirely from your hand, so you can immediately grab it again. Thanks to the strap you can’t lose your walking pole.

So, how to use them when we’re actually out there trekking? If we apply the concept that walking poles give us support, we will need to use them appropriately. With every step you make, plant each corresponding pole slightly at a backward angle so that it gives you propulsion ahead. Remember to use your shoulders’ strength and not only your elbows – your shoulders are far stronger than your elbows.
The three main ways of using your hiking poles are:
- Thrusting/Gasing
- Braking/Slowing down
- Coasting (no effort required)
Thrusting
One way (and the most popular) of using your hiking poles is to begin with alternating leg and hand, e.g. plant your right pole and move your left leg ahead parallel to your pole. This is usually the correct and most efficient way to use your walking poles. Otherwise, there is a walking posture called square-gaiting, which is incorrect and it happens regularly that people use it. It is unnatural though and disrupts the natural flow of your posture and gait.
Braking
This method is specifically used to slow you down if you’re on a steep slope and need to slow your speed or protect yourself from rolling over. This technique requires that you always plant the poles ahead of you, at about one foot from the tip of your feet, or even further on.

Image credit: hikehalfdome.com
As we mentioned, you may have to extend the length of your poles to match the corresponding steepness of the hill/slope. This is also a great way to actually rest for a while by propping yourself onto your poles’ handles.
Coasting
Another version you can use, which is great for light walking on flat and easy terrain to use the poles parallel to each other. Do it like this: hold both your hiking poles and plant them both at the same time ahead of you, at an angle smaller than 90 degrees (about 70 is ideal), then move ahead. Keep repeating this while walking. This gives you a nice fluid motion, without actually relying on the poles to keep your balance. Yet, it’s also good for the same purposes we indicated above – both propulsion and balance can be achieved with this technique as well.
[the_ad_placement id=”in-text-2-type-r”]You don’t have to ‘load’ your poles to move ahead. They can simply help you keep your gravitational center (balance) with the least effort.
In this YouTube video you can clearly see the correct and incorrect positions of your body, including wrong walking and using the hiking poles.
Final words to consider when it comes to the above three methods is that you can plant your poles according to the obstacles you’re passing across.
For example, if you need to step over a large fallen tree, it’s best to plant your poles onto the tree, if you intend to step onto it. This technique gives you enough propulsion power to step onto the obstacle. Of course, keep the poles at the needed height, and make sure that no matter how you position your hands, it’s always good to maintain a 90-degree angle at the elbows.

If you’re stopping from a high obstacle to lower ground, plant your poles onto the ground you intend to step onto. It’s easy to imagine four-legged animals and how they tend to move across obstacles. Using hiking poles makes walking straight a bit easier, because you transfer part of your body weight over your shoulders and optimally at your hiking poles.
Nordic walking
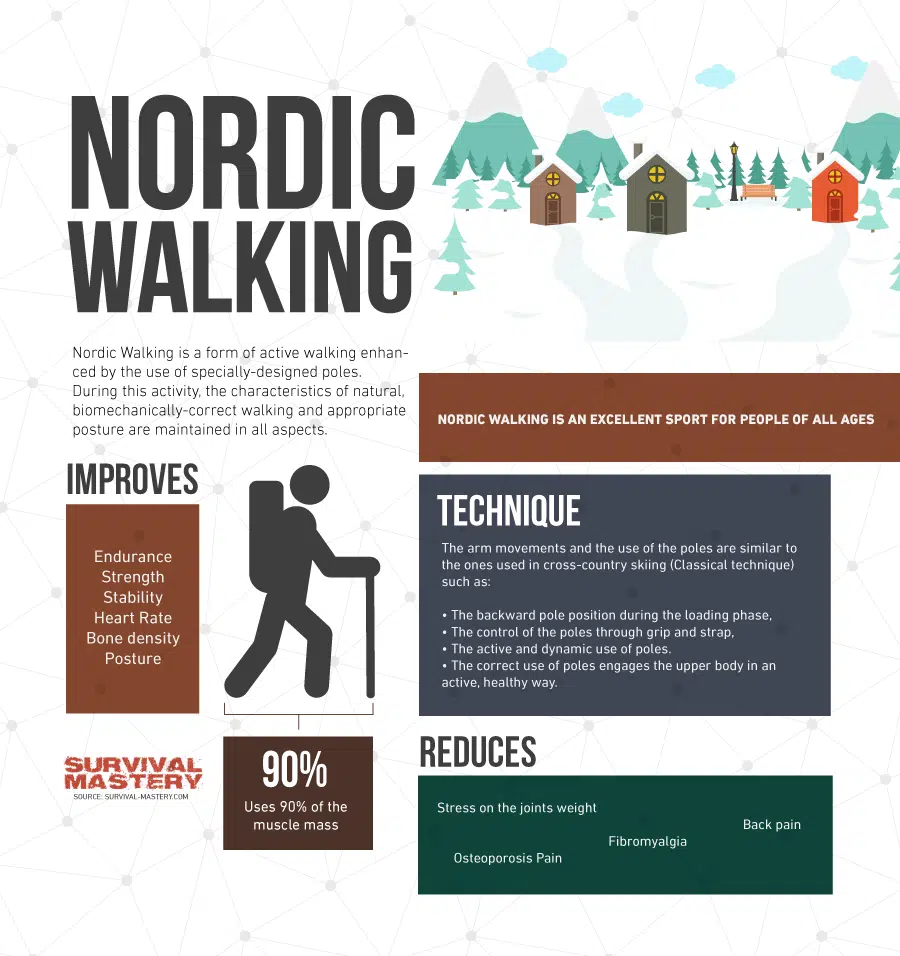
The above techniques are slightly different from the so-called Nordic Walking. The above explained ways of using your walking poles are more suitable for hiking and trekking in rough and uneven terrain, on slopes and hills. On the other hand, Nordic Walking is more workout oriented and useful if you’re going walking before or after work and you’re walking on even and hard ground. Since it’s more about walking fast and light, you have to use slightly modified techniques.

To do proper Nordic walking, you need special caps on both your walking poles that create traction upon contact with the ground surface. This is used to give you a slight push ahead, and it still makes you move your hands. Place your hands on your hiking poles just like we explained earlier and plant your pole at an angle appropriate to the pole’s cap, the angle should be nearly 45-50 degrees.
You hardly pick up your hands from the ground. The hiking poles should feel natural and should move naturally to your walking gait. You can do brisk walking with this technique, because you are not supposed to carry heavy weight or backpacks. Go checkout our reviews of the best hiking backpacks that can help you walk well when you go trekking.
Above you can watch another YouTube video where you will learn even more about the difference between hiking in the wilderness and Nordic walking.
Hiking pole tips and advice
It’s good to know that almost all walking poles have the ability to absorb the shock from walking downhill. You have the option to turn this feature off, for example, while you’re going uphill, but it’s a great way to protect your knee joints from the shock when stepping down. The anti-shock feature is also useful if you have weak joints, including ankles and hips.
Also, to improve your hiking experience it’s best that you get hiking poles adjustable at length. It’s much easier to control the length of your poles and also keep them compact on your backpack, in comparison to non-adjustable poles. Don’t forget to wear the right kind of shoes. Read our article on the best hiking boots to help you in your journey.
[the_ad_placement id=”in-text-3-type-r”]Another thing to consider when using walking poles is what material they are made of. The most often found on the market are poles made of aluminum and of carbon fiber. Aluminum is very light, thus making a pair of poles weigh no more than 22 ounces. You still have to keep in mind that aluminum is more fragile and can bend if you apply too much pressure on it, but it won’t be that easy to break it in half.

Carbon fiber, on the other hand, is much more expensive and lighter than aluminum. Unfortunately, along with the low weight come the downside and it is that they are far more prone to breaking if pressed too hard. In case you go hiking in a rough terrain you should better consider the aluminum poles.
And to have just any walking stick is always better then don’t have it at all. Check out this great DIY instructions on how to make a walking pole by yourself.
The best way to learn the above techniques is to just go out and practice in a safe environment. Don’t go straight ahead at hiking for 20 miles if you’ve never tried walking poles before. You are probably inexperienced and it can be risky to rely on something you’ve never tried before.
Check out our complete reviews of the top hiking poles to give you more options.


I don’t have manufactured stick like these ones. When I go for a hike I just find a nice branch and use that, it works fine from me. Should I consider buying a pole like the ones in this article?
I dried smaller branches from my oak tree and made something similar to walking poles. Any hard, semi-flexible wood will work. I’ve used it several times before it wore out. I’ve also tried poles with foam handles, but they have eroded faster than my oak branch and its shaft cracked. A friend recommended to look for fixed poles with cork handles. Cork is less prone to wear and is more comfortable. Getting fixed poles gets rid of joint failure that you will get from collapsible poles.
Do you know if walking poles are specifically designed to withstand slippery terrains? For example, you’re going down a muddy hill with a ground surface that’s hard to pierce?
The metal tips on your walking poles will slip and slide on hard to pierce surface. Pop some rubber tip protectors on your poles, and problem solved.