
Food should be one of the first considerations when planning for an emergency. The military uses MREs, but these and other retail backpacking and survival foods can be expensive.
Knowing how to prepare your MRE-type meals is essential, not only so you have plenty of food available but also because you can save money.
This article reviews MREs that you can make with regular items from the grocery store or by dehydrating and canning your foods. I’ll also provide a few ideas to get you started.
Table of contents
Shelf-Stable MRE’s
Regardless of the types of MREs you choose to make, they should be shelf-stable. There are several methods for extending the life of your foods.
- Dried grocery items can be sealed for storage.
- Dehydrated foods are foods you can dehydrate via your oven or a dehydrator.
- Freeze-dried foods maintain the most nutrition and last the longest.
Many Survival Food Companies provide numerous meal options if you are limited on time and want to use a faster approach.
One other option is BackcountryFoodie.com. I use them for backpacking. The owner is a nutritionist who provides all types of recipes you can make yourself. The nutrition information alone makes the site valuable for me. This is also a less expensive approach.
Daily Nutrition
When packaging your MREs, you should understand how many calories you will need in a day. This varies for men and women.
There are several good resources that can provide this information, but there are several general rules of thumb you can follow.
- You can survive on 1,200 calories per day.
- A sedentary female needs 2,000 calories per day to maintain weight.
- A sedentary male needs 2,400 calories per day to maintain weight.
You also need to determine what minerals and vitamins you will need. Vitamin deficiencies can cause numerous health problems.
Finally, and especially if you have children, store foods everyone likes eating. This makes maintaining weight easier and can provide a mental boost in challenging situations.
Grocery Store
Creating DIY Meals Ready to Eat (MREs) can be as straightforward or complicated as you want. Locating shelf-stable foods at the grocery store is probably the most straightforward approach.
You will also need a few other supplies to prepare your meals.
- Vacuum Sealer
- Oxygen Absorbers
Under ideal conditions, a homemade MRE should last you at least five years. You should ensure all foods are dated so you can rotate them as needed.
There are many easy dried foods to choose from for your meals. Some examples include rice, pasta, oatmeal, coffee, hot chocolates, grains, grits, spices, etc.

Tips & Tricks
Vacuum sealers are easy to purchase online at a range of prices. If you are looking for one, check out the FoodSaver VS2150. I like the FoodSaver because it is small, durable, dependable, and moderately priced.
When you purchase the vacuum sealer, make sure you also purchase your Mylar bags and oxygen absorbers. Other bag choices exist, but Mylar bags are the most durable and dependable. They are also one of the more straightforward solutions.
Here are some tips for preparing the MRE packages with Mylar.
- Shelf-life – For the most extended shelf-life, use dry foods without fat. The drier, the better, so if you dehydrate your foods, get them as dry as possible.
- Oxygen Absorbers – Open these just before you are ready to seal your Mylar bags. It should be the last thing you do before you seal the bags.
- Date – Date your packages and containers to determine when to rotate your products. Some will last 2 years, and some will last 25 years.
Setting up your homemade MREs
Homemade MRE Package Example
- Eight packs of instant-flavored oatmeal
- Instant coffee, tea
- Paper towels
- Dry milk
- Plastic spoons
- Dried fruit
Follow these steps:
- Open all the packages and remove their contents. Don’t remove the contents of the dried milk unless you’re going to use it all. Lay them out on the counter.
- Determine how much of each item you want in each MRE.
- Separate them into their piles.
- Measure your desired amount for each day and place them into a plastic bag.
- Portion and separate your daily allotment of dried milk.
- Assemble all parts of the breakfast and vacuum seal them together.
- Identify the contents and put the date on the package.
Homemade MRE Lunch
First, you’ll need a tuna, chicken, or spam packet. Then, grab your favorite cracker type and some individual condiment packets.
Packaging some drink mix to flavor your water to provide electrolytes is also important. Finally, pick out your favorite single-serving snack or granola bar.
- Lay all of your chosen items out on the counter or table.
- Open the packages and separate them into individual piles.
- Take your Mylar bags and drop in an oxygen absorber
- Fill it with your chosen lunch items
- Measure your food-saver bag to be about 4 inches longer than your Mylar bag.
- Seal the bottom of the food-saver bag.
- Slide in your filled Mylar bag so that the open side faces the open side of the food-saver bag.
- Vacuum seal your food-saver bag
- Mark and date the contents
Homemade MRE: Meal In a Jar
Another way of creating a homemade MRE is to make a meal in a jar. This method involves adding all the ingredients for one meal to a canning jar and sealing it.

Oven canning is a specific process that can only be done with particular foods.
Below, we have listed some great foods for homemade MREs.
Ramen Noodles
Ramen noodles are very versatile. Here are a few recipes for your DIY MREs.

Ramen seasonings contain a lot of salt. This can be good on a hot summer day but isn’t always necessary. First, discard the seasoning packet and replace it with dried tomato leather.
The items you will need:
- I pack of ramen noodles
- ½ cup of dried shrimp or crab meat
- ½ cup of dried vegetables (your choice)
- ½ cup of tomato leather tightly packed
- Four tablespoons parmesan cheese
- 2 cups water
To prepare:
- Break noodles into pieces
- Combine all ingredients except parmesan cheese in the pan
- Bring water to a boil and cover
- Remove from heat and allow to stand for 5 to 10 minutes
- Stir in parmesan cheese and enjoy
When you pack this into a Mylar or vacuum bag, put the noodles and dried vegetables in the same bag and everything else in a separate bag.
Dehydrated Chili
Dehydrating chili is another fantastic idea for a homemade MRE. You can either purchase cans of chili or make your own.

Dehydrating homemade chili for your MRE
- Evenly spread your chili onto the roll-up tray of your dehydrator
- Place an empty dehydrating tray on top of the chili tray
- Continue this process with dehydrating trays until you’ve spread out all of your chili
- Turn on your dehydrator
- Follow the manufacturer’s instructions on the drying guide
- Place your MRE in a vacuum-sealed or Mylar bag
- Mark and date
Additionally, note the amount of water used to rehydrate your meal. Once you’re ready to eat, bring water to a boil, add your dehydrated chili, and simmer, constantly stirring, for about 20 to 25 minutes.
Check out our list of the top food dehydrators to jump-start your meal preparation.
Making Granola Bars
Granola bars and trail mixes are great for backpacking and snacking at home.
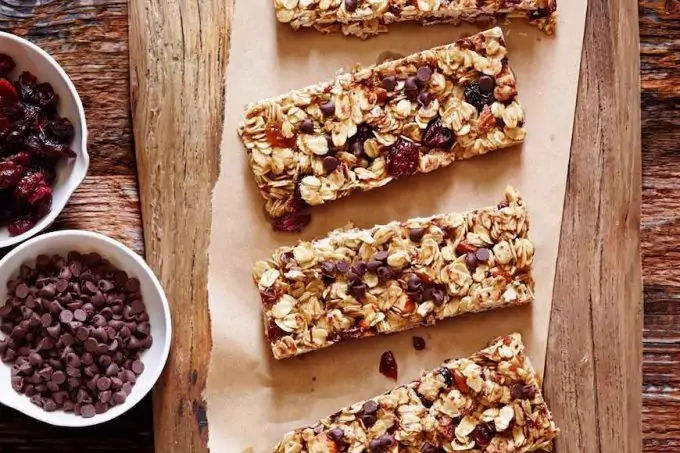
Create your granola or granola bars out of simple ingredients.
Essential granola recipe ingredients:
- 2 cups rolled oats
- ½ cup honey
- ¼ cup well-packed brown sugar
- Two teaspoons of vanilla
Directions:
- Preheat oven to 350 degrees
- Spread rolled oats onto a baking sheet, stirring occasionally
- Toast for about 15 minutes
- Combine honey, brown sugar, and vanilla in a large saucepan
- Cook until brown sugar is dissolved
- Remove rolled oats from the oven
- Reduce oven heat to 300 degrees
- Immediately pour rolled oats into the hot liquid
- Stir to combine
- Butter baking sheet to prevent sticking
- Turn the mixture onto the baking sheet, flatten, and evenly distribute
- Bake for 25 minutes
- Cut into slices
This is a basic recipe. You can add dried fruit or nuts for extra flavor if you’d like. See our piece on making your own energy bars to save money.
Trail Mix
Trail mix is great to have in your homemade MRE.
Ingredients:
- 1 cup almonds
- 1 cup peanuts (skins on)
- ¾ cup cashews
- ¾ cup brazil nut (optional)
- ¾ cup glazed/sugar-coated pecans
- 1 cup raisins
- 1 cup M&M candies
- 1 cup Reese’s Pieces candies
Mix all ingredients in a large bowl. Bag them up and seal them in. Don’t forget to date them.
Homemade MREs are so much cheaper and tastier than their military counterparts. If you’re penny-pinching, dehydrate your leftovers and save them for an SHTF situation. You’ll be glad that you did!
If you have the time to dehydrate items, buy products from the grocery store.


I love the recipes! I tried the trail mix and used it last weekend when I went on a day hike around Mount Wrightson and it was a life saver. I’m actually stockpiling some preserved items for my own SHTF shelter and these recipes are a blessing.
I’m glad to hear this Jason. Just make sure to keep a keen eye on those expiration dates. Also, make sure to consider the storage conditions.
I used to do this in college. On a tight budget, I can only eat noodles/ ramen with canned chili. But that was good, I saved a lot of money. Haha. Until now, sometimes, I got so busy with work, my lunches are almost always canned/ processed meals. Anyway, I make sure that I can still get enough nutrients and that my breakfast and dinner should be a real meal.
To be honest, I always just brought cans of food along when going on a camping trip. We would usually prepare food, but had canned supplies in case of emergencies or if we are simply lazy.
This article provides a lot of useful tips on how to diversify diet without using canned food all the time.