Hiking in the mountains can be the best way to get away from it all and get closer to nature. But in order to enjoy it to its fullest extent, you need to be adequately prepared, and that means accounting for all kinds of weather.
[the_ad_placement id=”in-text-1-type-r”]Sun, rain, and snow are just a few of the different kinds of weather you’ll face, and having what you need will protect your health as well as your happiness. If you plan on heading to areas where there is very deep snow, traversing this terrain can be difficult to plan for. Skis can be too cumbersome to pack. Instead, if you know how to snowshoe, then you’ll be able to stay high and dry above those several feet of snow.
The history of snowshoeing
Snowshoeing has been around for centuries, and it has helped people to get across heavily snowed areas. Without them, people would likely sink up to their waists, and that can make traveling almost impossible.
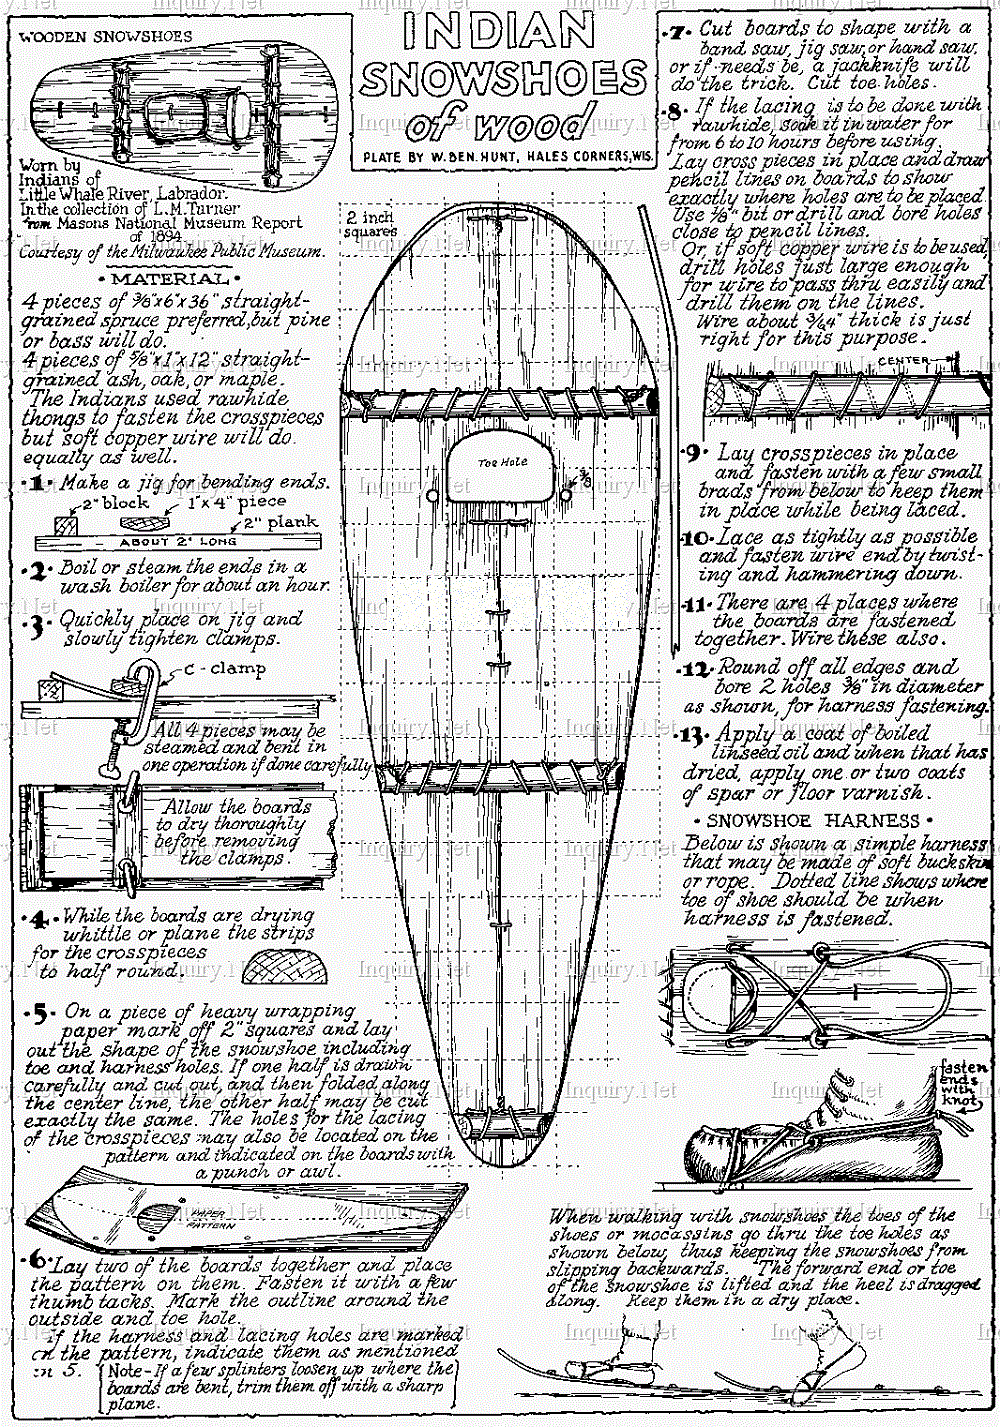
Snowshoes work by transferring your weight evenly so that you don’t sink into the snow. It has become more sophisticated over time, with new and better shoes that make it easier for you to travel. It’s even considered a winter sport now, so there are new lines of “sports” models of shoes that help to improve speed during a race.
See also: How to Make Snowshoes: A Fun DIY Project for The Survivalist in You
Whether you plan on using old-style wooden frames or newer models made out of aluminum, the basics of the practice are still the same.
The benefits of snowshoeing
Unlike other sports where it takes months or even years to master, knowing how to snowshoe is just as easy as learning how to walk. It’s extremely easy to learn and can be mastered within a week.
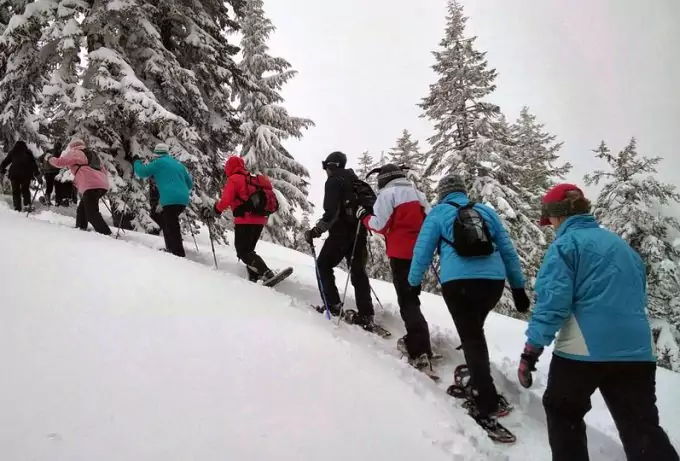
The sport itself is also very inexpensive, with very little equipment needed to be engaged in the activity. While other sports have an element of danger and risk of injury to them, snowshoeing is without these risks. It’s incredibly safe and anyone in your family can partake in it. If you’re a newbie, see our article on how to choose the best snowshoes for beginners.
And top of all this, it’s a great cardiovascular exercise that can be done during the winter months, at a time when people are at more risk to storing those pounds. The workout is quite intensive to the point that a person can burn about 600 calories in one hour. It’s definitely a great way to lose weight if you’re looking to shed some pounds.
Finding the right equipment
Before you get involved in the activity, it’s important that you find the right snowshoes for you. There are several different kinds, depending on what you want to get out of it. There are three basic kinds of snowshoes:
- Recreational: these are the best shoes for first-timers. They work on the simplest of terrains that don’t have a lot of steep hills and gullies.
- Aerobic: these are shoes that are most suitable for active snowshoers who want to get the most out of his session. They’re most suitable for runners and those going cross-country. They’re tougher than recreational snowshoes.
- Hiking/backpacking: these are the toughest snowshoes on the market and are designed to take a beating. Most of them have an aluminum frame and have bindings that will support all kinds of boots so that they can stay on better.
When looking at a shoe, the cost is generally inexpensive, ranging from $100 to $300. If you know what kind of activity you’re going to be doing, it’s important that you look to the function of the snowshoe first before looking at the price.
Many snowshoes vendors will also sell them with poles and a bag to keep your snowshoes in. However, these deals are most suitable for first timers. If you’re planning on going hiking, these starter kits might not be best for you.
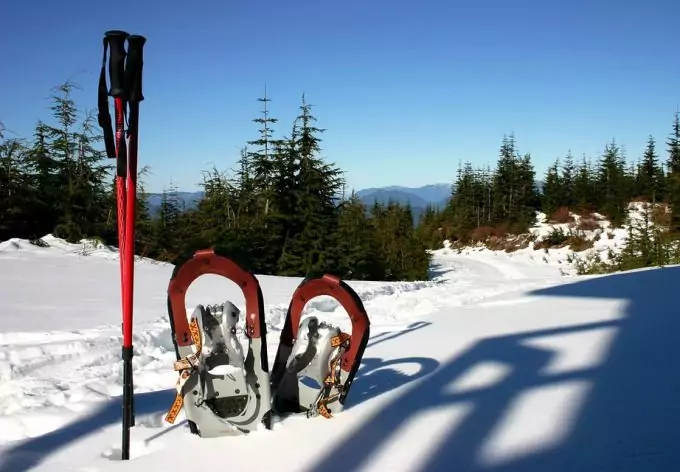
It is highly recommended that you don’t purchase used snowshoes. If you do, then it’s important that you inspect them thoroughly for any damage to the frames or bindings. Getting a faulty pair of shoes could spell your demise and leave you stranded with no way to get out. And lastly, you should pick a snowshoe using the helpful charts that are available at the place of purchase.
The size of the shoe is dependent upon how much you weigh, as well as the weight of the gear you’ll be bringing with you. The most common sizes are 25″, 30″, and 36″. If you’re still confused about it, it could be a good idea to get some help from the retailer to find the right size for you.
There are also different kinds of snowshoes depending on the kind of snow you’ll be facing. Again, a retailer can help you to figure out what will be best for your needs.
When you first start off snowshoeing, it can feel like you’re walking through the sand on a beach, so you’ll have to learn to lift your legs higher when you walk. It’s best to start on flat terrain first when you’re getting used with them so that you can get a sense of how you should be walking.
[the_ad_placement id=”in-text-2-type-r”]Having poles will help you to keep your balance. Be sure to start off slow so that you don’t overexert yourself. Once you’ve gotten used to that, test your snowshoes on hills and uneven terrain.
Walking uphill requires using the toes of your boots and shoes in order to gain good grip, while walking downhill requires you to lean backward. Take small strides in both instances to minimize your risk of losing your balance and falling over.
How to walk in snowshoes
First, you need to make sure that your snowshoes are properly attached to your boots. Put your boots in the proper footholds and fasten the straps as tight as they’ll go. The ball of your foot should be over the pivot point of the snowshoes.
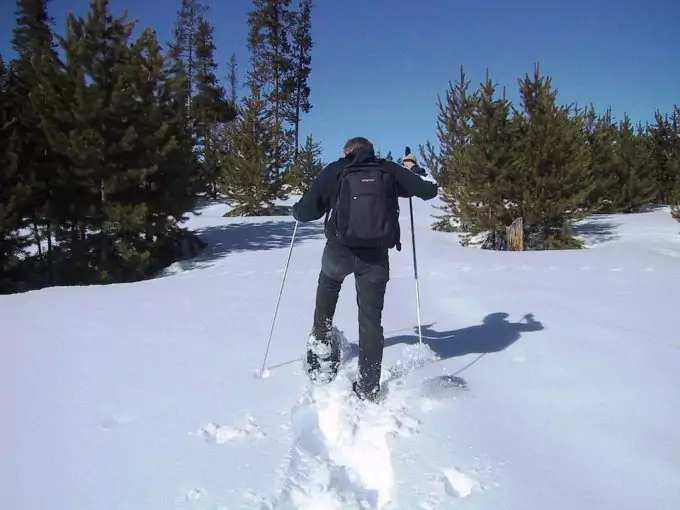
Once they’re on, you need to walk with a wide stance in order to accommodate the width of the snowshoes. This may feel a bit uncomfortable at first, but you’ll get used to it with more practice. Walk as you would normally, leading with your heel and then rolling your weight over the ball of your foot and then your toes.
Next, lift up the nose of the snowshoe at a height that will clear the snow. Be sure not to lift your foot higher than you need to, or you’ll become tired very quickly. If you need assistance, you can use poles to help you along and make your first time easier. These are especially helpful in very deep snow. Make sure that these are at the right height.
If you’re going uphill, kick the snow with your toes in order to sink the crampons into the powder and gain a good foothold. If your kick creates a deep hole rather than a step, then it’s too soft to go up and you need to find a different route up the hill.
When going downhill, there are hell crampons that will cling to the snow when you lean backward. Take time in descending so that you don’t lose your balance. Don’t swing your legs in long arcs, as you could end up falling and rolling down the hill.
If you’re walking alongside a hill rather than down or up it, then use the sides of your snowshoes to help you travel. You should lean in the direction of uphill so that you minimize your risk of falling.
Above is a helpful video by L.L. Bean that talks about how to snowshoe.
Precautions to take when snowshoeing
It’s important to stay safe during your adventures, so here are a few tips to keep in mind, whether you’re a first-timer or experienced in the sport.
- Travel with friends: it’s safer this way because, if there’s an emergency, you’re not stuck in the middle of nowhere all by yourself.
- Dress in layers: despite the fact that you’ll be engaged in vigorous activity, the warmer the better as long as you don’t overheat. The outermost layer should be waterproof, and you should always bring a spare layer in case one of them gets wet.
- Avoid ski tracks: it’s just good etiquette if you’re going to a popular area where there are skiers. Snowshoes can easily ruin their trails, so it’s better to walk alongside them.
- Take turns when breaking trails: making the path suitable for the people behind you can be tiring work, so it’s important to share the effort between everyone so that you can all stay safe.
- Stay energized: bring plenty of high-energy snacks and water to rejuvenate yourself when you get tired. It’s more exhausting than you realize, and despite the temperatures, you can lose a lot of water through sweating.
- Stay safe: always check the weather forecast before you decide to go out snowshoeing. You don’t want to get stuck in the middle of a snowstorm, so be prepared to take a compass with you, as well as a beacon and a portable shovel. Be sure to check for any avalanche danger zones in the area as well.
If you want more tips on snowshoe safety.
Above is a handy video to watch.
How to make your own snowshoes out of duct tape
In the event that you’re already out in the wilderness and you haven’t brought snowshoes with you or you can’t afford a pair of your own, it’s not the time to despair.
There are some handy ways you can make your own snowshoes that will still work so that you can get around safely.
- The materials you’ll need are two rolls of duct tape, hot glue, an Exacto knife, tree boughs that are at least six to seven feet long and at least 1/2″ to 1″ in diameter, string, scissors, hammer, and a large bowl.
- The first thing you need to do is to soak the boughs so that they become pliable. Tie them together with the twin and place them in a container of hot water to soak for at least four hours.
- Choose two boughs that are roughly the same length, and gently bend them until they make a large teardrop shape. Tie the crossed-over ends together and leave them out in the sun to dry.
- The next step is adding the cross braces. These provide stability to your snowshoes and maintain their shape. Choose two of the straightest boughs that you have left. Measure five to six inches down from the rounded edge of your tied bough; this is where the cross brace will go. Do the same for the back cross braces, except measure at least eight inches from the crossed-over edge of the base. Then, strip the bark from these pieces and cut notches into them so that they fit snugly against the base. The notches should be at least 3/8″ deep.
- Add some hot glue to the underside of the notches and place them in the respective areas on the base.
- Use long strips of tape to replace the twine that’s been holding the base of the shoe together. The lengths of tape should be about 1/8″ wide and 20″ long. Keep adding strips until the whole thing is secure.
- Now it’s time to create the netting out of more duct tape. Use long strips and fold them in half. Wrap them horizontally around the body of the shoe between the cross braces. Use more tape to secure them to the base. Repeat these six or seven times until this area has been covered.
- Then create a cross-thread pattern with more tape in the area between the cross braces, weaving in and out of the strips that are already there. In the end, you should have a woven mat of tape that will support your full weight.
- Using a piece of cardboard or thin wood, measure two inches from either end of the platform and bend it at a 45 degree angle. The wrap it with tape to create a stepping platform for the shoe.
- Building your bindings will help to keep your shoe strapped to the snowshoe itself. Use your boot that you plan to wear with your snowshoe and place it on the platform and base. Use a piece of duct tape to create an arch over the widest part of the show. Tighten the strap down so that it fits snugly on the sides and top of the shoe. Tape this to the platform, and do the same for another strip that will go across the top of the shoe. You’ll need a third strip of tape that will go behind the boot so that it’s locked into place on the stepping platform.
Secure this on one side to make it easy to put your boot into the shoe. You can create a clasp by taping a plastic curtain hook and a metal picture frame support to the open side. - Bending the front of the snowshoe is important to ensure that the weight is distributed evenly. Place the front of the snowshoe in a bowl of boiling water and soak for about thirty minutes. Remove and bend the front of the shoe up. Place something heavy to bend the shoe and let it sit for thirty minutes to dry.
- Use strips of tape to wrap the back of the snowshoe for about five to six inches of the shoe body.
- Cut four strips of tape that consist of five layers of tape, are five inches long and half an inch wide. Thread two of them through the spaces at the front of the webbing around the front cross brace. Place one binding on each snowshoe so that the point of the bend on the binding is at most 1/8″ over the front of the cross brace. Tape these strips to the binding on both sides. This should create a hinge effect that allows the platform to move with your steps.
- Just as you did with the back of the shoe, it’s time to wrap the front with tape in order to minimize the shoe sinking into the snow. Begin where the shoe starts bending upwards and tape in a diagonal fashion. Create an “A” frame that leaves enough space for the hinged binding to still move.
- If you want to seal your project, then create a mixture of 80% water and 20% gorilla glue and spread across the wooden areas of the snowshoe to protect it against the weather.
How to make snowshoes out of branches
In the event that you can’t make snowshoes beforehand, there is a way that you can make emergency shoes when you’re already out in the wilderness. You’ll need to find tree branches, preferably pine, have string or shoelaces, and a knife. The branches should be about three feet long. If you’d like an easy-to-follow video that details the process, you can find one here:
Whether you’re engaged in a simple cross-country trip through some snowy woods or you’re interested in getting some exercise, having snowshoes can make all of the difference in the world in getting around easily.
[the_ad_placement id=”in-text-3-type-r”]Making your own at home can be a rewarding process that saves you a lot of money. Knowing how to make your own pair when you’ve been caught unawares by the changing weather will help you get back home safe and sound, and with drier feet.
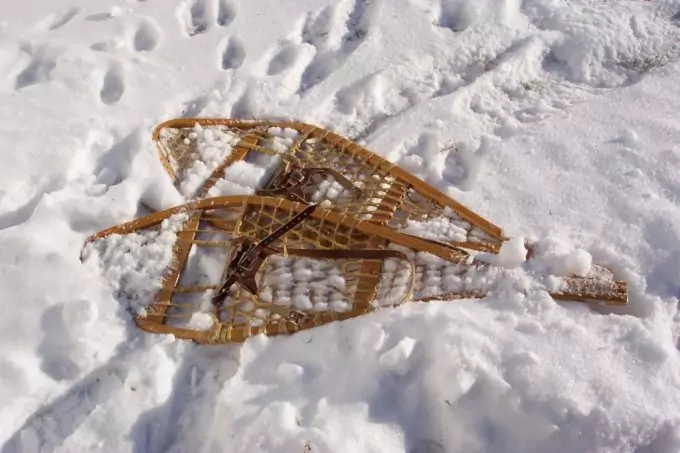
It’s a good idea to practice snowshoeing beforehand, probably with a rented pair, so that you know exactly how to walk in them without struggling or wasting energy unnecessarily. Staying safe, especially when the temperature drops, can safeguard your health and minimize the risk of injury and frostbite.
Check out our reviews of the top snowshoes for your information.




Just got back from my first expedition with the MSR Lightning Ascents. It’s astonishing how much easier it is to move around. During most of the trip there was a crunchy ice crust that would break at times while tramping around in boots, but shoes just scooted over it. On the hills, there is heel lift which makes walking comfortable. When we got to a pretty steep icy patch, the crampons ensured I had plenty of grips. Totally stoked on them, but if you get another brand, I will make sure the same options fit. The poles were perfect for walking as well. The only thing that took some getting used to was strapping myself into the shoes, but this got quicker through the day.
I think snow shoes are pretty awesome. If you think they’re dumb, you probably haven’t been in a situation where you wanted to hike through some beautiful area and snow shoes were the only way to make it happen.
I love running in snowshoes. It is a great cardio exercise and helped me lose a lot of weight.
If you like hiking it is perfect too, as you can combine exercise and love for snow and mountains.
Thank you Rodney for sharing your opinion with us.