
Water is a must have substance for human existence. Within a matter of days without water, the human body suffers through dehydration and death is imminent without a clean water source to drink. The question of how to make a water filter is, therefore, one most survivalists find among the top questions to address when it comes to emergency and survival readiness.
[the_ad_placement id=”in-text-1-type-a”]
In survival situations, it can be incredibly difficult to find water, let alone a clean enough source to consume. Thankfully, if you know how to make a filter for cleaning water you can convert potentially toxic water into one you can safely consume for your own survival. There is a myriad of methods for filtering water, all of which prove effective when done correctly.
The more ways you know to filter water from materials you can buy or that you already have on hand, the better off you will be in any emergency or survival situation.
Benefits of water filtration
Clearly, the main benefit of filtering out water is that it allows for its consumption. Human beings have to replace the water they lose daily. To replace the lost water one must consume over 2 to 3 liters of water through the acts of drinking beverages and eating some foods.

Water is vital to the body’s own filtration system and helps in clearing the body of undesired toxins. It makes digestion easier, helps regulate the digestive tract, and minimizes the risk of developing infections. If a person is not properly hydrated, they can become confused, exhausted, and suffer myriad symptoms of increasing intensity and consequence.
Then there are the contaminants in natural water sources that can make a person severely ill or worse. Different water filters eliminate different contaminants, both organic, and material. Some of the things that a quality homemade water filter can separate from the water include:
| Contaminants | Purpose for Filtering |
| Lead | Lead gets into the water via natural deposit erosions. Lead is a well-known toxin and studies have indicated it as a metal that contributes to developmental delays, both physical and mental, in children. It may also contribute to the onset of kidney issues as well as hypertension. |
| Mercury | Mercury also gets into the water via natural erosion of deposits. Studies have linked excessive exposure to kidney issues. |
| Chemical Pesticides | All streams contain at least one detectable pesticide. Some 56% of all streams have more than a single pesticide in it. |
| Microbial Cysts |
If animal feces get in the water, it is possible for microbial cysts to also enter a body of water. These cysts include the following: Cryptosporidium: Often in rivers and lakes, it leads to gastrointestinal conditions. Giardia: A parasite and single cell unit infecting animals and humans during the cyst life cycle. This also leads to gastrointestinal conditions. |
| Material Contaminants | Sediments and particulate matter in the water source. |
| Microorganisms | |
| Bacteria | Vibrio vulnificus, Salmonella, Escherichia coli , Vibrio cholerae, Campylobacter jejuni, and Clostridium botulinum, are some examples |
| Viruses | Poliovirus, Hepatitis A virus, Coronavirus, or Polyomavirus |
| Entamoeba histolytica, Cyclospora cayetanensis, Cyclospora cayetanensis, and Microsporidia | |
| Parasites | Echinococcus granulosus, Schistosoma, Enterobius vermicularis, Hymenolepis nana, Dracunculus medinensis, Taenia, Ascaris lumbricoides, and Fasciolopsis buski |
| Algal | desmodesmus armatus |
Simple water bottle filter
A simple DYI water filter is easy enough to make for the purposes of separating floating material matter from the water and some additional materials. In “The Prepper’s Pocket Guide: 101 Easy Things You can Do to Ready Your Home for a Disaster,” the authors Evan Wondolowski and Bernie Carr describe how to make a basic water filter for use in the home during an emergency.

The ingredients include the following:
- Mug (Alternative comparable container)
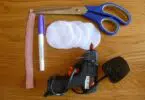
- Coffee filters (Alternative: paper towels)
- Sand: Coarse/Fine
- Gravel
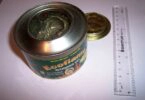
- Charcoal Granules – Activated
- Foam batting (Alternative: cotton)
- 2-liter plastic cola bottle
Step 1: Use the knife to cut off the bottom of the cola bottle.
Step 2: Insert foam batting (cotton ball) in bottle top opening.
Step 3: Add two to three cups of activated carbon. The charcoal carries a positive charge (activated) and it is porous so it will absorb and draw out the toxins of the water as it passes through the filter. Since the charcoal is activated, particular matter carrying a negative charge is attracted to the charcoal and binds to it.
Step 4: Add sand and a layer of gravel.
Step 5: Add several coffee filters (or paper towels) on top of the sand or gravel.
Step 6: Place a container at the bottom of the filter and pour water through the top of the unit to filter it out.
Please Note: This filter does not clear a sampling of water contaminated with organic contaminants including viruses, bacteria, and protozoa, and this is an important distinction. This type of filter only clears the water of sedimentary matter, particulate matter, iron, radon, and heavy metals in the water. It is the first step in the water purification process. Once filtered, you can boil the filtered water to help in killing of viruses, protozoa, and bacteria and any existing organic contaminants. For more information, see the video on:
Making a Bio-Filter
A bio-filter is similar to the smaller simple water filter. Both filters have layers of material that the water is put through to separate particulate matter from the water. This filter will still not clear the water of every single pathogen.
It can separate out the majority of pathogens so you can drink the water, but your body may have fight off the few pathogens that don’t get filtered out – it is a risk you need to be aware of and you may want to follow the filtering process with another water purification method, like boiling.

The bio-filter is comprised of three layers. Every layer is made of a different material to help in filtering out impurities.
[the_ad_placement id=”in-text-2-type-a”]
The ingredients are similar to those in the simple two-liter bottle water filter and include the following ingredients:
- Five-Gallon Food-grade Buckets with lids included: Four of each (one for each filtration stage and one for filtered water storage).
- Fiberglass screen
- Plastic cups
- Rubber bands or O-rings (Alternative: Glue for a more secure hold)
- Hole saw
- Plastic plumbing fittings: For use between the filter stages and for greater control of water flow.
- Plastic fitting with tubing: For releasing water from the bio, filter once it passes through the three stages of filtration.
- Gravel for the first filter stage: It is for the purposes of separating out big pieces of debris in the water like insects, tadpoles, leaves, and twigs.
- Sand for the second filter stage. It is for filtering out the smaller particles that the gravel did not capture. The water will then move the third layer of material.
- Activated charcoal (Also called activated carbon): The charcoal gets rid of some chemicals and bacteria, but not all. Air is passed through the charcoal and this forces pores on the charcoal’s surface to open. The openings are what absorb the chemicals through a bonding process. The openings also trap some bacteria. The microporosity of charcoal, once it is activated, is a surface area greater than 500 m2.
Step-by-step instruction:
Step 1: Stretch fiberglass screen over the fittings that will be placed in the interior of each plastic bucket. Use the O-Rings or rubber bands to seal and secure the screen on the fitting. Use the glue if you want a secure fit.
Step 2: In the center of two of the five-gallon buckets, cut a hole equal to the diameter of your threaded fitting. In the third five-gallon bucket, you have to cut another hole just above the bottom on the side of the bucket.
Step 3: Connect the buckets with the plumbing fittings ensuring that the screen side of the fitting is always up. To create a seal between the fittings, use the O-rings.
Step 4: Connect the fitting featuring the plastic flexible tubing to the third bucket where the hole is on the side.
Step 5: Take two bucket lids and cut a hole in each a bit larger than the fitting: This loose fitting will allow the buckets to remain stackable.
Step 6: With a few small plastic cups you can make the fiberglass screen more durable. You can drill holes through the plastic cups sides, position one cup over each screened fitting and glue it into position.
Step 7: Using a garden hose, hose out the entire system to free it of dust and debris.
Step 8: Fill three buckets, one with sand, one with charcoal, and one with gravel until each is 75 percent full. The bottommost bucket contains charcoal, the middle sand, and the uppermost bucket holds the gravel. Put a lid on the gravel bucket.
Step 9: Aeration is a process where you add air to the bio-filter: This is accomplished by passing water back and forth from one bucket to another: Do this several times. You can also accomplish this with pitchers.
Tips for maintaining your water filter
Tip 1: Refresh your filter. Every so often, once your water filter appears to stop filtering water as nicely as it did initially, it is a good idea to empty the filter out, remove its components, clean the fundamental parts of the filter, and replace the materials inside with new.
Depending on the filter you make, this can mean refreshing gravel, sand, activated charcoal, cotton, batting foam, and other particulate catching materials. Before putting in new materials, make sure you give each piece a fresh cleaning to ensure your water will be as clean as possible. Once the filter is reestablished, consider aerating once more.

Tip 2: Keep several clean storage containers at the ready for storing water you filter.
Tip 3: It takes time for water to move through a three-stage filter. As you pour the water into the upper portion of the filter, do so slowly: This will give the water time to move through each stage without forcing excess water up and over the top of the edge. If you notice the water rising too close to the lip of the filter top, stop pouring until the water drops into the other portions of the filter.
Tip 4: View the turbidity of the water once filtered. If it is still cloudy, push it through the filter a second and third time.
Tip 5: Follow up the filtration process with a one to three-minute boil to kill off remaining organic materials. You can get away with a one-minute boil in most places, but if you are in a location, where you are 1000 meters or 5000 feet above sea level, a three-minute boil is required.
Tip 6: Cool the boiled water and store it, but use it as fast as you can to avoid water stagnation and re-infestation.
Unusual DIY filtering systems
Method 1
Coffee Filters, Paper Towels, & Cotton Fabric: What do the latter three materials have in common? They can all be used to filter out large material debris from the water. Bear in mind that it may take several passes through the filter for the water to clear, and not all debris and particulate matter is captured, but it is a rudimentary method for filtering water before you boil it. At a minimum, you can make the water less cloudy. Use a coffee filter and place it upside over a vessel of your choosing.
Using a rubber band, seal the filter to the vessel. Take water and pour it over the filter slowly. The same can be done with a paper towel or fabric. Refrain from using colored or dyed materials and only use white fabric. If you are going to drink the water, you have to boil it for safety purposes.
Method 2
Banana Peel & Coffee filter: If you have a banana peel, you can grind it in a food processor and place the cut up peel in a coffee filter.

Put the coffee filter over a vessel and pour water into it. The peel will accumulate some bacteria and it may flavor the water a bit. Boiling water after filtering is again recommended.
Method 3
Tree Bark filter: While a number of DIY filters call for the use of plastic two-liter bottles, in an emergency, one might not have a bottle available. Thankfully, if you have a knife, you can peel the bark from a variety of trees, all of which have pliable exteriors and of which you can use in making a homemade filter for water. Pliable tree bark options include basswood, cedar, birch, pine, and elm. You will need to hack a piece big enough to form a cone shape when you bring the edges together.
Use string (if you have it, roots, or whatever you have nearby to tie the cone closed). You will still want activated carbon to filter out the water, but you can plug the interior with grass, sand, and gravel to create a rudimentary filter in a hurry.
Xylem Plant Filter
You can make a filter system of something as natural as a tree branch and a few supplies. A pine branch will be required for this filter because pine contains sap and sap contains xylem. The xylem in sap will filter dirt and absorb particulate matter. It will also filter some bacteria. In fact, this type of filter is impressively affective being so rudimentary in nature and it has been found to be 99.9 percent effective in getting bacteria out of the water.
That being said, the filter is not perfect and it cannot get rotavirus or hepatitis out of the water, and this is why you follow the filtration process with a boil. You will need the following:
- A bottle (2- liter)
- A pine branch about four inches in length
- A hose clamp
- Something to put the water in when it is filtered.
Use a knife to peel off the bark on the branch, and if you have a spare piece of sandpaper, you can smooth up the sides of the xylem filter. You can use this type of filter system more than once, provided you keep the stick wet and you prevent it from drying out. After peeling the branch, make sure it will fit into the neck of the bottle.
If it is a tight fit, use your blade to whittle a bit off the stick’s edge so it will fit with greater ease. Remove the bottom of the bottle with your knife. Put about 2.5 inches of the pine branch inside the bottleneck. Turn upside down to reveal the open bottom you just created. Fill the bottle with water slowly: The water is filtered as it moves through the stick and the sap collects the bacteria and dirt in the water moving through it.
Common purification practices
A water filter system helps to get the water clear looking and to reduce turbidity. It sometimes wipes out some bacteria, but it in no way conquers all organic contaminants: This is where the act of purification comes into play. Purifying water is the eradication of any invisible contaminates within the water. Read our piece on how to purify water for survival for added skills.
Boiling
This is the typical means of killing off organic contaminants in water. The boiling time differs from one to ten minutes. If you feel unsure of the water’s safety level, it does not hurt to boil the water a bit longer, but not so long that your only source or water evaporates. This method of purification is simple too, just boil, cool, and uses as you see fit.

Keep in mind that you must filter the water first to get heavy metals out of the water. Even if boiled, not all chemicals and contaminants are controlled. Check out our piece on how boiling keeps water safe to drink for more information.
Chemicals
Chemicals are another alternative, although not everyone approves of this particular purification method. The chemicals must be used as directed and for a short term only. Avoid using them for greater than three months’ time. Some chemicals you can use for purification processes include:
Bleach: When bleaching water for purification, make sure you use that which contains no phosphates, soap, fragrances, or additives. The ratio of bleach to water is 1/8 teaspoon per gallon of clear water. Add the bleach to the filtered water. Shake it. Allow it to rest for 60 minutes. The water should smell a lot like a backyard swimming pool with chlorine added. Now add 1 pint of the solutions to about 12.5 gallons of filtered water for purification.

Chlorine Dioxide Tablets: Add one tablet per quart of filtered water (this is the general rule, but check the product packaging to be certain. This can purify water for up to four years and is a four-hour purification process.
Iodine: Crystalline, liquid or tablets are available. Follow packaging for purification information. If you have a thyroid condition, you should not use iodine. If you are pregnant, you should also avoid this method of purification.
Less common purification solutions
Just as there are several filtration systems you can choose, there are also several methods of purification: Some extremely simple and others complex. Here are several more ways for purifying the water you pass through your homemade filters:
Pasteurization
Pasteurization is another means of purifying filtered water and it involves heating the water so that it reaches a temperature of 149F (Fahrenheit). There are indicators (WAPIs) one can use to ensure that the proper temperature is reached.
The indicators feature a special grade wax inside a tube. Once reaching 150 degrees and maintaining that temperature for a quarter hour, the wax will melt. While good for dealing with some bacteria, this method of purification does not do away with chemicals, salts, or heavy metals.
Solar Water Disinfectant
soDIS is the practice of exposing turbid water to sunlight and natural ultraviolet rays for a period thereby allowing the UV and the Sun’s heat to destroy the bacteria that contribute to the onset of waterborne illnesses. The water has to be in a clear bottle and exposed to sunlight for at least six hours and up to two days if the water is extremely cloudy. If you put the bottle on a darker area, like on the pavement where heat is absorbed, the purification process is even faster.
Distillation
There are several means for distilling water, and the types of liquids you can use are varied. Unlike boiling which sterilizes the water but does not remove minerals, distilling water will take out the minerals and make it save to consume too. Distillation involves boiling the water and collecting the steam.
You can use a canning pot and put the water at the bottom of the big pot. Place the canning rack inside the pan and a large, empty glass bowl on top of it. Place an upside down lid on the canning pot and turn on the stove heat. The water steams up, collects on the top of the lid, and runs down to the lid’s center where it will then drip into the empty bowl. Add ice to the top of the lid to speed the process of making drinkable distilled water.
In conclusion
Knowledge is, indeed, power when you are in an emergency or survival situation. The worst time to wonder about how a person can make a water filter is when you are in dire need of one, and learning methods for purifying water sources is one of the most important parts of survival training. Don’t forget that you need to store water after filtration. See our article on ways to store filtered water to ensure a safe supply.
[the_ad_placement id=”in-text-3-type-a”]
While it is always wonderful to know exactly how to make a water filter in the event you find yourself in need of a clean water source for hydration, knowing more than one method for making such a filter is highly recommended. It is a good idea to learn two or three methods for filtering water, if not more.
In some situations, you may find one water filter is better than another, easier to put together or create, or easier to use. The kind of water filter that suits a particular emergency or survival situation is ultimately dependent on the situation itself, and you want to be ready for every situation imaginable. Just make sure you follow the filtration process with a purification process to make the water safe to consume.
Read our tips on how to purify water using primitive methods to help you survive.
Is the type of water found in the area important? I live in a particularly muddy area. Water found here would be incredibly difficult to process.
No water is difficult to process, as long as you have the right skills and equipment.
I would like to share a trick that does not require experience and a lot of equipment. The people in North Pakistan use this process to purify/filter the water. All you need is a pot to boil the water and a piece of fabric as a filter(You can use your shirt if you do not have any spare fabric). Once the water is boiled, all you have to do is filter the water through the piece of fabric; you would be able to see all the impurities left on the fabric and the water will be 100% pure.
In a survival situation, this method can be very useful.
In the era of modern technology, nothing is impossible anymore! There are water purification tablets available in the market and I would recommend using these tablets instead of going through all the trouble. These tables are not costly, so always grab a bunch of these while going on a rough hike.
We appreciate your opinion, thank you.