One reason people tend to put emergency preparedness off to deal with at a future date is the expense of having to buy all the items one might need for such occasions. Thankfully, you can begin your preparedness right now and save a significant amount of money with a DIY survival kit. Making gear by yourself lets you come up with innovative ways to meet your needs in the event you face an emergency. If you have children, this is the perfect time to teach them about survival readiness and that innovation is, indeed, the mother of invention.
[the_ad_placement id=”in-text-1-type-r”]It is a given understanding that emergency preparedness is important, and it is something everyone should give some thought to at some point.
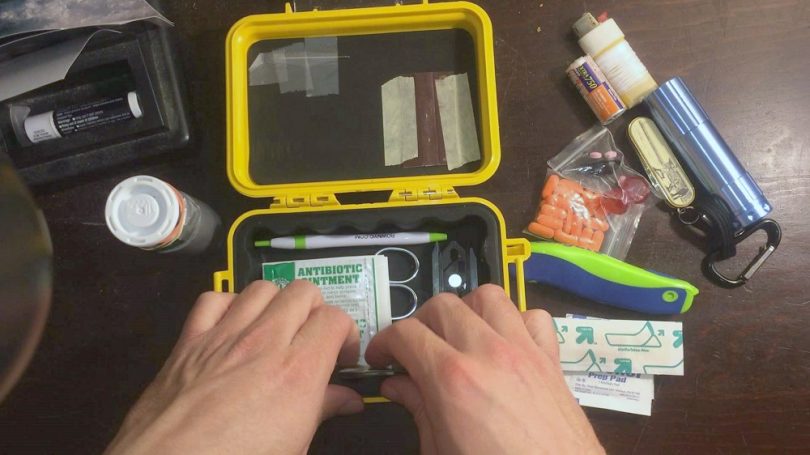
Whether you are planning a camping trip, hike, or for the day the power grid finally fails, if you are not prepared for such emergencies it can lead to dire consequences for both you and your family members.
DIY mini survival kit
Part of being a good survivalist is adhering to common sense. If you know you are going to be taking a hike or you are planning a camping trip, then a survival kit should be a must-have item in your backpack. In the event you get lost in the woods, fall and are injured, or you experience any other number of unforeseen situations, the pack will prove to be an incredible tool.
With the right items inside, it can help you survive until either you make it back to safety or a rescue group finds you.
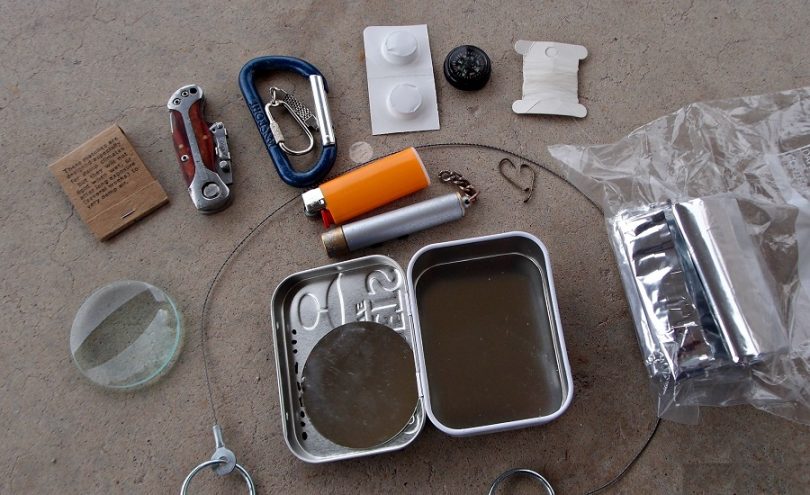
Larger survival kits will contain enough items to help you survive for at least 72 hours or more. These bags are expensive if you buy everything you have to put into the bag plus the cost of the bag itself. You can, however, make a mini version of the larger kit so that you are not caught without anything to help you in a survival situation.
A mini survival pack should get you through 24 to 48 hours, which gives you time to regroup and figure out your next step. Here are just some of the things you can bring along with you in an effort to be prepared:
| Carrier | Use an old backpack or buy an inexpensive bag for your homemade survival kit. |
| Fire-Making Tools | Lighter
Lint or other fire starting material Magnesium fire starter Steel wool Waterproof matches |
| First Aid | Bandages
Medications you need (At least seven days worth) Peroxide |
| Food | Beef jerky
Energy bars Peanuts Sunflower seeds Trail mix |
| Hygiene | Bug spray
Comb Sunscreen Toothpaste Trial-sized soap |
| SOS Items | Mirror
Whistle |
| Tools | 25 feet of nylon cord
A small knife Compass Duct tape Fish hooks Fishing line Flashlight Small pan Spare batteries |
| Water Filter/Purification Tools | Filter Straw
Water Purification Tablets |
DIY energy bars
Energy bars are the best food to take along with you on any excursion, whether you are hiking your favorite trails or camping in new territory. The best part about energy bars is they are jam packed with nutrients and they are small so they are easy to carry.
Some people choose to buy their energy bars at the local grocery store, but one may find that these items cost a good deal of money and they can be fairly bland and boring in terms of flavor.
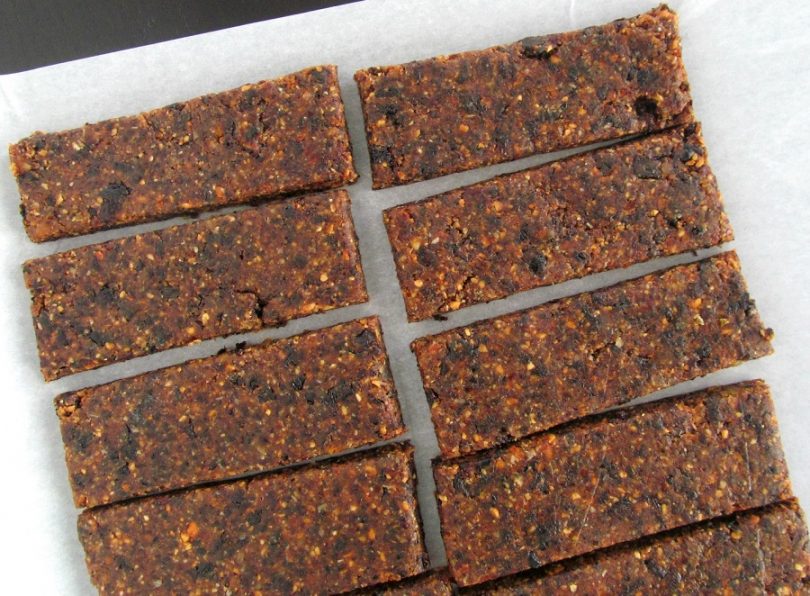
In contrast, you have greater control over the ingredients of the bars if you choose to make the bars yourself. In the event you have children, this is another project you can do with your kids – It can teach them how to mix ingredients, bake, and the importance of making nutritious food choices. Here is what you need to make homemade energy bars to pack in a homemade survival kit:
| Energy Bar Ingredients | Alternatives |
| Oats: 9 cups | |
| Raw Cane Sugar: 2 Cups | |
| Butter: 2 Cups | |
| Chocolate Chips: 4 Cups | Peanut Butter Chips, White Chocolate Chips, or Butterscotch Chips/ Add Reese’s Pieces or Skittles candy if you desire instead of just adding chocolate chips. |
| Pure Raw Honey: 1/2 Cup | |
| Peanuts 1/2 Cup | Cashews, Almonds, Walnuts, or include all of the latter for extra crunchy bars |
| Maple Syrup: 1/3 Cup | Try molasses as an alternative. |
Cooking instructions:
Put everything into a bowl and stir well. Turn the oven on to 350 degrees and allow to heat. While the stove is heating, take the mix and put it onto a cookie sheet measuring 9” x 18”. Back until the mix begins to bubble (about 15 minutes). Pull from the oven and cool. Make sure you let the mix cool all the way before cutting it up into small bars – this prevents the bars from being to crumby.
Once bars are cut up, wrap tightly in plastic wrap or put in vacuum sealed bags to ensure the bars last as long as possible.
Homemade Yucca rope
The Yucca is a perennial shrub. It features long, firm, upright green leaves shaped like the blade on a sword. The plant is native to North, Central, and South America. More specifically, in North America the plant is in the west starting at Baja, California, and moving northward into the United States’ southwestern region.
[the_ad_placement id=”in-text-2-type-r”]The shrub is also found inland and the middle states all the way up to Canada. The Yucca is accessible along Virginia’s easternmost region and the shorelines of coastal Texas. The plant is often seen growing in the wild along the side of the road and in wooded areas as well as open fields.
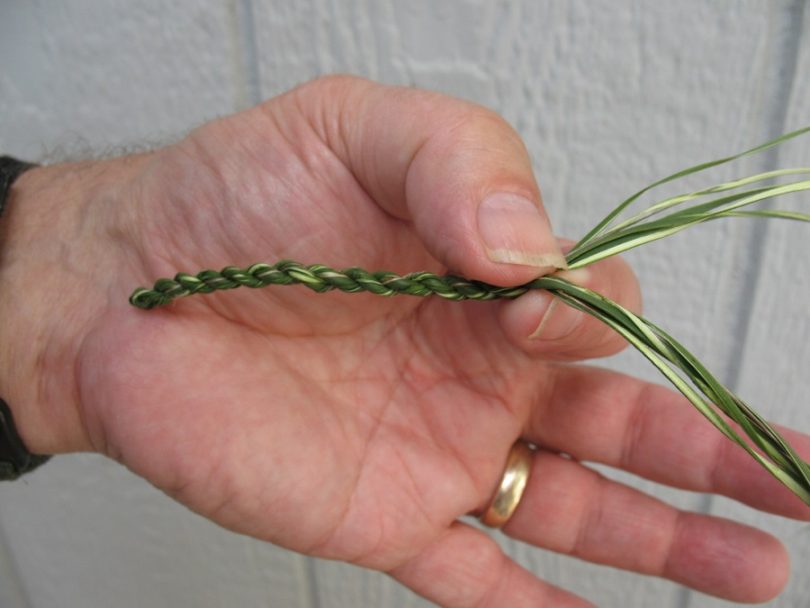
The leaves of this particular plant are flexible and durable, thereby making great homemade rope material. If you do not have access to the Yucca shrub, you can use alternative plants with similar leaves for making rope.
Below there is a list of items you need, in addition to Yucca leaves, to make a durable rope for survival uses. The list of things you need will vary depending upon your current situation. In the first situation you are relaxed and at home so you have access to some tools and materials, and the in second mode, you are already struggling to survive and may have limited materials at your disposal.
| Creative and Relaxed Mode | Already in Survival Mode |
| Yucca | |
| Butter knife or scissors | Knife |
| Flat table | Working area that is flat |
| Tack hammer | A flat-edged rock (alternative: a stick) |
How to make it
Gather some Yucca leaves that are fresh and those featuring green coloring along the base of the leaves. Using the tool you have available, cutaway the leaves from the shrub near the base. Remove the needle in the leaf.
Use the rock, stick, or hammer to make it easy to peel away the first layer of the leaves so you can see the fibers. Separate the leaves into four sections and braid them by weaving in one piece at a time. Make sure you tie off the end tightly. If you do not know how to braid, twist the fibers until they are tight and form a rope like structure.
DIY outdoor emergency shelter
You can create a waterproof and windproof emergency shelter out of a few simple items you can get from home or the local hardware store. The shelter is definitely a minimalist shelter, but will serve you find in the event of an emergency. You will need the following items:
- Duct Tape
- Emergency Blanket
- Paracord
- 55 gallon drum liner
- Knife or shears
Open up the bag and locate the bottom edge of it. Cut about an inch of the bottom edge of the drum liner. When finished the bag should have two openings. In lei of a bag, you can actually use a large tarp for an emergency shelter as well.
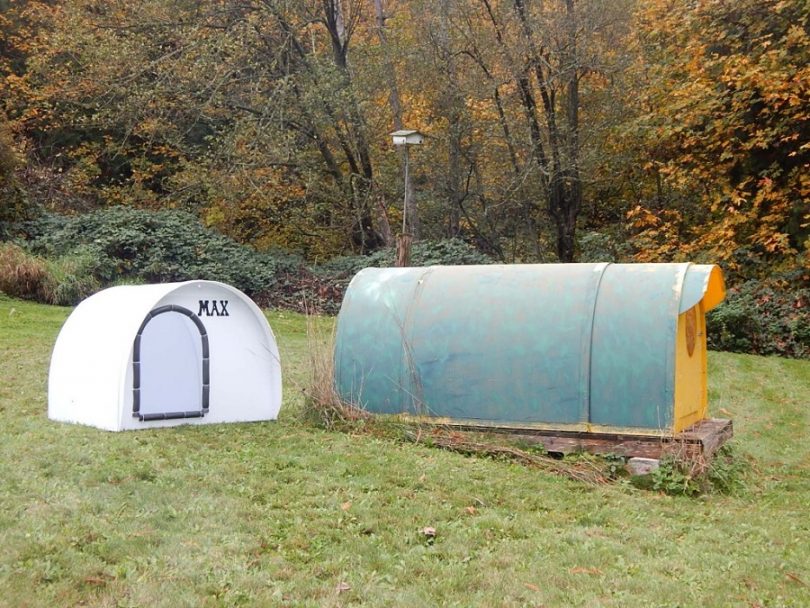
Run the paracord from one tree to another beyond the length of the bag you just cut. Make sure you run the cord through the bag first before you tie each end of the paracord to a tree. Tape the upper edge and corner to the paracord so it remains in place. See our article on how to make a paracord bracelet to help you.
Run two more paracord lines through the liner to make a triangle. The shelter should be about two inches off the ground: This air space should be stuffed with soft leaves and other debris to keep yourself off the ground: This will help prevent you from losing body heat.
Homemade fire plough
Fire is just as necessary as water for your survival. When you are out in the wilderness and you have no matches, lighter, or fire starter, you can make a tool called a fire plow as a means of starting a fire.
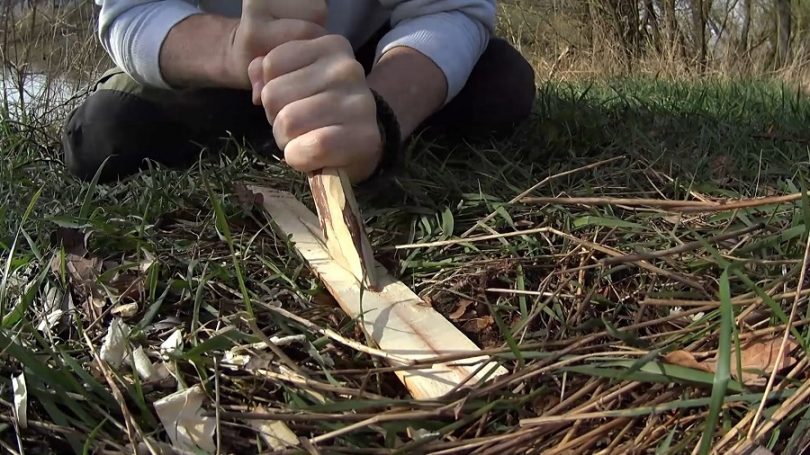
The plow consists of a baseboard and a rubbing stick: The two pieces are rubbed together and it is the friction produced by the rubbing that produces a spark. The fire plough is, by far, one of the easiest homemade survival tools to make:
- Step #1: The baseboard will have a small trough cut out of it: This means you will need a solid piece of wood, on free of cracks, for the bottommost portion of the plough. The piece should be about a foot long, two inches thick and about 2 1/2 to 3 inches wide.
- Step #2: If you are wise, you have packed a small blade and you have it with you. You need to cut a straight line running down the middle of the board, starting from the left and moving all the way down the foot long board.
- Step #3: Using your knife, you have to widen and deepen the line you just cut about a 1/4 inch into the wood.
- Step #4: You need a stick that is between 9 and 12 inches. The end of the softwood piece needs to be cut into a rounded off tip. The very end of the tip should be able to fit tightly into the 1/4 trough you cut into the baseboard.
- Step 5#: Make sure you have some kindling on hand. The plough is an exercise in patience and physical endurance because you have to use the stick and rub it against the base repeatedly until embers appear.
Do-it-yourself survival knife
A do-it-yourself survival blade is something that only an adult should attempt to make since it is a dangerous process. This survival blade is made out of a hacksaw blade and some paracord. If you are going to take on this project, you can file the blade with a basic file, but you are far better off if you have bench and grinder. For ways on how to make your own survival knife, see our earlier article on this topic.
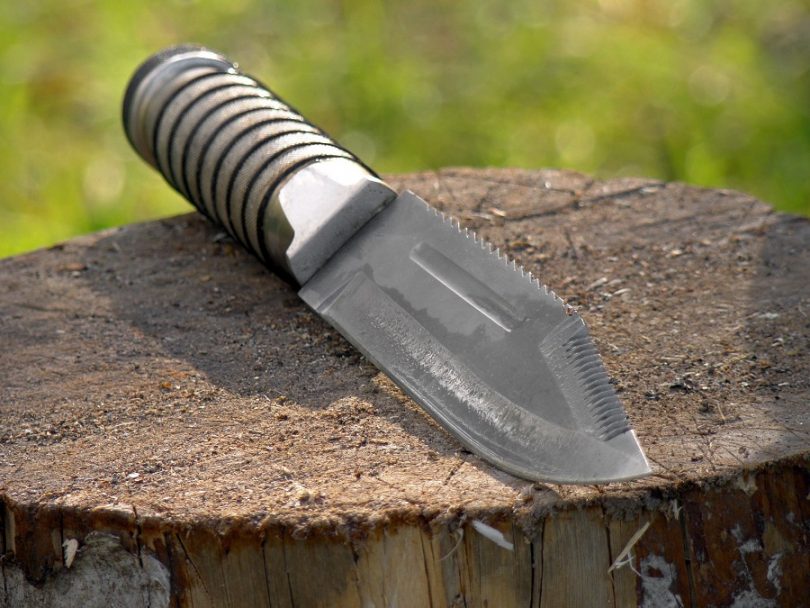
You can save up to two hours time if you have the power tools to make the project go more smoothly.
Here is a complete list of the tools you will need to complete the task:
- A grinder
- File
- Lighter
- One hacksaw blade
- Pair of scissors
- Paracord
The process:
- Step #1: Carefully take up the hacksaw and wrap your dominant hand around the blade, hacksaw teeth in, very gently. Make a note of where your hand stops and the blade begins so you can use it as a reference for manufacturing the handle of your knife. Using the file cut in a small grove on the hacksaw blade to mark the spot.
- Step #2: Cut in a 1/2 grove starting at the small hole you just made and working your way back to where your ring finger might be if the blade were in use.
- Step #3: Use the file to remove any metal burrs that remain.
- Step #4: Crave the hacksaw so that you shape the blade into a curve that terminates into a point. You will have to sharpen it before you can use the blade.
- Step #5: Wrap the handle area in paracord – in fact, wrap it into several layers at a time to keep you hands cut.
For more information on how to make a homemade blade.
https://www.youtube.com/watch?v=LNCnU1WEbno
See the above video “Mini MOD Monday: DYI Survival Knife,” on YouTube.
Homemade slingshot
A homemade slingshot might be useful in a survival situation, especially if you are hunting for some food or you need a weapon for self-defense. You can make a slingshot from items in your home and with some very cheap items from the local store.

You will need the following items for making a slingshot at home:
- Paint Roller
- Duct Tape
- Hole Puncher
- Nylon Rope
- Zip Ties
- Electrical Tape
- Thin wire
- Soda bottle top and screw portion
- Bicycle tire tube
- Razor
- Lighter
- Glue
The process:
- Cut the bicycle tire tube into ten-inch strips and set aside.
- Tear off some duct tape about the length of your hand and cut it half way down the center (width wise). Fold over one of the edges. Take the edge you just folded and fold it toward the unfolded edge that remains. Flip the remaining piece of exposed tape downward: You should have a rectangle shape. If there is excess tape, cut it away.
- On each end of the piece you just made, put one hole punch in it about 1/4 from the edge.
- Pull the metal paint roller holder out of the black handle. Open up the hole punch and lay it down. Put the brush handle over the open hole punch. It should look like you created the letter “Y.” Connect the two pieces by wrapping it tightly several times with the thin wire.
- Once you have the two pieces very tight together, take up the paracord and wrap the handle of the brush tightly.
- You can add the black electrical tape to make the handle smooth: Put the tape over the wrapped paracord.
- Cut off the soda bottle top and the portion it screws to: Glue this to the end of the sling shot brush handle (now you have a storage area for extra slings).
- Attach the rubber tubing cut from the bicycle tire and use the zip ties to attach to each end of the hole puncher that now serves as your sling shot “Y” section. For more information, view the video “DIY $5 Survival Slingshot from Household Items!” by GreekGadgetGuru on YouTube.
Check the above video how to make survival slingshot.
For tutorials on homemade weapons for self-defense, see our article on the topic to find out more.
Conclusion
Now that you know that it is possible to save a significant amount of money if you make use of DIY survival gear, there is absolutely no reason why you should ever be caught off guard or ill prepared for an emergency.
[the_ad_placement id=”in-text-3-type-r”]When making homemade survival gear, you can also make it a family time where you and your children spend time together while learning vital lessons for survival. In fact, disaster readiness lessons or emergency preparedness practice might be something you spend the weekend teaching your children. The DIY gear is a great project for the summer months when your children are out of school as well.
Check out our article on the best survival kits available in the market for more options.



I am particularly glad you included hygiene items in the kit.
Keeping clean becomes a real problem after a while in the wilderness, and can quickly become a medical hazard. It is important to have proper hygiene items in areas of extreme heat.
Thank you James for sharing your opinion with us.
The items listed in the article are surely amazing. However, I think that all these items will make your backpack a lot heavier than needed. You will be using most of your energy in carrying all these items. I would suggest just keeping the basic items. Hopefully, SAR would find you in less than 48 hours with a record of 96% successful rescues.
Make sure to have sunblock in your backpack as well, you never know how long you might have to stay in the blazing sun. It could help you prevent skin diseases and skin cancer.
Thank you, David, for sharing your opinion with us.