Have you ever thought about ways that you can make yourself more self-sufficient? Well if you haven’t, then you definitely should. There are a number of ways to do this and a lot of them center on making or raising your own food. For some, this means having your own farm with livestock and animals, but that’s not the only way you can actually raise your own food.
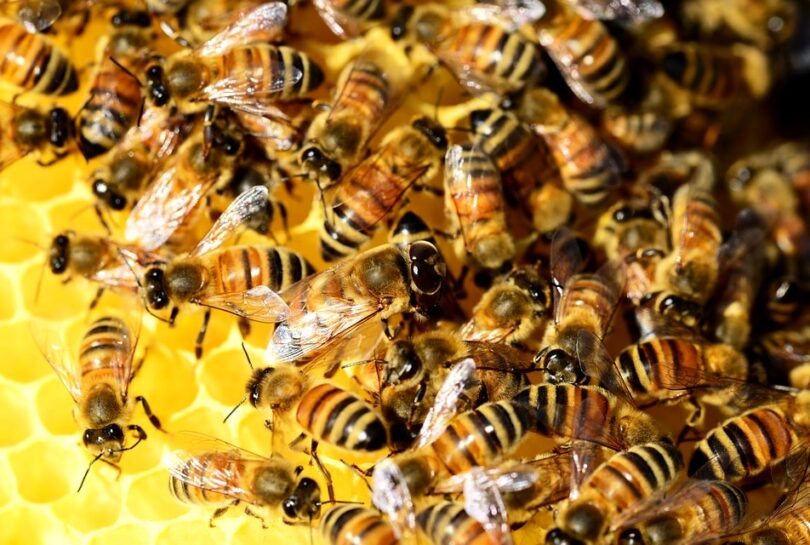
Another is by learning how to raise honey bees, which can provide honey and beeswax. These products are healthy and have a number of uses. Even more, it can help with pollination around so you’re helping the entire community. To learn the various health benefits of honey for the body, read our article on this important topic.

Getting started with bees, means you need to create your own colony. This means making sure you create the right habitats for your bees so they can survive and create an entire colony. After all, you’re only going to start out relatively small. It’s going to be up to your bees to make the colony take off and make sure that they are going to build up from what you’ve created into something that provides enough for them and for you at the same time. Do read our article on homemade bee sting treatment before you start your bee colony for added safety.
Starting the colony
First, you need to make sure you have your hives. In nature you’ve probably seen bee hives that look like giant gray or tan balls with little holes all over for the bees to get into. But of course, you’re not going to build something like that. Instead, you’re going to want a structure that makes it easy for the bees to get in and out but that’s also going to make it easy for you to take honey out when it’s ready. A traditional beehive doesn’t make it easy to do that and you’d have to break the hive to get inside.

You do have the option of purchasing an already complete beehive which can save you a lot of time in the long run, but it’s going to cost you a lot more money just to get started. These prebuilt hives are going to be ready so that all you need to do is find a place to put them and install your bees.
So if you’re a little pressed for time it will help you. Just make sure you know how the hive works and how to take out the honey before you put the bees in. you don’t want to find yourself pulling apart the hive just because you wanted to get something out.
If you choose to build your own hive you’re going to have to invest a pretty decent amount of time into it. The benefit is you’re going to have less cost and you’re also going to know everything there is to know about your beehive before you ever put bees in it. This is great because when you’re trying to extract wax and honey you’re going to be able to do it more quickly and that means less of a chance of getting stung or injuring your bees.
The building process
The first part of your hive is the supers. These are the boxes that the bees are going to build inside. You know the structures you see outside? That’s going to still be where the bees live, but inside the box instead of hanging from a tree or on the roof. You want to make sure you have about 1 or 2 of these supers and each one is going to contain somewhere between 8 and 10 frames for the bees to build up the rest of their hive to hold all the honey.
The boxes shouldn’t have a top or a bottom because the bees need to be able to get through and build them up. Remember that the hive shouldn’t be entirely square. You want to build it into a rectangular shape and make sure that you use a tongue-and-groove end to connect all the joints together.
Of course these supers are only one part of the hive. You’re also going to need additional supers which are called the honey supers. These are where the honey is actually going to go settle and that’s important so you can get the honey out easily.

Your honey supers are going to be shallow to medium, much shorter than the deep supers we’ve already discussed. You want to put it all the way on top of the deep supers but with a queen excluder in the middle (which we’ll talk about in a little bit). The honey supers will allow your bees to build up their wax and honey and that’s going to be a great thing because you’ll want a lot of honey from your colony. It’s definitely going to help them build things up as well.
So now you want to assemble the pieces and that’s going to require a little waterproof wood glue to help them interlock. Use a clamp to hold the pieces together until the glue dries. Once it’s all put together you’re ready to install the bottom board. This is going to be an easy piece because it’s just a small piece of screened wood that has slightly raised edges.
You’ll likely want two of these pieces or you can make one that is reversible, meaning that you have the same distance between the screen and both of the raised edges. Having two can be difficult because you have to store the second one but with a reversible piece you can just flip it when you need to.
Make sure you create a door that is about ¼ of an inch wide and that can be reduced to about 0.38 inches when it gets cold. You don’t want your bees to get too cold in the winter and that will definitely happen if your doorway is too wide. Anything larger will also allow rodents in and that’s going to be detrimental to your hive and the bees you’re trying to cultivate. So make sure you keep the doorway small enough to keep out any unwanted pests.
You will next need the queen excluder that we’ve talked about earlier. The excluder is extremely important and extremely intricate as well. That means you need to purchase one rather than attempting to buy it. The excluder fits between the different types of supers and makes sure that the queen stays in the deep supers rather than getting into the honey super. You don’t want her to get in the way while the workers are doing their job after all. So having a proper excluder is going to be important to reaching that goal.

Once you’ve got everything ready you’re going to need covers and frames. These are easy to purchase and quite inexpensive so you want to pick them up so they’ll match properly. The inner cover fits down into the box and includes a hole for the bees to get in. The cover that goes over this is going to be made out of metal so when the weather is bad you can cover it up and help keep your bees safer. It needs to fit over the top of the box as well as down the sides so it stays snug no matter what.
The frames are made with wire and wood and can be difficult to make properly. So purchasing them is generally the easier option. Once you are ready to put it together you want to have about 8-10 for each of your 2 deep supers and one 6-8 for your honey super. Next, get your stand ready and start putting the pieces together. You want the hive to be kept up off the ground because otherwise it’s easy for animals to get into it or terrorize your bees. You can even set it up on a table if you want.
Put the stand wherever you want it; lay down the bottom board then the deep supers followed by the queen excluder. Now you’re ready to add the honey supers and top it all off with the cover. It’s going to be a little more work getting your bees in there and making sure they’re going to start adjusting well to their new hive but it won’t take as long as you might think. It also won’t take too long before you’re ready to make a go of things with your hive and you’re bringing in honey for the family.
Getting your bees
It’s actually quite easy to get bees for your hive. In fact, you can actually purchase bees through a mail order system where you’ll get approximately 3 pounds worth of bees and that will include a queen. You need a queen for your bees because they are the ones that keep the workers going.

They’re also the one that worker bees and drones are going to follow so if your queen leaves the rest of your bees will go with her. She’s the one you need to keep happy while you’re running the hive.
The key when you’ve got your bees is making sure you set the queen inside the box first and then insert the bees still in their box inside the hive. They’ll work their way out and then free their queen. Once this happens you can pull the boxes out of the hive and set it up properly and you’ll be on your way to running your own hive.
The queen will stay in the hive at all times and as long as she is there the workers and drones will continue doing what they’re supposed to do to keep her happy. That means they’ll build up the hive the way they want it with honeycombs to store the honey that they produce and they’ll produce a whole lot.
Caring for your bees
The best thing you can do is let your bees do most everything on their own. They’re created for this type of work. They carry out all the tasks they need to do in order to create the honey simply because it’s an intrinsic part of who they are. You don’t need to do a lot about it and really all you should be doing is getting the honey out when it’s ready and making sure that there’s flowers or other crops nearby so the bees don’t have to travel too far when they’re looking for food. It’s going to make their job easier and your reward that much better at the same time.

If your bees seem to be running low on honey you should make sure you’re feeding it to them. Make sure you use honey that came from their own hive or honey that came from another beehive and not from the store (yes we know that comes from a hive too but it’s been treated and processed between the time it came out of the hive and the time it was sold to you in that store).
Your bees don’t want and can’t process that type of honey. Instead, make sure that you fill a dish with honey (don’t try to put it in their hive either) and leave it out near them so they can easily get it. This will help them stay full through the season.
Harvesting your honey
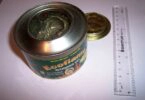
In order to make a harvest you want to make sure you use a smoker. This is a small can that burns branches or hay and produces smoke in puffs. That smoke keeps them from attacking you which is important when you’re trying to harvest the honey from them. Make sure you only spray a couple puffs into the entire hive so you slow down and sedate your bees. Too much smoke could hurt them and that’s definitely not what you’re looking for.

You should have a couple extra supers that you can slide the frames into and some extra frames to replace the ones that you’re going to take out. You may even want a cloth to put over your frames so you don’t end up with insects crawling through your honey when you’re trying to take it in.
Once you’ve got everything ready you can open the hive lid just a little and blow in the smoke. Open slowly and you’ll see that the bees are buzzing calmly around the bottom or even lying near the bottom. Remember just to puff a little smoke in and then let them go for a minute. They’ll calm down fast.
Pull out one frame at a time and look over the honeycombs there. You’ll see some that are sealed over and some that are not. If they’re sealed that means you’ve got honey. If not you’ve got nectar and those frames aren’t ready to be pulled yet. Slide these frames into the supers you’ve got set aside and then inspect what you have left. Get rid of any honeycomb that is being built up outside of the frames and clean off any excess debris.

Now you want to put the new frames in and close up the hive so it’s all ready for when your bees get back to what they’ve been doing (and over the slightly drowsy haze you’ve put them into). You’re ready to harvest the honey and they’re going to be getting back to work. Make sure that you never take all the honey out of the hive because your bees need some of that as well. You want to leave something behind for them and you want to make sure you’re leaving any frames that contain the brood (eggs laid by the queen) rather than honey as well.
If you have an extractor it’s going to help you the most with your honey. All you need to do is lightly press a heated knife to the caps on the honey and make sure you do so very quickly. This helps to loosen those caps so you can pop them off and then the frame goes straight into the extractor. Once you’ve done that you can close it up and let it go. The extractor sucks all the honey out and lets you disperse it through a strainer with a small nozzle just like on the coolers most people use at picnics.
Put it through the strainer or sieve to get rid of wax or anything else you don’t want in the honey you’re going to eat and drop it into a bucket. It’s now ready to sit about 12 hours so it can settle and then you can pour it into jars to be stored until you’re ready to use it.

Setting up your own hive and managing a colony isn’t going to be for everyone, but it’s something that you definitely can do if you’re interested in putting in the work. The bees will provide you with honey and wax which can be used for a number of different purposes and they’ll also help you out by pollinating flowers and crops so you end up with a bigger harvest all around and it all comes from learning how to raise honey bees.
See our beginner’s guide on how to start your beekeeping for more information.


If I may add, make sure that your bee farm is far from any farm that has genetically modified crops as these would have pesticides that target bees.
You’re right, pesticides are killing bees and we this is a global issue that we should address from a higher level.
Beekeeping requires a pretty amount of money for equipment. However, if you don’t have the “means”, you can still help honeybees for conservation purposes if you plant a garden with lots of flowers. Avoid those flowers with multiple petals. I’ve also read that native bees have the lowest maintenance cost compared to other species. I am not sure about this but if it’s true then that would be great.
Hi Molly,
Planting flowers is a great way to help conserve the dwindling number of bees in our country. Make sure to plant those that bees are often attracted too and make sure that none of these are genetically modified. Also, try not to use pesticides on them, we want our honey to be as organic as possible.
Samuel
Does extremely hot weather affects bees?
My grandfather used to raise bees, and i did enjoy maintaining and taking care of them with him in my youth, but I moved to Arizona ever since and am afraid hot weather over here could harm them.