
Electricity is one of those things that no one wants to do without, but no one wants to pay for it either. So what do you do? Well, there are a few different ways to get electricity completely free (or at least nearly free) if you’re willing to do a little bit of work to get there. There are three different methods of power generation that are most commonly used. These include solar, water, and wind power. Of course, we can’t explain all of these methods in this one little article, but we will talk about how you can make wind power work for you.
Wind turbines are one of the best ways to generate electricity, but they don’t work everywhere. Not all areas of the world get enough wind to supply electricity via this method. Some places will get enough sunlight or water movement, however, so these are other viable options to consider if you cannot get wind through your area. However, suppose you are (and there are tests to determine how much wind power is moved through your site in a generalized time frame). In that case, you will use this particular article to help you get better, cleaner electricity.
How a wind turbine works
Wind turbines (the generator that gathers the wind and harnesses its power) work similarly to a fan. Now a fan will use electricity to create a type of wind.

On the other hand, the wind turbine uses a mechanism of blades to create something that looks like a fan but is taking in the wind rather than making it. You see, the edges of a wind turbine will only spin if there is already wind to push them. When the current goes through the blades, a shaft (the low-speed shaft) inside will start to turn. This causes movement in the high-speed post located within the gearbox. Then the gearbox will power the generator itself, and the electricity is created.
The types of wind turbines
Currently, two types of turbines are utilized. These are either horizontal-axis or vertical-axis. The vertical-axis turbines are the ones that are more recognizable as they often look like large pinwheels sticking out of the ground. On the other hand, horizontal-axis turbines are shaped in a more elongated style, with the blades going around the center support rather than rotating free of the license.

These turbines can be built in various sizes, from very small (enough to power a single house) to extremely large. There is little doubt that you have seen wind turbines at some point recently as they are becoming more and more popular. Large wind farms are becoming quite popular with many pinwheel forms of turbines in a remote locations. These are generally located in fields though they are capable of being placed offshore as well.
A traditional turbine, used for commercial purposes, is generally capable of producing upwards of 100 kilowatts of power (up to several megawatts). Smaller turbines, utilized for domestic purposes or pumping water, are usually only capable of 100 or fewer kilowatts of power.
These smaller turbines are generally quite different from their larger counterparts in a few key ways, which we will discuss in the next section. First, these cannot power more than a single facility with ease and will not harness as much power in a single period.
Small wind turbines
As we mentioned, a small wind turbine is capable of producing only about 100 kilowatts of power. This is plenty to power a home or small business. However, it is not capable of producing much more than is necessary for these uses. Therefore, these smaller turbines are also not necessarily 100% ‘green.’

Rather than taking power solely from the wind and harnessing it to be used in the form of electricity, some of these smaller turbines are connected to diesel or battery-powered generators to supplement the energy produced. In most cases, this is done when traditional electrical methods are unavailable.
For guidelines on DIY electric generators, please read our article on this topic to find out more.
Why use wind turbines?
There are several reasons that you (or someone else) might want to use wind turbines to generate power. For one thing, electricity is expensive. Most people are dependent on the government to generate electricity for them, which means they’re dependent on the cost of that electricity.
You don’t have a lot of say in how much you pay and if the electrical company decides to raise your rates? Well, you don’t have anything that you can do about it, do you? But if you generate your power, you don’t have to pay those high rates.

Another benefit is that some areas will let you sell power back to the electrical company. This means that if your windmill generates more electricity than the household needs, you can connect to the electricity for the community you live in and sell the extra to them.
You can make a little bit of money from generating your power (which can often help offset your upfront costs to create your generator). Now, this is only allowed in some areas, so you’ll have to check into the rules, but it’s an exciting area to consider.
Finally, many people use wind turbines because they want to protect the environment. But, unfortunately, many of the traditional forms of electricity generation are not suitable for the environment and can cause damage to the planet as well as the animals living here.
By generating your power, you’re able to protect the planet and help conserve a lot of energy. When greenhouse gases are used less frequently and even natural resources with a finite supply, it helps preserve the earth. For many people, this is reason enough to generate their electricity.
Your homemade windmill generator
Building a wind generator is not as easy as you might think. Though at the same time, it may not be as complicated as you may think either. This is because a wind generator will require some skill and a lot of equipment, but once you know what you’re doing, you’ll be able to put it together relatively well. Plus, once you’ve done it the first time, it will be easier if you ever decide to add on another generator for your home or a friend.
Now, if you’re going to build a wind turbine of your own, you need to make sure that your area will support it. First, this means you need to have permission from your city, township, or other governing body. Second, you need to make sure that building and putting up a wind turbine is going to be allowed as some areas will not permit you to do this (a wind turbine is going to take up some space, and it’s going to be noticeable from other homes after all).

You will also need to ensure that the area you are building it in has enough wind to power your turbine. You don’t want to spend all your time and money creating this turbine only to find out that you’re not even going to have enough wind in your area to use it. This is not going to be a benefit for you. So make sure you can figure out the average wind speed in your area. The ideal amount would be anything over 10 miles per hour relatively steadily. If you can get higher than this, it will be better for you and your results, so keep that in mind.
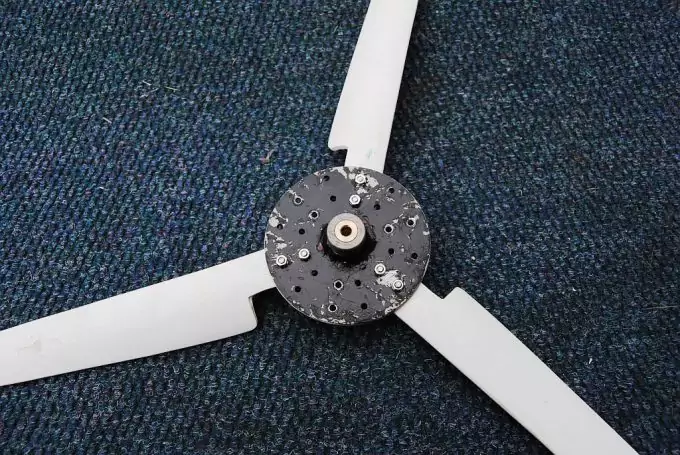
Turbine blades are going to be one of the essential parts of your windmill. This means you need to pay extra close attention to what you’re making them out of or where you are getting them. If you don’t, you could end up with a turbine that doesn’t work or doesn’t work as well as you need it to. So make sure you carefully consider this component even more than the rest of the pieces in your windmill to be sure it’s high quality, and it’s going to work the way you want it to.
You can choose to purchase your blades from a reputable manufacturer, or you can create them out of anything from wood to PVC pipe. You will want to use a traditional number of edges (three) for your turbine because this will provide the ideal mixture of efficiency and power.
You will be able to get the most power out of your turbine because three will allow the turbine to spin more quickly than if you were to add additional blades. Also, three, as an odd number, is better than an even number such as four because an exact number of edges is more likely to increase the vibration in your turbine.
The next most crucial component of your turbine is the actual generator that you use. You want to make sure it’s high quality enough to provide power to your entire house (or whatever you’ve chosen to connect it to). This means you need it to be capable of holding high voltage and usable with low rotation speed. This is going to ensure that it will be compatible with your turbine and your windmill. It should be capable of generating at least 12 volts consistently.
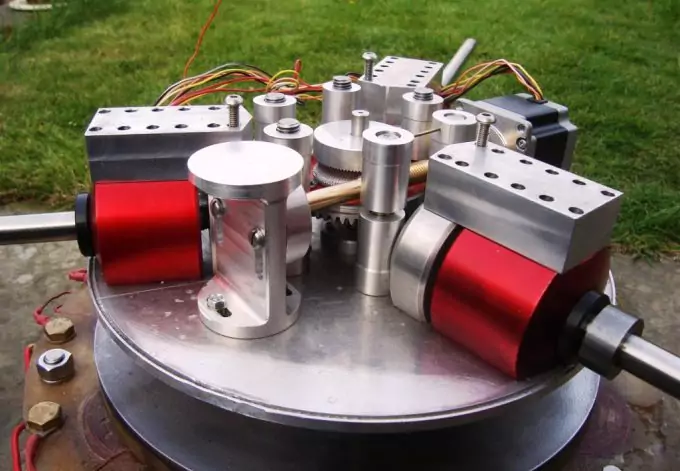
You will most likely find yourself with a DC generator, so make sure that you get a power inverter to convert your electricity to AC before it is fed into the household. If you use an AC generator, you may find that you don’t have enough electric field to produce what you need. You’re also going to want to have a deep-cycle battery bank and a charge controller to connect your generator and inverter because this protects both if there are power spikes or low wind periods (that way, you don’t have to purchase additional materials).
Putting together a homemade wind generator
To get started, here is a video of a commercial wind generator being built and installed so you can see what they look like and how they function in the commercial realm.
A wind generator will require three blades (we already discussed that in the last section), a hub, ahead shaft, a generator, the wind vane, iron floor flange, pipe nipple, base, conduit, charge controller, battery, and insulated wires. Each of these pieces (along with a variety of screws and bolts) are going to work together to create the wind turbine and generator that will be used to power your facility (whether it’s a house or a business, or anything else). You want to make sure you have high-quality parts, so you don’t end up with a malfunctioning product.
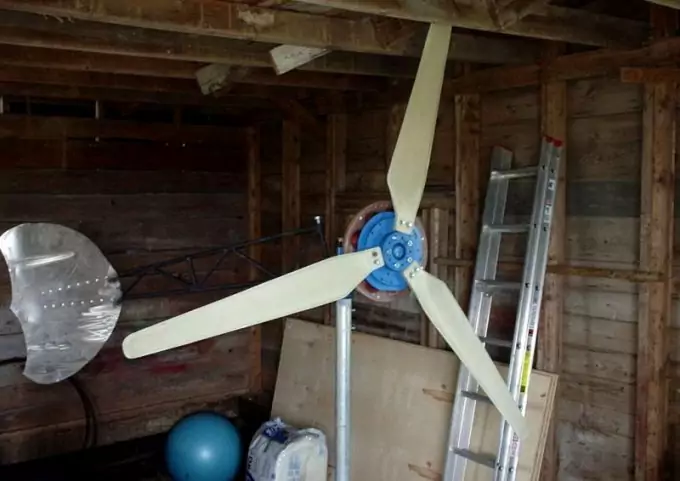
The first thing to do is take your three blades and attach them to your hub. You want to make sure they are approximately 120 degrees away from each other and angled the same way. This will allow your blades to spin in one direction rather than being buffeted around by the wind. If they aren’t spaced evenly or angled in opposing directions, you may not be able to get the power you need from them when the wind blows.
A head shaft can be created from a 2 x 4 if you don’t have anything else intended to keep the blades out from the tower. This will allow the wind vane (which you’ll attach later) to get the breeze and turn the turbine itself. In addition, you want a hole approximately ¼ to 1/3 of the way down the 2 x 4 so that you can attach the generator closer to the spot and thread the wires through easily without them getting tangles or your turbines potentially getting stuck when your blades spin.
The generator should be attached to the head shaft at this point. You can do this with metal straps or with blocks of wood or PVC. You will want to protect your connectors from the elements. Keep in mind that metal can easily rust, and wood will begin to rot.
If either of these things happens, it can cause problems for your turbine or even cause it to be damaged, stop working, or come apart entirely. By protecting these pieces from the elements, you won’t need to worry about these problems (though you will still want to check on your turbine frequently and evaluate for damages).
Attach your wind vane on the opposite side of the head shaft. The vane doesn’t need to be large or complex. It can simply be a piece of sheet metal that is 1/3 or so of the length of the 2 x 4 you used for your head shaft. You can easily attach this vane to your head shaft simply by creating a minor groove in the 2 x 4 and affixing the vane to it. This will help your turbine spin when the wind comes up (since we all know the wind isn’t going to come from the same direction all the time).

A 1-inch iron floor flange will be used under the head shaft to support the entire post. Make sure you screw it incorrectly and tightly to ensure that it will keep the shaft and the pieces above the poet. You’ll then want to screw in a 1-inch piece of pipe nipple onto the flange. This will allow the turbine to turn with the wind as well as it’s going to enable the turbine to move in the way that the wind vane directs.
Finally, attach the blades and hub to the generator shaft and check that everything is balanced. Both sides of the piece you have built should be level and evenly weighted. If there seems to be too much weight on the vane end, you should add some weight to this side to level out everything before you continue to create the tower for your turbine. Keep in mind that if this piece is not level before you begin, you may end up with a top-heavy turbine, and it could break when you put the entire work together in the end.
As you build your base, remember that it’s going to support the entire turbine. This means it needs to be robust, oversized, and heavy. If you want to create a permanent base, you can do so with concrete or sandbags. Remember that you want your floor to be at least 1/3 of the tower’s height horizontally.
Make sure you know how tall your tower will be before you begin this step, or take the time to figure it out before you complete your base. You’ll also want a 1-inch diameter pipe set into your concrete floor before it dries and is attached to a 1-inch tee and pipe nipple. This will allow your tower to stand.
Cut your conduit for the tower, making sure it is thicker than your pipe nipple (at least 1 inch in diameter). This is how tall your building will be, so make sure you measure carefully before you cut and keep in mind the diameter you used for your base when you’re missing this pipe. Once you’ve cut your line, you’re ready to put the pieces together and get started with your wind turbine.

Connect your charge controller to your battery before connecting it to anything else, as this will prevent power spikes (which could ruin your turbine before it even starts). Next, make sure you have insulated wires attached to the charge controller and make sure the unit is disconnected from the batter so that you don’t have to worry about the blades spinning while you’re trying to put up the turbine itself. You don’t want to get hit by the edges, and you don’t want to have to worry about electricity running through the system as you’re moving pieces.
Thread the wire through the base and into the tower shaft from the tee you installed at the bottom up to the top. It may take a little bit of time and effort to get the wire all the way through, or you may want to use string to help thread the wire up to the top of your turbine.
Remember you want to do all of this before you mount the tower shaft, so it will be much easier to thread the wire all the way through and out the top, so it’s ready when you’re ready to start your turbine.
Use guy wires to support your shaft as you mount it to the base and then mount the wind turbine head onto the post. Make sure you thread the cables through the top and connect them to the generator. You want everything to be adequately installed because shorted wires can be difficult to replace once your generator is fully mounted. Next, connect all of your wires to the generator and reconnect wires at the base to the battery so that your turbine will start to spin. You’re now ready to get started enjoying your (nearly free) electricity.
In conclusion
Creating your wind generator is not for everyone. It’s something that not everyone will be allowed to do because of government regulations, but it’s also something that not everyone will want to do.
If you’re interested in generating your power, this is a great way to do it. Whether you’re just looking to save some money or you’re looking to save the planet, you’ll be able to make a difference with your generator. Not to mention it can be fun to do some things on your own.
Check out our piece on alternative sources of energy for the homes to give you more information.


Great article! I wonder if I can use the blades of an electric fan for a small turbine that I plan to build for my boathouse.
Well, you can certainly try and see how it goes. As you saw in the article, blades are quite important for this project.
Instead of building a wind electric generator from scratch you can check out ebay and marine consignment stores for second hand wind generator units which you can just refurbish. It might be more realistic and easier to get this wind generator project done if you have a working body and blade already, and you just need to focus on replacing internal bits and coils. Often complicated DIY projects end up costing more in the long-run.
You can be an amazing survivalist if you are good in DIYs. Therefore, it is absolutely necessary to learn as many projects as possible, and the homemade wind generator is a good start.