
There is nothing better than having a Camelbak stored safely in your backpacking bag during a long trip. The water sacks provide to essential things to the outdoor enthusiast: hydration and easy access. Any adventurer will tell you that having a water bladder is essential in your outdoor gear supply, and to leave home without it can be a deadly mistake.
Dehydration can not only make you sick, but it can quickly become deadly out on a long hike or bike ride in the hot sun. It’s not just owning a bladder that is important, it is also necessary to keep your equipment clean.
Aftercare is the number one priority to the explorer who has just gotten home, and while it may seem like a pain at the time, properly cleaning out your Camelbak can be the difference between using it again, and having to buy a new one. In this article, we will cover the importance of water sanitation and jump into how to clean a Camelbak.
Water Sanitation and Your Health
Any outdoorsman will tell you that water is the key to a healthy hike and body, and not just a small amount of water either. Hydration calculators factor in your weight, gender, how long you are hiking for and the weather on the trail, to let you know exactly how much water you should be consuming.
The average hiker, for one hour in hot temperature, should bring at least two liters along. These two liters should be consumed during the hike in regular intervals. Before you even approach the hiking trail you should also have consumed water prior to the start of the hike.
See also: How to Stay Hydrated: Smart Ways to Avoid Dehydration
This calculator is not accurate if you are already dehydrated. Most peak baggers and bikers will get tunnel vision when trying to complete their hike or ride and will forget to drink water, or simply not want to break up the momentum to pull out a cumbersome water bottle.
The Camelbak, and hydration systems like it, mitigate the need to pull anything out, or even stop on the hike, with its easy to access tube and bite valve.
When we get dehydrated our ability to perform at our best begins to quickly diminish. You are at risk of getting muscle cramps, higher heart rates, and overheated. Hydrating before, after, and during your adventure or workout will allow your muscles to heal and your joints to stay well lubricated.
It also keeps you alert and attentive, dehydration clouds our vision and ability to make important decisions. The old saying is that by the time you feel thirsty, you are already dehydrated. This is even truer when you start to factor in heavy workouts and elevation gain on mountains.
Serious headaches, nausea, and even vomiting can occur if you tackle a big outdoor sport without the proper amount of water. Altitude sickness comes along quicker and is more unbearable for the hiker that is dehydrated. If you know that you get altitude sickness, bringing along extra water can help calm your stomach and alleviate other symptoms.
Having water is only half the battle, you also need to have clean, sanitized water in your pack. Many people know that drinking unclean water from streams and lakes can cause serious life-threatening illnesses.
The most common disease amongst adventures is cheekily called “Backpacker Disease” and occurs when a traveler drinks out of a spring that looks clean when it actually has Giardia cysts and other waterborne bacteria. These bacteria, in the best case scenario, will make your stomach upset, while other can send an otherwise healthy hiker to the hospital. Be extra careful! Read our piece on the benefits of the LifeStraw Personal Water filter to give you more healthy options.
What some may not consider, is the problems that arise when mold and debris build up in their hydration systems, in the tube, mouthpiece, or even the bladder itself. Or, if you are not finishing your water, and allowing it to sit for long periods of time before drinking it again, you risk allowing bacteria to grow in the distilled water as well.
Water bottles and bladders with mold and bacteria in them are breeding grounds for stomach ailments and even more serious flues that are resistant to antibiotics. By simply cleaning your water bottle you cut down these risks considerably.
Consider cleaning your water bottle just as necessary as washing your hands. To help prevent nasty bacteria from growing your bottle simply follow our how to clean a hydration bladder, just remember to clean the mouth bite and the tube as well!
What is a Camelbak?
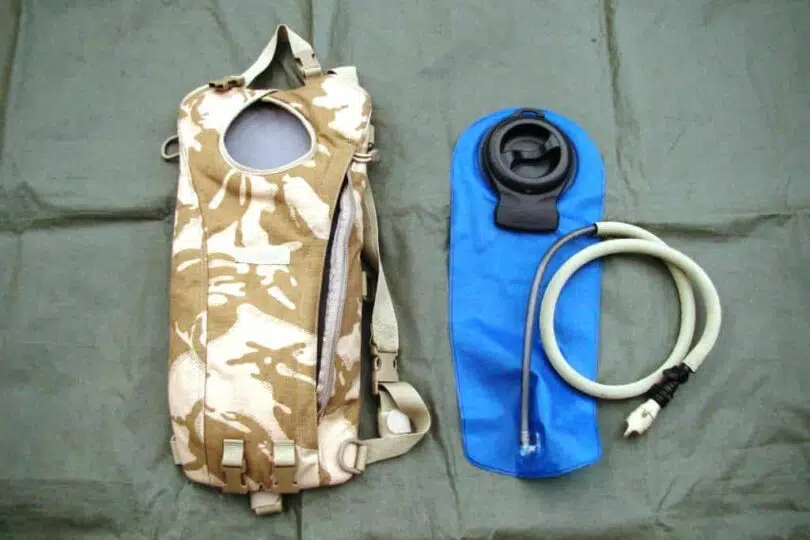
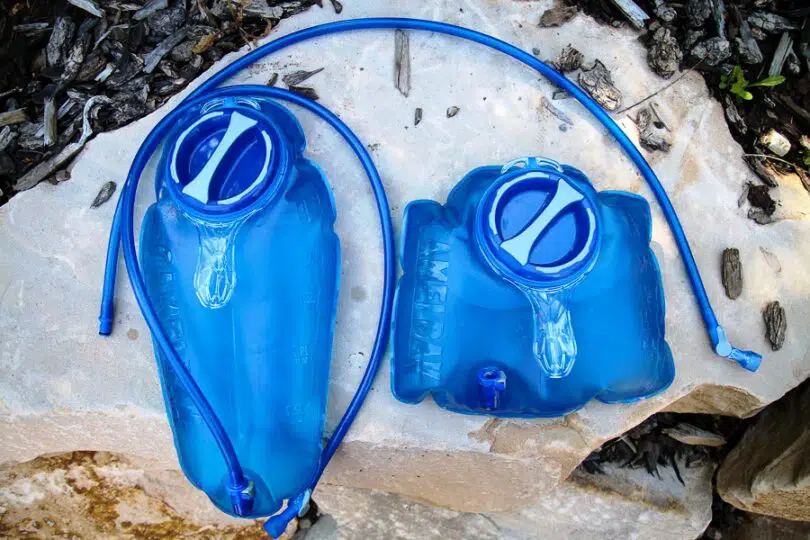
You may be asking yourself, what exactly is a Camelbak, what is it made out of and why does one invest in this hydration system. Simply put, a Camelbak is a specialty bladder made for the outdoor adventurer’s and enthusiasts to stay hydrated and on the course.
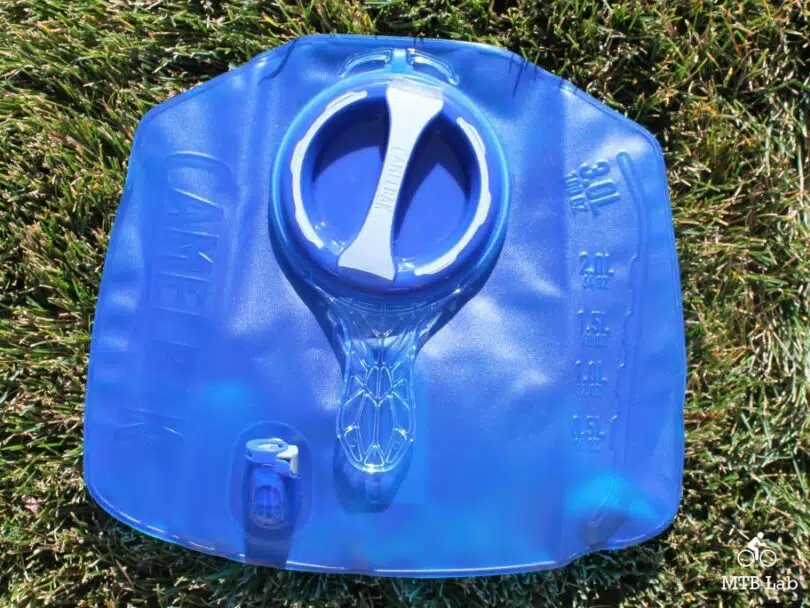
The sack itself is made out of a material commonly referred to as Tritan, with the technical name of copolyester polymer. Like many water bottles, the hydration sack is BPA free and is tough enough to avoid leaking even on your most rugged adventures.
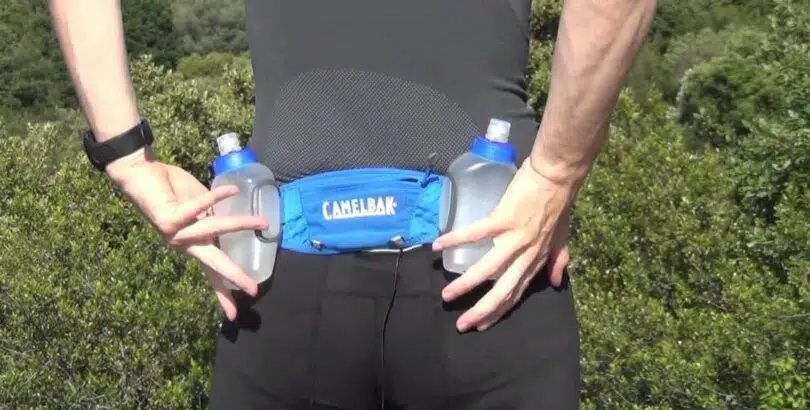
What sets the Camelbak apart is its unique hydration system. You place the bladder itself inside your backpack and then using the long tube, wind it outside your backpack to sit on your shoulder.
At the end of the tube is a bite piece. As you hike along, you can easily sip the water you are carrying on your back by placing the tube in your mouth and biting down to suck up water. This is the perfect solution for the traveler who forgets to hydrate or doesn’t want to stop frequently to rehydrate.
Hikers, bikers, and adventurers alike love the device to keep them hydrated on the go. The novelty of a Camelbak also helps you keep your little ones well hydrated as you hike along without it being a big production every time they need a sip.
Step by Step: How to Clean a Hydration Bladder
This step by step guide is intended to help the hiker who is looking to regularly maintain a sanitary Camelbak and uses their hydration system often. For this process to work best, make sure that you are cleaning your CamelBak right when you get home from your big adventure.
What You Will Need:
- A water source, preferably a clean sink, or enough water to fill up your pack twice.
- A Camelbak Cleaning Brush
- If possible a Camelbak Tube Brush
- Mild soap
- Dry storage area, with hanger and hooks
*Help with mild soap: You may be wondering what exactly is a mild soap, and looking at soap you have around the house. Simply put mild soap is a natural soap without any additional artificial fragrance.
Ideally, this soap has no fragrance at all and is made from coconut oil or even olive oil. While they are a bit more expensive, they will be safer to use on your hydration system.
Step by Step
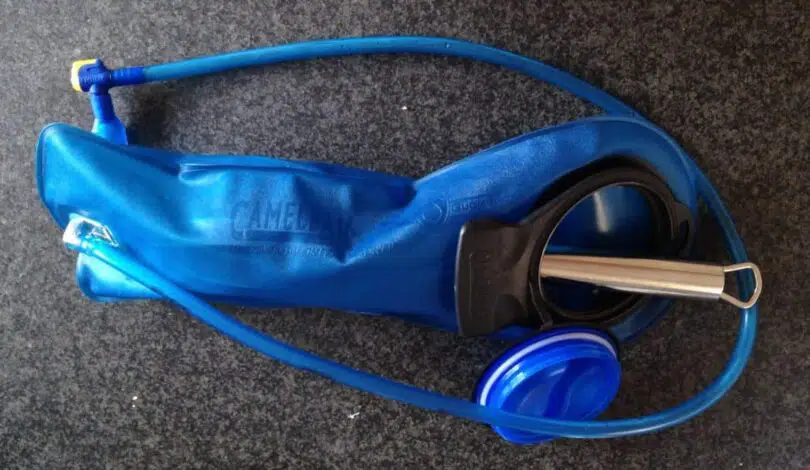
- Remove your bladder from your backpack and take it apart, being careful to separate the tube, the bite valve, and the bladder itself.
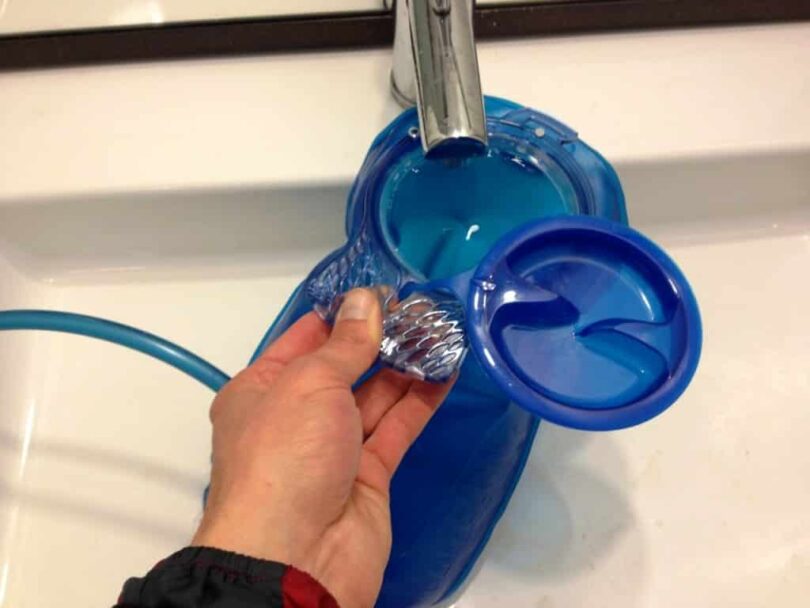
- Starting with the bladder, empty all the water that is still left in the reservoir and using a sink, fill the bag with warm water and your mild soap. Place the closing cap bag on and allow this part to soak, while you proceed to step 3.
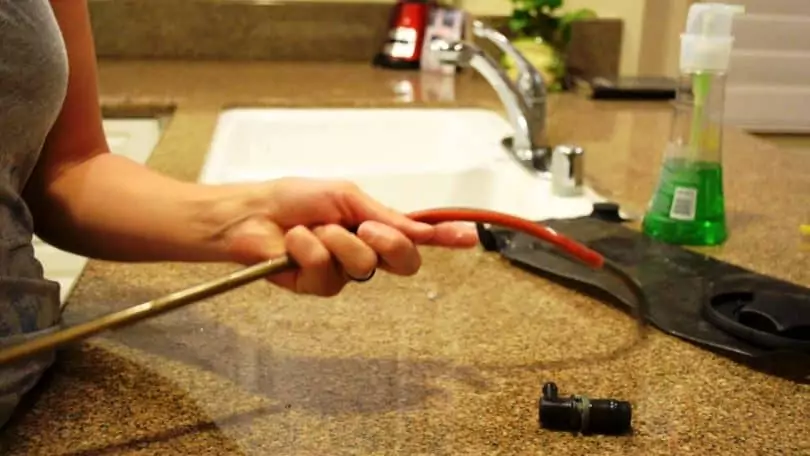
- Run the tube under your sink, or fill it with water several times to wash out any initial bacteria or mold.
- If you have a tube brush, place it through the tube pushing it all the way down and then pulling back up to catch or dislodge any bacteria or debris. Run the tube under water once more.
- Keeping the mouth piece clean is also an essential part of keeping your water sanitized, punch the bite valve so that it opens and run water over the piece. Using either a brush or a clean cloth make sure to scrub the piece on the inside and the outside. Rinse once more.
- Finally, open up your soaking bladder and empty out the water.
- Using the Camelbak cleaning brush, scrub the inside of the bladder gently to get rid of any lingering debris.
- After you have scrubbed the inside of the bag, fill it back up with water at least twice to get rid of any access water, soap, or debris.
- Keeping the pieces separate, hang up the bladder, tube, and mouthpiece to air dry. Use hooks and hangers to keep them far enough apart to dry.
- Once the components are dry, you can reassemble them and store them in a dry place for future use!
*Buyers tip: If you are already splurging on the brushes, it is best to also buy the hook system Camelbak sells as it helps open up the Camelbak for a more efficient air dry. If you are using your own hanger try to prop open the bladder for most efficient drying.
Oh no! I waited too long!
Our cleaning guide is for those who come straight home and clean out their water bladders, however, we have all gotten home from a long trip and fell fast asleep before even thinking about aftercare. This mistake is not life ending and doesn’t necessarily mean the end of your bladder.
It does mean that there is the potential that your CamelBak has collected mold, and should not be used again until it is properly cleaned. Instead, we have another how to, for those who waited a bit too long:
What You Will Need:
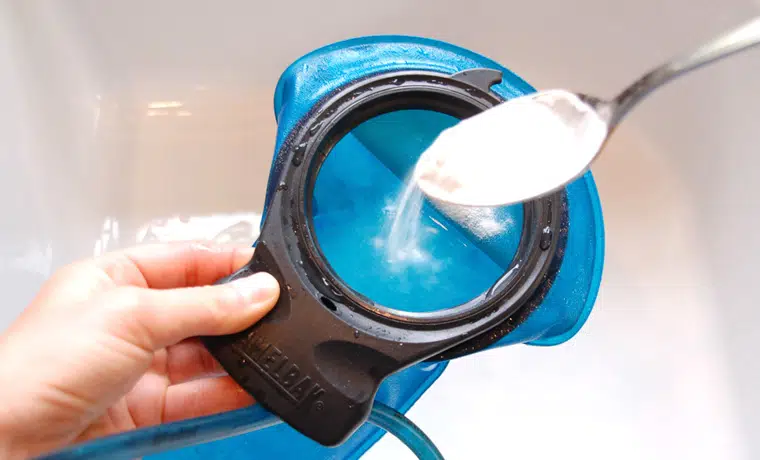
- 2 tablespoons of baking soda
- Enough hot water to fill up your bladder twice
- Mild soap, preferably scentless
*Quick tip: If you are headed to an outdoor store, check to see if you can purchase the Camelbak cleaning solution. This solution packet can be substituted for the baking soda, and works just as well!
Step by Step
- This may seem obvious, but just in case, make sure to remove your bladder from your backpack before beginning this process.
- Take your hot water and baking soda and combine them in your bladder.
- To sanitize the tub, take the now full bladder and raise it above your head while pinching the valve. This way water will fill up the suction tube and by pinching the bite piece you won’t be taking an accidental shower.
- Allow it to settle for 30 minutes, this way it will decontaminate any accidental mold or fungus that has grown in the bladder.
- Empty the bladder of the water solution.
- With the mild soap and the second batch of water, fill up your bladder and then in the sink allow it to slowly drain out. The solution has been sitting in the bag for thirty minutes, so if you still detect a scent, go ahead and repeat this step.
- Air dry in an open space. If you fold it up and put it away, you will collect more mold.
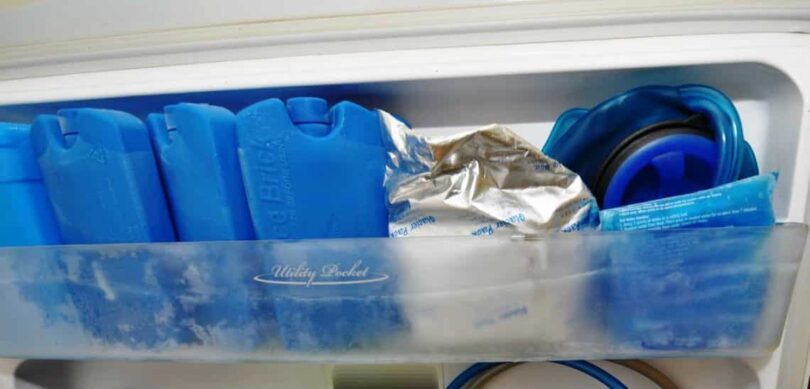
*Pro Tip: Hikers who are in constant use of their CamelBak will opt to air dry their bladder and then pop it in the freezer. This way, even if there is the tiniest amount of water in the water reservoir they can still stunt the growth of mold.
Will This Help the Taste?
If you are a big time outdoor backpacker who travels for days on end, you might be using iodine pills to help purify your water. While they are life savers in the backcountry, they can leave a pretty gnarly taste in your water bladder, especially if you use the pills regularly, or forget to clean our sack right away.
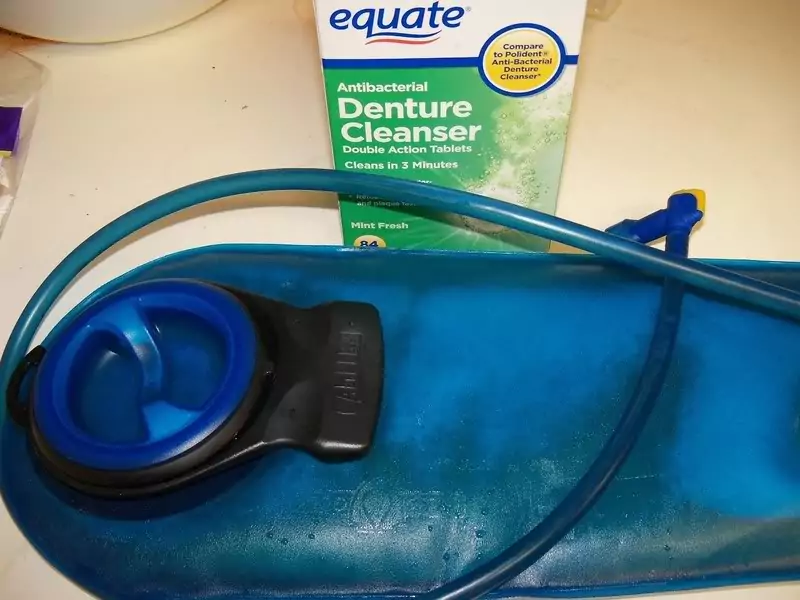
Our cleaning methods will help reduce some of the tastes, but for the most effective taste remover denture tablets work surprisingly well! Simply, use the tablets as instructed (amount of tablets for the quantity of water) and then thoroughly rinse.
Sometimes we let our water sit in the bladder too long, or perhaps we are going on a long hike and have no option but to let it sit. The plastic flavor will link in and make for an uncomfortable drinking experience. While you need to be more careful with this idea, you can try adding bleach into your water to get rid of the taste.
Putting two tablespoons of bleach in with warm water, and allowing it to sit for thirty minutes can not only sterilize the bladder but also get rid of any smells and tastes. You need to be extra cautious with bleach, as it is unsafe to have it in your drinking water.
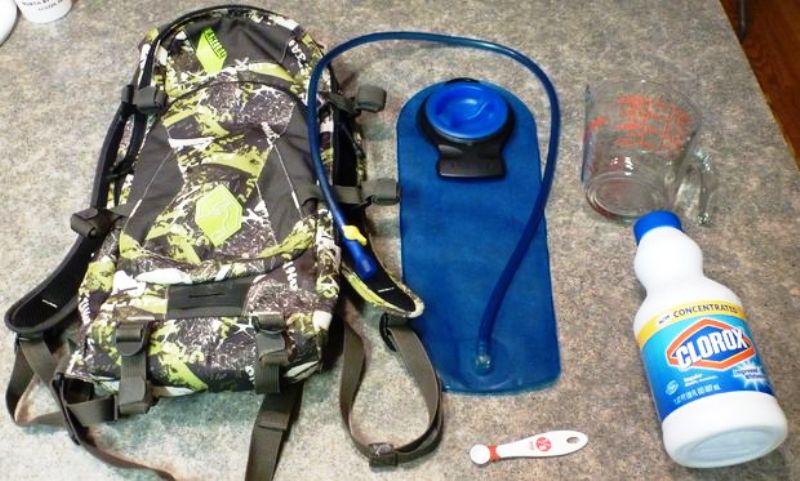
Make sure you rinse the bladder out several times before sipping it again. Using a strong corrosive like bleach on the bladder should not be your go to permanent cleaning solution, but will help with initial strong plastic tastes on the new product.
Sometimes it is the temperature of the water that is bothering your taste sense. If you do not wish to use cleaning agents like bleach, baking soda, or denture cleaner, try placing your bladder in the freezer the night before a big hike. The incredibly cold water will give you the fresh sensation you are missing and will mask the plastic taste.
Make sure that you remove the hose and mouthpiece before you place the full bladder in the freeze, or it can be difficult to drink out of the next morning! Note, that using a freezer is not a substitute for cleaning your hydration system regularly, while it will help prevent the build up of mold, it will not clean any pre-existing bacteria or mold.
Our last suggestion for taste also allows for you to rid any odors and taste without the use of chemicals. Try washing the Camelbak out with a teaspoon of lemon just and a cup of water.
Allow it to move around the full hydration bladder, and then because there are no chemicals added, you can sip some of it through the bite piece to allow it to clean the hose and the mouthpiece.
Do not substitute this lemon method for a general maintenance or deep clean, as it will not keep bacteria from growing inside the hydration bladder, it only helps alleviate some of the strong tastes associated with plastic or iodine tablets.
Keeping it Clean
Whether you buy a kit to keep it clean or try you’re in home products, keeping your hydration system clean is essential for your health and happiness on outdoor adventures. While many of us finish our big day outdoors prioritizing food, showers, and sleep, the aftercare of our adventure equipment is just as important.
By taking the twenty minutes it takes to clean your hydration system, you can ensure its longevity and healthiness for all of your outdoor adventures. What is most important, with all gear but especially a hydration system, is to keep mold from growing and spreading.
Mold can negatively affect our health and performance when we need it the most. Enjoy your adventuring, but do so by staying hydrated! Have we missed your cleaning technique or favorite product to clean a Camelbak? Let us know in the comments below!
Check out our review of the best hydration bladder to give you more high-quality gear for the long haul.

Despite the fact that I burn out energy in my profession, I always see to it that biking, hiking, trekking is part of my weekend vocabulary. And, a camelbak is my best friend. Until such time that, I noticed tiny molds in the tank and some solid dirt on its hose. I realized, I have been cleaning it with plain water and using air for drying. Luckily, I encountered various tips from here; I will be starting to clean it up with baking soda.
Unlike water bottles or glasses, a Camelbak is quite complex to clean. Last time, I had some cold sore, which causes me an anxiety of getting a new Camelbak. I don’t know what went wrong, but I guess I was not able to disinfect it properly. Now, I am caught in between using bleach or baking soda. What could be the best cleaning material to ensure safe and effectual cleaning?
In addition, you can choose to use Camelbak cleaning tabs, and allow the reservoir and cleaning solution to sit for around half an hour.
No need to panic, Tris. You should consider using hot water and a maximum of two tablespoons of either bleach or baking soda. They are both very effective, really. Just make sure you get the cleaning right, and you will be okay.