
Every day millions of people flip a switch; light fills the dark rooms of their homes or the outside darkness surrounding their houses. Why not have solar lanterns set the stage? You can make them as elegant or as plain as you like. Solar lanterns will not only save you money, they can also be used to set a tone of ambiance or just light your way as you walk to the refrigerator in the middle of the night for a snack.
DIY Solar Lanterns are easily made and here I will explain to you the different kinds and the how to. You will find below the items you will need and the instructions on how to create lanterns. You can add your own personal touches to make them yours. Can you imagine sitting outside on a warm evening in the middle of June with dusk quickly approaching, your lanterns lit up as the fireflies start to show themselves? Doesn’t that sound great?
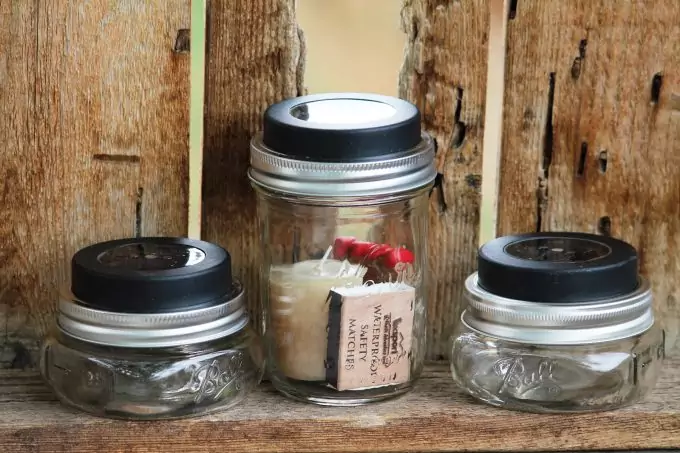
Spice jar string solar lanterns
These are perfect if you have a small overhead porch to hang them from. An evening of sitting outside in the cool night air with the soft glow of these small frosted string of solar lights.
Items you will need:
- 6 solar lights
- 6 spice jars
- 1 box cutter (just in case)
- Painter’s tape
- Frosty glass paint (optional)
- Sponge brush
- Industrial strength glue
- 18’ twine
- Extra twine for wrapping
Instructions:
- Remove the tops off both the solar lights and your spice jars. If the spice jars have not already been clean, do this now and allow them to dry.
- After the spice jars have been cleaned and dried attach the solar lights to the spice jars.
- Tape off each jar along the top to ensure that the solar lights stay attached.
- Paint your spice jar with your glass with the sponge brush. You can use whatever colors you want.
- While the paint is drying attach you twine by taking the glue and applying to sides then wrap the light working from top to bottom, set aside and allow to dry.
- Take you 18’ of twine and fold it in half. Make a hanging knot in the twine by tying a knot and making a loop. Go 10’ and do the same thing.
- Separate the two pieces of twine and begin to add you spice jars by wrapping the twine around the jar and securing it with a knot. Be sure to space you jars evenly. Once all you jars are secured on the twine they are ready to hang in the place of your choice.
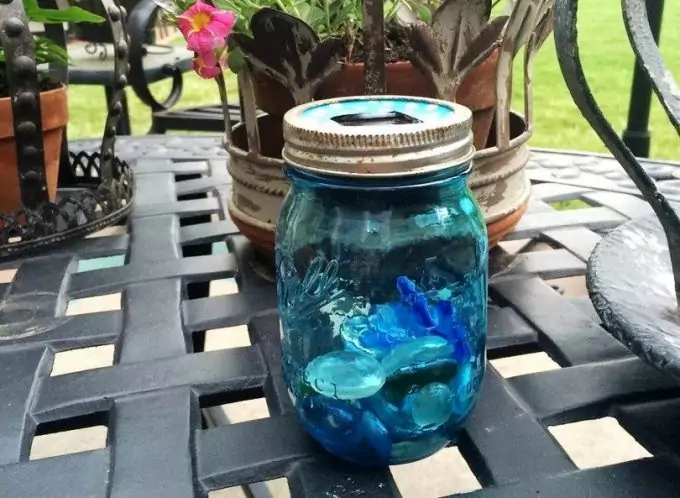
Water glow solar lanterns
With this solar lantern that looks like moonlight lighting up the room. You will get a softer bright light than when you use a solar light without water. The reason for this is the light actually disperses the light as it shines through the water making it just a bit brighter. This lantern could be used as a bathroom night light or for a child’s bedroom. This one is actually the easiest out of all of them.
Items you will need:
- Drill
- Drill bit the size of your solar light bulbs
- Any clear containers that have lids (peanut butter or salsa jars are good)
- Solar light tops
- Water
- Glue (optional)
Instructions:
- Clean jars and lids and allow them to dry
- Take you drill and drill a hole in the center of the lid.
- Replace lid on container and glue solar light top onto the top of your container. If you choose not to glue it then just set it on top.
- Let glue dry if using
- Fill your container with water replace container lid and screw it on tight.
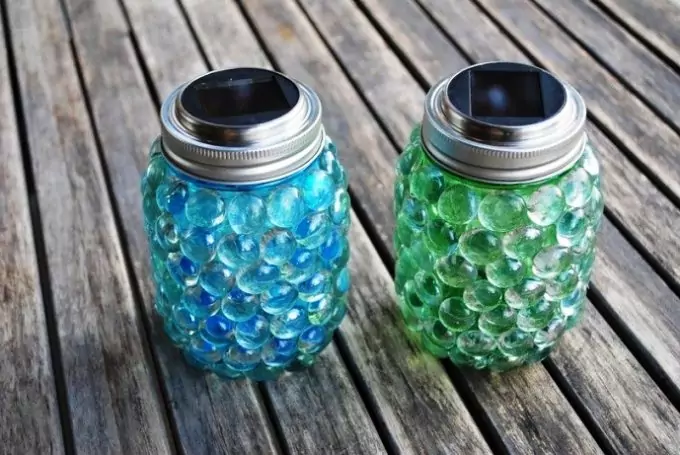
Mason jars solar lanterns
These lanterns are the most popular to make. You can go to your local grocery store and buy a case of whatever size jars you like at a decent price. You can get little ones for those tiny little toddler hands so that they can hold them. You can get medium and large ones also.

This one is actually the easiest out of all of them.
Items you will need:
- 12 pint canning jars
- 12 solar light tops
- Hot glue
Instructions:
- Remove the rings and lids from the mason jars. Keep the rings Put the lids away
- Take the solar light tops and slide them into one of the rings to the Mason jar (it should fit snug.)
- If the top is loose then apply glue around the ring to hold lamp in place
- Screw it into place
Unless you like to do things on your own and make things on your own. You may be thinking right about know why do I would want to do this? What good will making my own solar-powered lights do? I’ll tell you. Think green. No matter how small solar energy is a renewable energy source that is a good thing. Think of how much fun it would be to make these with your kids. The bonding that will happen between you and them.
These items don’t take that much time to make so it won’t take that much time out of your busy day or theirs and just think the next time a storm blows through and knocks your power out you have a backup plan (at least for a minimal amount of lighting).
Glitter lanterns
These lanterns are one of the most beautiful I have found so far. They aren’t that hard to make either and are great for gift giving!
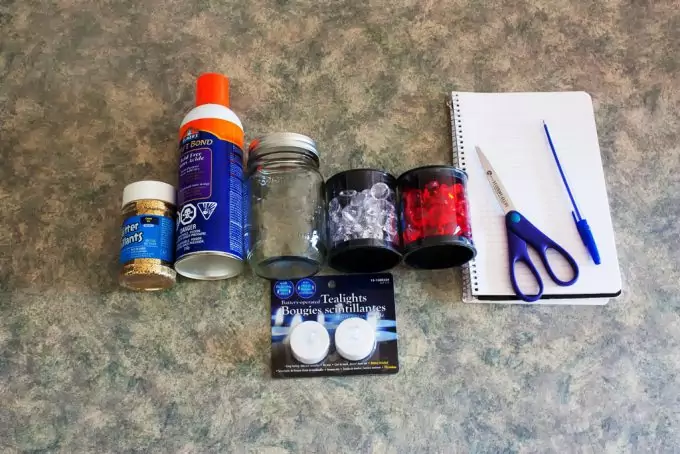
Items you will need:
- Glitter
- Spray adhesive
- Solar light tops
- Canning jars
- Hot glue
Instructions:
- Take the lids and rings off your jars. Keep the rings close put the lids away.
- Spray the inside of the jar with the spray adhesive
- Sprinkle in glitter
- Shake all over the inside of the jar
- Spray more adhesive to set the glitter and allow to dry
- Place the solar light tops in the rings if they are loose glue in with hot glue, let dry
- Place tops on jars
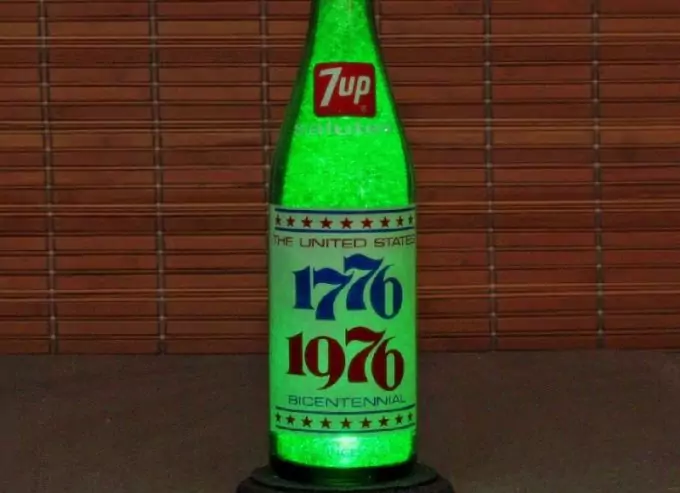
The soda bottle light bulb
Have you ever heard of it? Let me explain it. What is a solar light bulb or light tube? It is a simple clear soda, water, or another plastic drinking bottle that can be used during the day to bring natural sunlight into a dark room or dwelling. The one thing I see wrong with it is you have to put a hole in the ceiling of the area you want to light up.
Sealing the area around the bottle up will definitely secure the bottle and prevent leaking around the area. A very positive thing that I see is that it is natural light. It is also free. You can also use these with solar and flashlights also.
Items you will need:
- Reusable plastic drinking bottles with lids
- Bleach (if making permanent
- Water
- Sealant
- Small piece of sheet metal
- Small metal hacksaw
- Tin snips
Instructions:
- Empty and clean your bottles and caps
- Measure you bottle and cut size out of the sheet metal and roof to fit.
- Fill the bottle almost to the top with water (remember you will be adding bleach if this is permanent)
- Add 3 tablespoon of bleach
- Tighten on the cap
- Carefully slide the bottle into the sheet metal
- Seal the edge around the bottle with the sealant to keep out the elements
- Drop the bottle with the cap side outside into the hole of the roof if possible put sealant on the part of the sheet metal touching the roof also
Making paper lanterns at home is a great idea because you can make them for all occasions. The Fourth of July, Halloween, Birthdays, Labor Day, Easter, etc. Whichever festive occasion you choose you to have choices. You can even go to the dollar store and buy those paper lantern shells that they have available for purchase if you do not have the time or the patience to make one. Then you can just add ribbon and a splash of paint here or there to make it look festive.
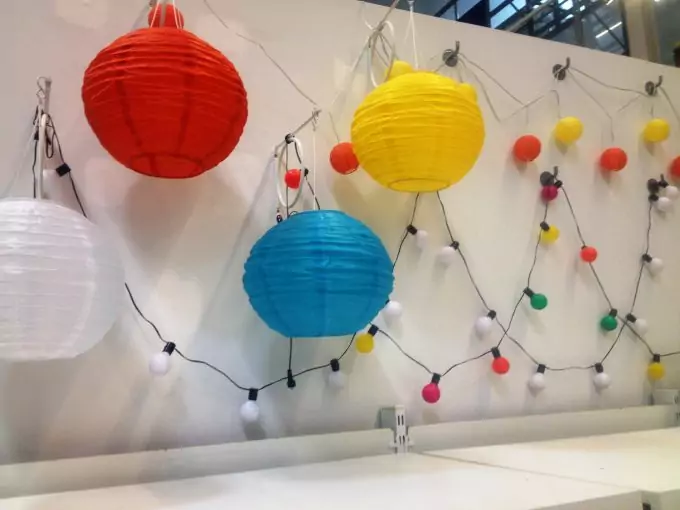
Solar paper lanterns
Items you will need:
- Paper Lanterns
- Washi tape
- Solar lights
- Thin wire
- Duct tape
- Scissors
Instructions:
- Wrap the wire around the solar light and secure it in place with the duct tape.
- Then loop the wire around the top of the lantern frame. Make sure you hang it towards the top so it can still receive sunlight.
- Then open your lantern and secure it with the frame.
- Use washi down the sides of the lantern and secure them in place.
Hang them throughout your yard and enjoy. Change them to match the festivities.
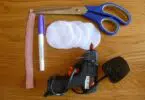
Please consider another method of crafting these types of lanterns.
Items you will need:
- Scissors
- Water
- Glue
- Paint brush
- balloons
- different colored tissue paper
- glitter
- wire
- duct tape
Instructions:
- Blow up your balloon to the size you want you lantern to be
- Put a small amount of glue in a bowl and mix with water until paste becomes thin
- Cut you tissue paper into small squares and rectangles
- Using your paintbrush brush glue and water mixture onto balloon a section at a time and place piece of tissue paper on wet area(maximum of 3 layers)
- Be sure to make sure all holes and gaps are covered and all paper is wet enough to stick to each other.
- Once balloon is completely covered sprinkle on a small amount glitter
- Allow it to dry (usually overnight)
- Pop balloon with a pin
- Cut you holes in the top and bottom
- Wrap wire around the top of the solar light and secure it in place with the duct tape. Loop wire around the top of the lantern frame. Make sure you hang it so it will receive ample sunlight to charge.
- Hang the out in your yard and enjoy
Basket illumiaries
If you can find any glass containers that look like cracked ice then you can make your basket look like it’s a piece of frozen ice. Even if you can’t and you just have a really pretty hanging basket that has a nice thin design on it you can use it, It will look elegant either hanging or sitting. The wireframe baskets you can pick up at any of your hardware stores are great for this project.
Items you will need:
- A fancy/nice basket
- A jar or nice glass holder
- Solar light topper
- Decorations for the bottom of the basket
- Hot glue
Instructions:
- Take you basket and place your decorations it like a nest for you jar or holder
- Place you solar on your jar or holder if it’s
- If loose, hot glue your solar light onto the top
- Place into the basket and nestle in to the bed of decorations
- Arrange the decorations around the base of the jar so the it sits nested into the bottom of the basket
- Hang or sit in the area of your choice
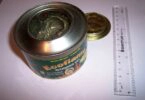
Tin can lanterns
People have been making tin can lanterns for as long as I can remember so this is just a new twist on an old thing. Maybe it’s one of those things you forgot about. You can use ant can for this. You don’t need to pay for anything except your solar lamps unless you already have those. Most of us usually put sand and candles in the wonderful little lanterns. How about trying some solar lights? The only thing you would really have to do is take out the light during the day so it could charge or is there another way?
Yes, there is so if love these wonderful crafty little tin lights then with a little effort you can make them solar. Stop spending money on candles and sand.

Items you will need:
- Recycled tin can
- Drill with metal drill bits
- Solar tops
- Quickset epoxy adhesive
- Galvanized steel wire
- Pliers
- Clear waterproof silicone caulk
- Safety glasses
- Black permanent marker
- Spray paint or clear acrylic sealer (optional)
Instructions:
- Clean and dry tin can thoroughly
- Draw you design on the can with marker
- Put on your safety glasses and grab the drill
- Make your design holes to make different size holes use different sized metal bits
- If you haven’t taken your solar light apart yet do it at this point.
- In the center of the closed end of the can drill the hole for the light bulb
- Make your handle holes. Do this by drilling holes on the outside of the closed end of the can opposite each other approximately ½ inch from the rim.
- Insert wire ends from the outside into the handle holes. Twist the ends into a small u shape loop on the inside.
- If you want to spray paint you can you should do this know,
- Prepare the epoxy resin according to the package directions apply where the can and solar light will connect.
- Press firmly and let the epoxy set and cure
- Once epoxy has cured apply clear waterproof caulking around the solar top
- Allow it to dry
- Hang in the area of your choice
I have spent many hours researching and looking for unique ideas on how to make solar lanterns at home and inexpensively. How others have used the resources they have to create different items to suit their needs. All of the items that I have spoken about are very easy to make and not very time-consuming. For those of you who are trying to live a greener lifestyle and don’t know where to start try some of these ideas. It may just be what you are looking for.
Sitting outside on a warm evening with your chosen lantern illuminating the evening will relax you and make you feel at home. It may even give you a little more confidence in yourself knowing you created something so beautiful. When your friends and family ask you where you got them you can proudly say I made them or share at the moment with your kids and say we made them. If you plan to go camping, see our article on how to choose the best solar backpacks to power your needs – it’s a great piece.
They may just ask you to make them one. Wouldn’t that be something? If none of these things that I have mentioned to you really matter to you well then just remember that it’s simple living at its best.
Read our article on how solar energy works to give you an idea of its sustainability, do check it out.


Solar lanterns seem so pretty!
I have been playing around with candles and homemade lanterns, but never with solar ones. How long do they usually last?
I experience problems when using the candle ones for prolonged periods of time, but they are absolutely durable.
This article will make you an expert solar lantern creator.
Recently, I bought one of these for backpacking/camping and I was left stunned to see the performance. However, I did a little bit work on it: I cut off the plastic on it and just left the base., then I added a cord for hanging it. But somehow I totally wrecked it in the process. Now, when I check back at the store to buy a new one, I found out that the store only had a limited stock.
Your article solved all of my problems, I have successfully made a great homemade solar lantern without spending much. Thank You!
I did not know there were so many types of solar lanterns – they just look incredible! I have seen people keeping these as decoration pieces in their homes. Now, that I have learned the method to make one, I would definitely try it at my home to surprise my little kid!
Thank you for showing interest in our community