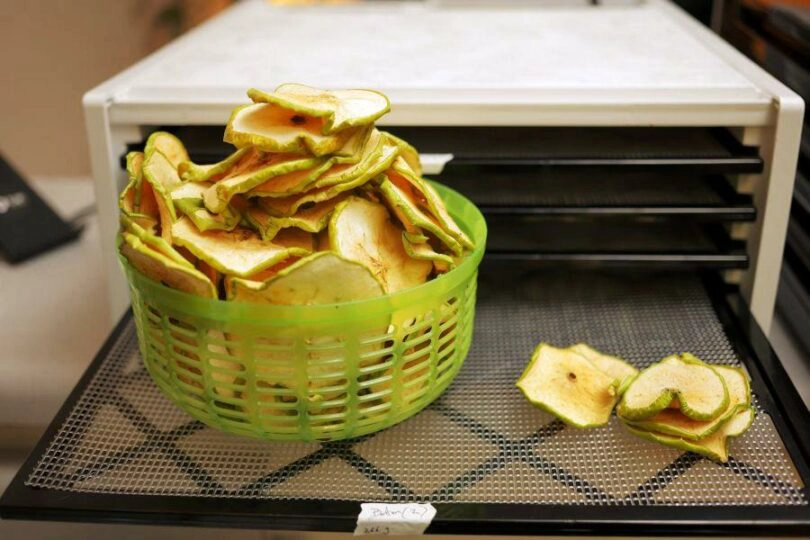
Food dehydration is a very quick and easy method to preserve whatever food you have (mostly food with some water content). Dehydrated food is very useful for hikers and campers as the weight, most of them have to carry in their backpacks, can be significantly reduced by simply carrying dry food. It still preserves its nutritional value, takes very little space in your backpack and the weight is insignificant.
[the_ad_placement id=”in-text-1-type-r”]
Basically, in order to dehydrate your own food at home you will need some sort of a system. Usually a nice way to make sure the dehydration process goes smoothly is to keep the food vertically on plates with holes (so that there is air ventilation both from above and below). Sometimes this may be a slight problem, as food on lower levels may not receive fresh air coming from above, since the top levels block the passage.

To avoid this problem, place food with lower water content on the bottom levels, and those with higher water content on the top level, e.g. fruits, vegetables, etc. Of course, you have to keep in mind that different foods may, with time, absorb each other’s smells, which may be disturbing if you’re drying beef along with apples. So, better off to keep different types of food away from each other, and dry fruits and vegetables away from meat, etc.
Also, if you want to dehydrate food like a professional, take a look at our reviews on the best food dehydrators that can be used at home.
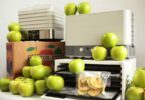
DIY electric food dehydrator
In order to make sure your homemade dehydrator works is to follow a few simple guidelines. First of all, you need a heat source, possibly the dehydrator must have a fan attached to it and have it blow some warm (hot) air into the food.

Image credit: dvo.com
Here is what you’ll need to make your own dehydrator with items you don’t have to look for on special stores:
- Aluminum foil
- Large box (preferably should have wings to close later)
- Light and/or heat source
- Racks
- Tape
- Wooden dowels/slats
First of all, take the cardboard box and place aluminum foil all over its inner walls. Use the tape to stick the foil to the box so it stays firmly attached. Then make a small hole to the bottom of the box. This is where you’ll attach the heat/light source so it generates warmth.
The hole should be small and well-insulated. Be very careful to keep the wire away from the aluminum foil (if possible insulate the wire with some more tape). Since aluminum foil doesn’t let moisture away there may stay some of it nearby the wires (if they are exposed) and cause short-circuitry, which can lead to a fire hazard.

Next cut holes to the sides so you can place the wooden racks/slats through them. You can also use PVC pipes for this purpose. It’s all up to your imagination. These should go exactly across the middle of your box.
Then cut small holes on top of the box. In this way moisture can escape from above. Our advice is to have many smaller holes, rather than many larger holes. It works much better for your purposes. You can also place one small hole at each edge, not just the top surface.
As all this is done, place the racks on top of the slats and you’re ready to put your food in for test. Place the heating source right below the racks. Then you have to close the box and let the moisture leave only from the holes. Don’t leave the box unattended.
You can extend this system by having several levels of slats and racks, so you can dehydrate more food at once.
Solar homemade food dehydrator
Solar dehydrators are very popular among people who prefer it simple and easy. It doesn’t cost you anything (besides the materials) and you let all be done by the sun’s heat.
The mechanism behind it is to keep the air moving inside the dehydrator, but not too fast, or the temperature will naturally decrease. You need it to be high to remove the moisture from the food, yet slightly moving to let the moisture leave the box.
First, you need to make the frame of the whole dehydrator. The size doesn’t matter, since it depends on your needs and plans on how much food you want to dry at a time. One of the sides should be at an angle so that it can face the sun, almost like a real solar panel.
The rest should be like a cube. You can use metal or wooden pieces to construct the frame. Keep the front panel though facing the sun. Your frame should have parallel slats so that you can then place the food racks there. You should aim at square shapes all the time. The bottom frame should be used for any fan or ventilation, on which you will later attach a net cloth.
Next is the door frame. It should also be in rectangular shape and will face you. It will be placed vertically to the opposite side to the one facing the sun. When the door frame is done, place it to the side, as you will have to attach it last.
Next come the trays. You can use wooden slates, which you can attach to both sides of the dehydrator frame. The trays have to be perfectly parallel as they will be used for the racks, where you place your food.
Now it’s time to use a polycarbonate sheet to cover the entire side, facing the sun. You then proceed to place sheet to the sides and the front vertical side. Also, place part of the sheet right above where the door frame begins. To cut the polycarbonate sheet use can use a box cutter, or galvanize it first where you’ll cut, as that makes it far easier.
[the_ad_placement id=”in-text-2-type-r”]
Make holes with a drill where you’ll attach the sheets, and use screws to do so. They have to be perfectly attached and flat on the frame. Now you can place net with small holes as vents to the front and the back of the dehydrator. This is to make sure no insects come in contact with your food. One of your vents should be right below the door, so that it creates ventilation from below to the top.
As this is also done you’re nearly there. We advise you to seal all edges where materials touch each other. This is to make sure that there are no small holes uncovered, as you don’t want insects on your food. To seal the edges use silicone caulk. Also, paint all the insides (walls and door) black. This will attract the light and will heat the inside much faster.
Finally you need to make the trays or racks. Make however many trays you have support for (if you remember those wooden side slats you placed in the beginning). Use wooden trays. Place screws to the side so you can attach the trays neatly on the wooden supports, but make it so that it’s easy to slide the trays in and out.
Finally, the door frame comes. Make sure it is covered by polycarbonate sheet (or a wooden piece) and attach it to the main dehydrator frame with screws and hinges. Paint it also black on the inside. As this is all done now, let the dehydrator stay in the sun for several days, so that all paint and other smells from the making process escape. Otherwise, they will mingle with the food you place inside.
It is always a good practice to keep a thermometer inside the dehydrator. This way you can control the temperature and know when the process is in full speed. The ideal temperature should be around 130 degrees F (54 degrees C). In case the temperature is lower you can place a cloth at the lower vent so that the heat is preserved and the temperature rises slightly.
Another version of a solar dehydrator is called basic solar dehydrator. It basically takes almost the same shape as the above described, but the wall facing the sun starts from top to bottom (unlike the above version which has an angled part and a vertical part towards the sun).
In this basic version, the sun-facing side can be covered with transparent plastic sheet (preferably thick enough) or even a glass sheet. Its frame isn’t as complicated, but should have again a vent at the bottom. You can make the entire dehydrator from wood and keep only the plastic or glass the ‘window’ for looking inside and see how the process goes.
You can also have the plastic or glass sheet be the door itself to save time for making it.
And now, that you know how to make your own food dehydrator, it’s time to think about recipes with dehydrated food. We have a few delicious ones in our article here so please take a look and rejoice.
Another version of the solar dryer is the one, which has a horizontal top, almost like a table.
You need to construct a table-like structure with legs and a horizontal plane. Preferably make it 2 by 4 feet, so that you have two squares next to each other.

Image credit: pinsdaddy.com
Next construct another such frame in the shape of two squares, 2 by 4 feet. Place metal sheets or polycarbonate sheets and screw them tightly to the frame. Paint the sheet in a dark (preferably black) color to conduct more heat). This frame should be neatly placed on top of the two squares you created in the second step.
You can simplify this dryer without constructing a whole table-like structure. You can simply make the basis and then place it anywhere horizontally – on chairs, on other tabletops or such horizontal surfaces. Of course it’s better to keep it at an approachable level (better off not at ground level) or you don’t know how insects may creep in.
[the_ad_placement id=”in-text-3-type-r”] Again, use a thermometer to measure the temperature and regulate it if needed. If you want to do that, you may want to very slightly crook the whole setting at an angle (e.g. 87 degrees). This will create slightly stronger air ventilation. If you need the temperature to rise, you can try to cover some of the ventilation holes and cracks with some thin cloth, but not too much otherwise, the moisture won’t be able to escape.
This setting doesn’t require for you to install any additional ventilation, although you can do that. If you do it, place it below the two square net frames, right below the food. Since it will be very close to your food, keep it at low speed and let it blow gently. Also, to make sure the food dries evenly cut the food to very small pieces, preferably at equal size. The smaller the food pieces, the quicker the dehydration process.

All these variations can be modified according to your needs, as long as they create the needed heat and ventilation inside the allocated space for the food. It is crucial that the food is placed on a net or a rack, to ensure that the food touches any surface as little as possible. The process will be much quicker this way.
In order to make the above dehydrators you don’t need expensive materials. All of these can be made with tools and materials present in almost every house. Even if you have to purchase something, it can be cheap and accessible. And after a few days you will have your own dried produce and enjoy your hiking or camping experience.


This article comes in handy because dehydrated foods is easy to carry with you wherever you go: it doesn’t need too much room in you backpack. Most of all I like plums, kiwi and strawberries.
As for me I use electric dehydrator. But of course in camping better to use a solar power. Construction seems to be easy to make. Maybe I’ll try it this summer.
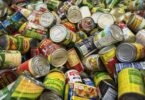
Thank you Samantha, you are right. However, dehydrated food is not just easy to carry, it’s also easy to store for longer time periods which makes it ideal for a survival situation.
I’ve been looking at electric food dehydrators online but the reviews are making me apprehensive at buying one – deformed trays after several processes and high electricity consumption. I’ll ask my husband to make us a DIY solar food dehydrator for now and see if it will work for us. Thank you for this guide, Samuel!
Hi Barbara,
DIY Solar food dehydrators are easy to make, all you need is correct information, such as the one provided in this article.