When it comes to hunting, some people prefer to do it the old-fashioned way, and that’s with a bow and arrow. It may seem simple enough to use, but there’s a lot that goes into learning how to shoot a bow and arrow, as well as getting the right equipment to suit you and your needs. It takes a bit more practice than shooting a gun, as arrows don’t fly as fast as bullets, and require some adjusting in your aim depending on your distance from your target.
[the_ad_placement id=”in-text-1-type-r”]These helpful tips will not only help you to learn how to shoot a bow and arrow properly, but will also provide you with some information on finding the right equipment that will improve your aim and ensure that you hit your mark every time.
Learning stance
Knowing how to stand will help you with your aim, as well as provide comfort and support for your back. Standing the way self-taught archers do is not the way to do it. You should face your target at a forty-five degree angle, with your feet parallel and about eighteen to twenty-four inches apart. Your toes should be pointed towards the target – most beginners start with their toes at ninety degrees from the target, and that’s not the way to do it.
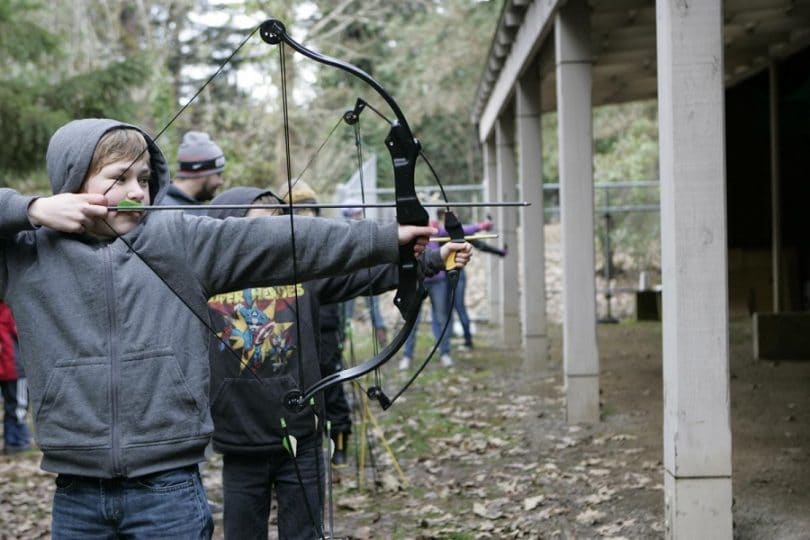
This is called the “open stance”, and helps you to face your target more directly so you can have the best aim and be able to track the movement of your target. You don’t need to move as much, which allows your target to remain unaware of your presence. This position also moves the bowstring away from your bow arm and chest, which minimizes/eliminates your bow string from brushing against your clothing. If this happens, then your arrow is likely to veer to one side.
How to grip your bow
Your bow should be gripped with a relaxed and closed hand. Gripping too tightly will tense up your entire bow arm and affect your accuracy terribly. If you find that you’re having difficulties maintaining a loose grip, then you may want to try an open bow hand while using a wrist sling. The sling keeps the bow ties to your hand so that you won’t loosen it after each shot.
Sometimes, these slings can hinder your ability to be able to shoot quickly, but accuracy is definitely more important than how many shots you can get off per minute.
How to draw
In learning to draw, you’re going to need to use a lot of arm power, so developing your arm strength is key. Extend your bow arm towards the target with the string gripped in either your fingers or in the mechanical release aid. In knowing how to grip the bow string, the most common grip is the index finger being on the string above the nocked arrow, and then two fingers below the arrow. This helps to aim and keeps your arrow steady.
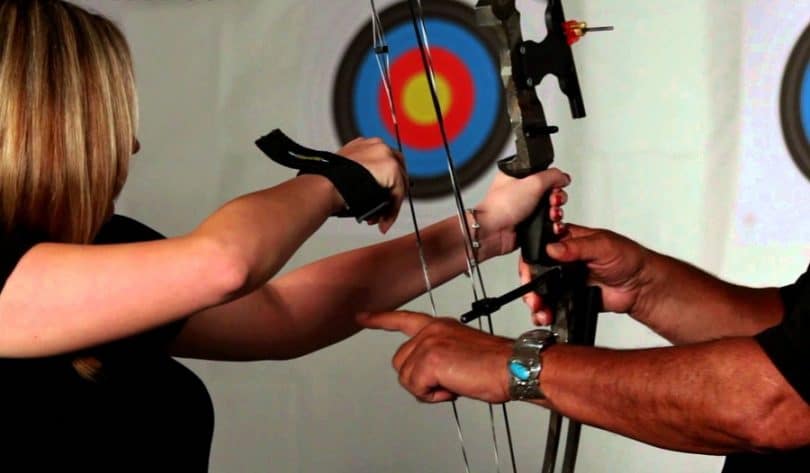
Double-check that your bow grip is low and point the bow at your target. Pull the string back smoothly to your face. You shouldn’t dip the bow or point it into the air as you drawn, and should not push the bow forward as you draw. It’s better to have the bow extended fully first before you pull the string back.
If you find that a bow has too much poundage for you to be able to draw back smoothly, then you might want to consider moving to a lighter bow until your arm muscles have developed properly. Shooting a bow that is much too heavy for you can result in damage to your muscles, as well as affecting your accuracy. You’ll end up missing many of your targets and develop bad shooting habits that can be difficult to undo.
Anchoring
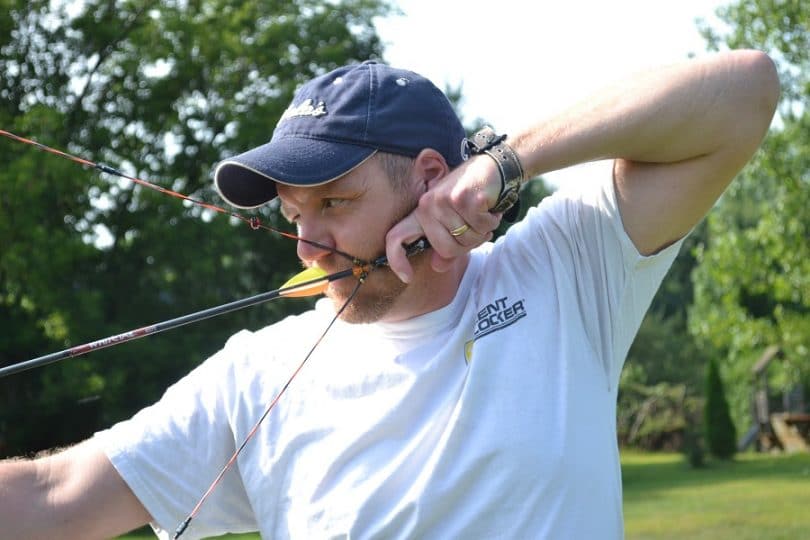
Once the bow string has been fully drawn, then you should lock your string hand against the side of your face. This is what the anchor is. Right-handed shooters tend to anchor to the right side of their face with the right eye behind the bow string, and the opposite is for left-handed shooters.
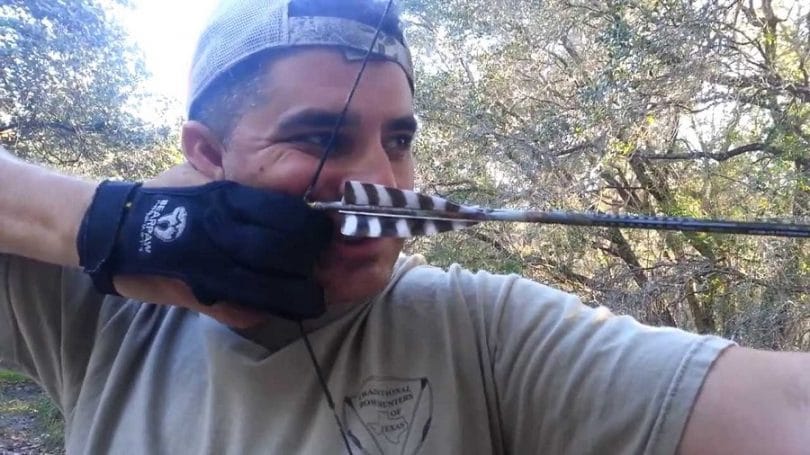
You should find a comfortable anchor point that aligns your aiming eye with the string. Many archers tend to press the index finger to the corner of the mouth with the thumb beneath the chin. If you happen to use a bowstring peep, then you’re guaranteed to have a consistent anchor point when you shoot, as your eye will be aligned through the hole every single time.
Aiming
Most bow hunters use bowsights to help with their aiming, but it’s really up to you and how confident you are in your abilities. Bowsights are more accurate than aiming with your hands, but the choice is really up to you. If you do use a sight, then you use it to pin a target; it not, then aim by feel.
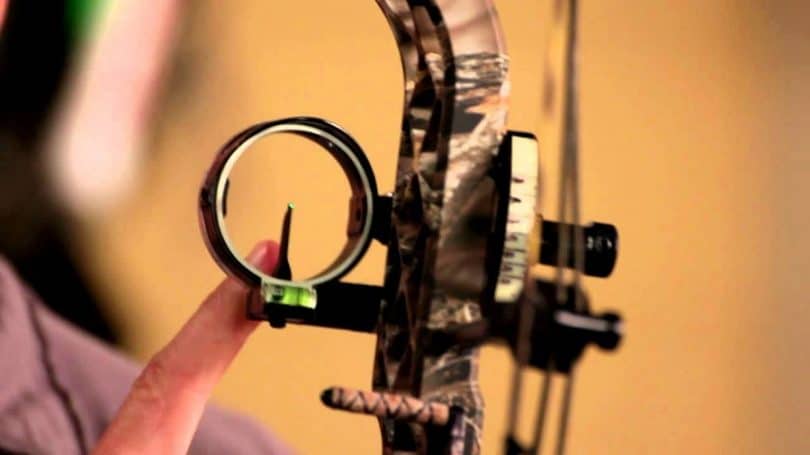
The key factor is consistency so that you know exactly where your arrow will go every time. That’s what practicing when you’re not in the field is important.
Releasing
How you release your shot can make our break where it goes. The release must be done smoothly, or else you’ll completely miss your target. Training yourself not to flinch or jerk is not as easy as it sounds. When aiming with your fingers, it can be difficult to relax all three of your draw fingers at the same time, and consistently from shot to shot. It can also be hard to stop yourself from “plucking” the strings as you release.
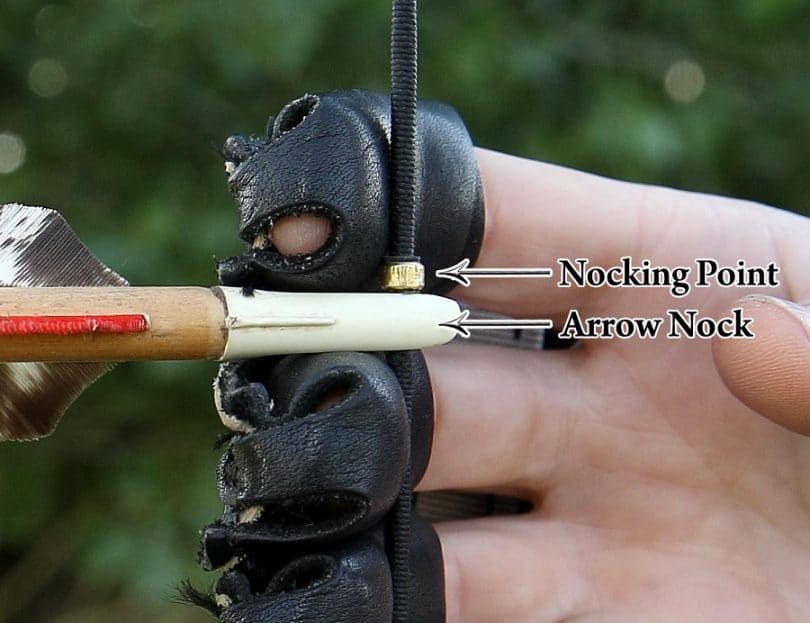
Once you’ve aimed properly, slowly relax your fingers. The bow string should take care of the rest for you, as you’ve already built up the tension within it to send your arrow flying. Some people choose to shoot with a tab or a glove to help them with this, but a tab is much easier and will remain consistent. A glove can develop grooves it in that hinder a smooth release. A tab can feel weird at first to most shooters, but it quickly becomes second nature.
If you choose to use a mechanical release, then you won’t have to worry about releasing at all. Simply draw, anchor, and aim, and then squeeze the release trigger to do the work for you.
Following-through
The last step is the follow-through, and is probably the most overlooked yet most important part of the bow shooting process. After your release, you should keep aiming until your arrow finally hits the target. Your bow should be kept up in order to keep the picture in your sight the same.
[the_ad_placement id=”in-text-2-type-r”]This way, if you need to hit the same or another target, you’ll already be in prime position to shoot again instead of having to restart from the beginning. Maintaining this position trains your body to understand how to shoot a bow and arrow correctly, so much so that you won’t have to think about it much anymore in the future.
Knowing your equipment
Now that you’ve learned the fundamentals of the actual shooting process, it pays to know what to look for in terms of equipment.
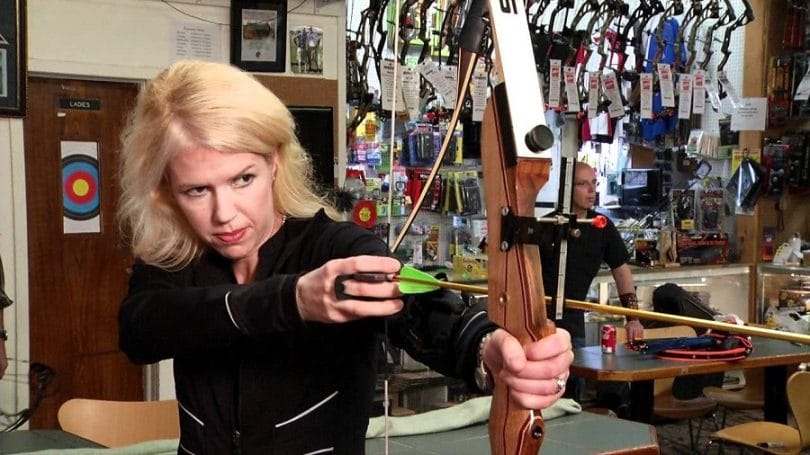
The first thing that should be considered before purchasing your bow is whether you’re right- or left-handed. You may think this means that your dominant hand will be holding the bow, but it’s actually the opposite. If you’re right-handed, your left hand will be holding the bow while the right hand draws on the string, and vice versa for left-handed bows.
Many bow shooters choose to purchase a bow based on which eye is their dominant eye rather than their dominant hand, as this is the primary focus of aiming. If you’re not sure what to go with, get some help at your local sporting goods store to see what feels comfortable for you.
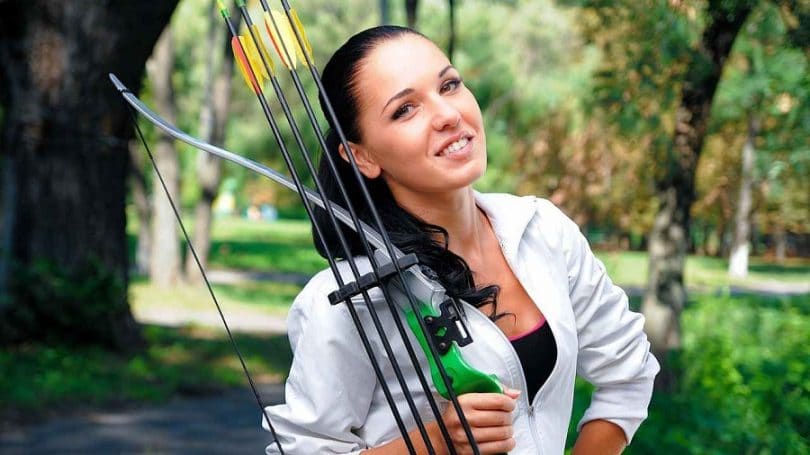
When it comes to bows, they can come in a variety of weights, but this doesn’t mean how much your bow weighs. The “weight” is an indication of how many pounds of force are required to draw the bow string back completely.
Testing them out in the store before you purchase them will tell you what you should get, as getting a bow with too heavy a weight will result in a terrible experience when you go shooting. If you’re just starting out lighter weights can be good for you (so between twenty-five to forty pounds). As your muscles develop, you may choose to move to lighter bows, such as fifty to seventy pounds.
When you first purchase your bow, you can have the bow string adjusted to any poundage that’s comfortable for you within the ten-pound increment.
For example, if you purchase a 50-pound bow, you can have it adjusted to anywhere between 50 to 60 weight, but not over 60.
This help you to adjust to accordingly as your muscles develop, and the string can be altered yourself with just the use of a hex wrench. If you’re aiming for the upper ends of weight limits, you’ll have an easier time using a 50-60 bow that has been maxed out, rather than a 60-70 bow that is at its minimum.
Keep in mind that depending on your location, there may be requirements on what the draw weight minimums on your bow can be. Adhering to these regulations is important in order to avoid incurring fines and penalties. As a general rule, 40-50 is sufficient to take down deer, while 50-60 may be necessary to take out much larger targets.
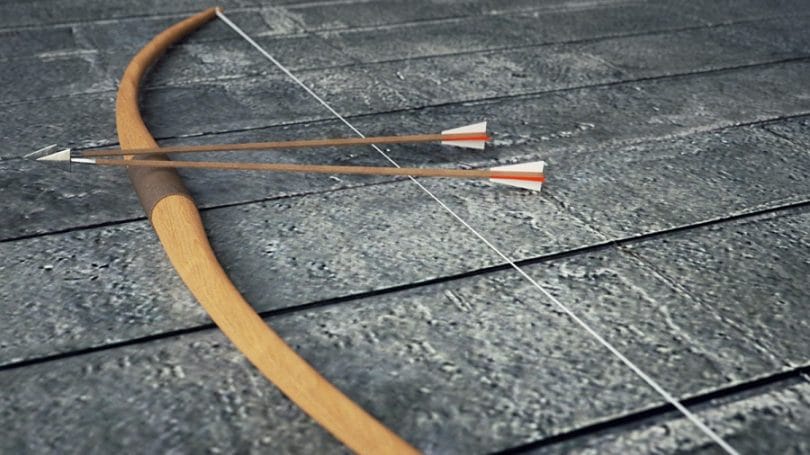
In addition to the weight of your bow, there are a variety of different kinds of bows to choose from, such as:
- Compound bows: they have wheels on the limbs that help you with drawing your string back. Once you get to the halfway point, it becomes much easier to draw it back the rest of the way. They also have a let-off that makes it easier for you to hold the string back without losing your aim or forcing your arm muscles to suffer.
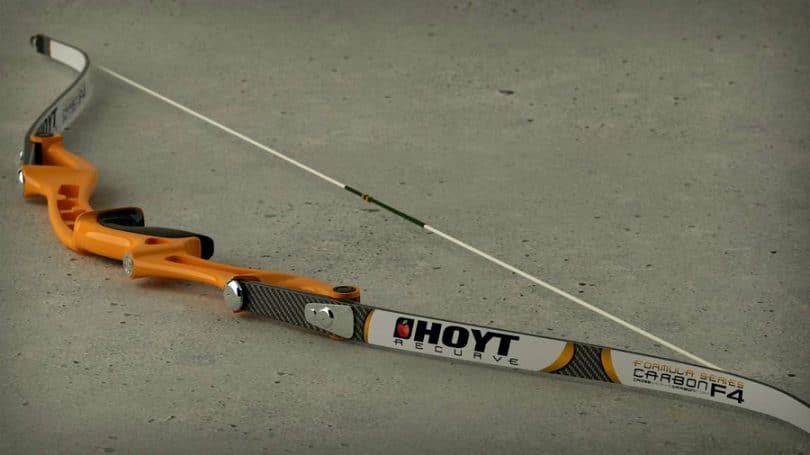
- Recurve bows: they don’t have wheels or a let-off, and are a little bit harder to pull back. The ends are curved away from you to store more energy when the string is pulled back, adding more energy and speed to the notched arrow.
- Long bows: this is the most basic of bows, and is what you’ll see in historical photos of bows and arrows. It’s a piece of fiberglass or wood with a string, and that’s it. These can be quite difficult to learn to shoot, but requires a lot of patience.
If you thought that the intricacies of shooting arrows stopped at the complexity of the bow, then you still have a lot to learn. Arrows come in different varieties as well. The come in carbon fiber, wood, aluminum, fiberglass, and a variety of other material. Carbon fiber is the best to use, but they can be the most expensive. They provide great accuracy, durability and speed.
Cheaper materials work just as well, but they will break if you miss your target and hit something hard, like a house or a tree. When practicing, you should use arrows that have field tips on them, but hunting arrows have three to four blades on them that will help to penetrate the skin and muscle of an animal.
See our must-read article on the best hunting crossbow to give you more choices and options.
Measuring your draw length
This is important in the drawing process of the bow, as having the wrong length can severely affect your aim. The best way to figure out your draw length is to measure your arm span and then divide it by 2.5. This tells you what your draw length is. If you end up being between sizes, then it’s better to choose a little less draw length rather than more.
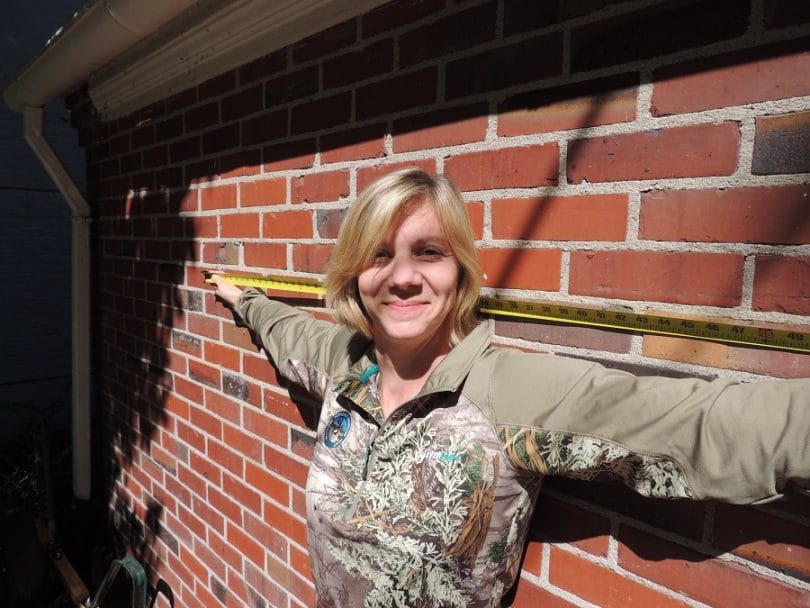
Having a draw length that’s too long will result in inaccurate shots, poor shooting form, and the string slapping against your arm.
Finding the right let-off
This is what helps you to hold the arrow as you aim so that you’re not straining your arm muscles. A higher let-off percentage means holding less weight at full draw as you aim, and vice versa. However, there are some pros and cons to both. Many who have tried a high let-off bow feel that they are too “loose” or “sloppy”, and prefer much lower percentages, as it allows them to shoot faster as well as keeping good alignment during the draw. It’s all a matter of comfort when it comes to let-off, so it’s best to try out a variety to see what works best for you.
Choosing fletched arrows
This may be for pure aesthetics, but there is an important reason for considering the fletching of your arrows. In terms of the material used, plastic or feathers are the more popular options. Plastic is definitely more durable, especially if you plan on using your arrows over and over again, and can be used for any kind of fletching. Feathers, on the other hand, are a bit more delicate, but they’re a lot lighter, making it easier for your shots to ring true. They are typically only fletched in a helical configuration to offer stability.
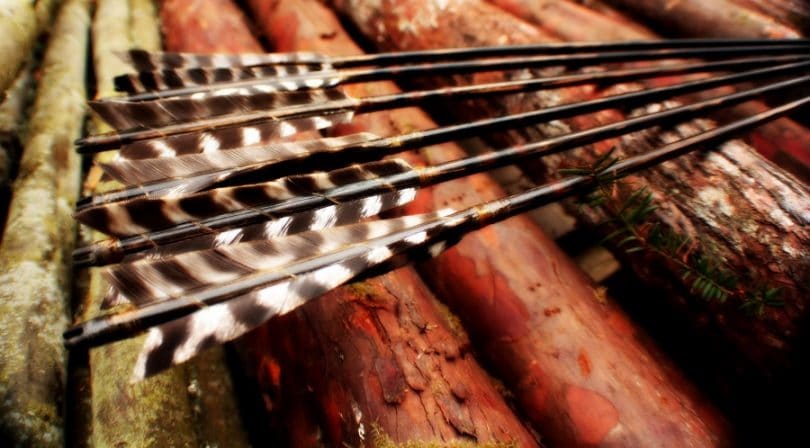
Knowing the difference in the fletching of your arrows can also make all the difference in the world, depending on your shooting style and what you’ll be hunting.
- Straight fletch: with a straight fletch, your arrow doesn’t rotate in flight. This is the fastest flying configuration, provides the least amount of air resistance, and works with any kind of arrow rest. Unfortunately, arrows with this kind of fletching can be less stable at very long distances, there’s less stabilization for broadheads, and requires a well-tuned bow for use.
- Offset fletch: these arrows will rotate slightly in flight. This provides more stabilization for broadheads, very little loss of speed, and works with most arrow rests. These make arrows pretty stable at moderate distances. The downside to this kind of fletching is that there are some fletching clearance issues, and there is some eventual loss of speed at greater distances.
- Helical fletch: this provides the greatest speeds for broadheads and has the best long-distance accuracy out of all the other fletches. And the more you practice with these arrows, the tighter the tips of the fletching get. Two downsides to this kind of fletch are that there is less speed to the arrows, and the fletching clearance can be quite challenging.
To help you with more information, see our guide on the best arrows for hunting, check it out.
Some tips to keep in mind
When it comes right down to it, the numbers are meant to be a guideline for finding your comfort with shooting, but you shouldn’t break everything down to the decimal point. It’s better to try out what works best for you and feels comfortable. Whatever you invest it can always be adjusted to your requirements to make it easier for you to shoot. Don’t forget that you need good shoes, so check out our article on the best hunting boots to keep you in top form.
[the_ad_placement id=”in-text-3-type-r”]When shooting, always pull to full-draw before shooting. Many bows, especially compound bows, are only designed to work most efficiently when they are in the full-draw position. Shooting from the middle of the draw won’t gain you anything. On the other hand, you won’t gain any benefits from overdrawing either. Forcing this can result in damage to your bow.
Don’t worry about needing to work out in order to move up to using heavier bows. The muscles that are used in the sport are part of the large muscle groups that you use anyway, such as the ones in your upper back. So once you start putting them to use, they’ll start to develop on their own and it will become easier over time.
Shooting a bow and arrow has been part of human history for many centuries, for both defence purposes and hunting for food. They can prove to be useful, as they’re light and easy to carry, and make much less noise than a rifle does. There’s something to the art of shooting a bow and arrow by hand and taking down your prey. As always, you should endeavour to form healthy safety practices when it comes to using your bow and arrows, especially if there are other people hunting with you.
Are you a beginner? No worries. See our article on the tips and guides for crossbow hunting to jump start your interest.




How will the stance and aim described here fit with a homemade arrow? Do they have the same principle?
As long as you make the arrow correctly, your position shouldn’t change. However, certain adaptations may seem necessary from one bow to another so try to personalize as much as you can. You must feel the right position
Some of my friends like to use stabilizers which supposedly improve their aim. Would you recommend those?
You do not really need a stabilizer when shooting arrows. You should base your decision on the shooting distance and the target.
Great article! It was a nice read and I definitely found this helpful since I incorporated some of the things you mentioned above. Thanks.
A good archer is not only defined by his or her bow and arrow, but the skills required to successfully shoot a bow and arrow. I am glad this posting has been helpful to you.