05Wine is an extremely versatile beverage and, you may have already noticed just how many varieties are out there. Wine can be enjoyed before or after a meal and, depending on the type of wine, it can be paired with any dish to enhance the flavor. In fact, while cheese and wine pairings are most common, it might surprise you to learn that chocolate can be paired with certain types of wine as well!
[the_ad_placement id=”in-text-1-type-a”]When learning how to make wine at home, it’s important to understand your diet and food preferences before choosing the type of wine you’d like to make. Even if your first batch of wine does not come out quite as perfect as you hope, remember that you can always use this wine in your cooking! Wine is great for making sauces and marinating meat.
Different types of wine
Homemade wine is not only more natural, but it can also be a really fun and interesting process. Before you buy any equipment or supplies, it’s important to have a basic understanding (at least) of how the different wine flavors are achieved. Different kinds of wine are made using various types of grapes. This is fairly obvious but, what you might not know is that the same grape can taste very different if grown in different locations.
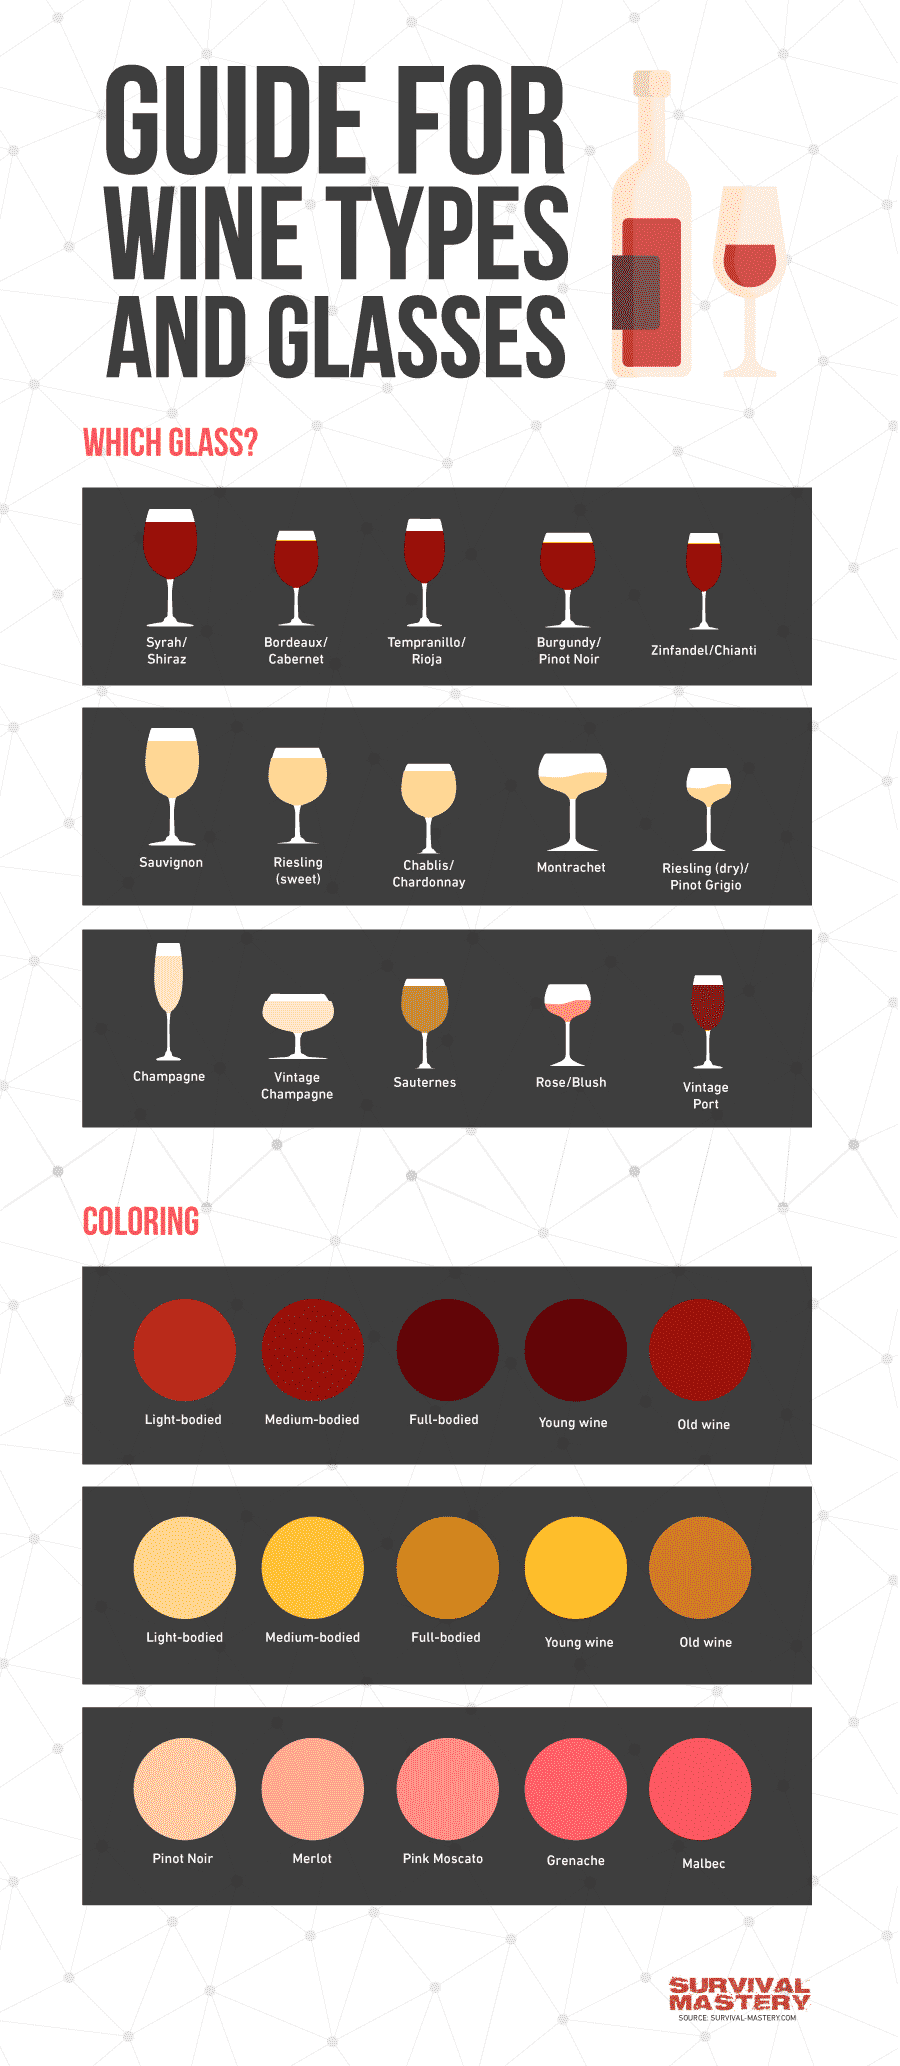
For example, a Riesling from Germany will have a slightly sweet yet acidic appeal to them while a California Riesling is often sweeter and lacking in the acidity. It’s important to understand that there are several factors that influence the flavor of the grape, and this will determine the flavor of the wine. Such factors include soil conditions and the weather. Some grapes do very well in colder climates whereas others prefer more moderate temperatures year-round.
When choosing the type of grape you wish to use, and you’re not cultivating it yourself, you should make sure that you check the country of origin. If you’re planning on cultivating your own grapes, you will need additional equipment to monitor soil conditions, and you will also need adequate irrigation.
Possible problems
When you buy wine from your favorite bottle store or co-op, you can pretty much trust the label. Established winemakers have years of experience and all the necessary equipment. Homemade wine can prove somewhat trickier when you make your first attempt, and there are some potential problems to be aware of.
Firstly, you need to inspect your grapes thoroughly for damage, decay, and any bugs. If you fail to do so, bad grapes could ruin your entire batch. The weather can also play a devastating role on the process. If there is a sudden drop in temperature, fermentation could stop and, if it gets too hot, it could also have a negative effect on the end result. It’s also important to remember that, just like any natural product, when making your own batch of wine, you need to keep its shelf life in mind.
If you wish, you can add preservatives to the wine, or you can leave it as is, store in a cool place and make sure that it is consumed before it turns to vinegar. Again, the weather and temperatures play a huge role in how long your wine will last in storage. As for flavor issues, it’s good to know that corrections can be made if your wine is too dry, too sweet, or has other property flaws.
Benefits of homemade wine
It’s fairly common knowledge that wine contains a number of beneficial properties. Now, whether you buy it from the store or make it yourself, you will still enjoy those antioxidants and other advantages. If you make your own batch, however, there are several additional advantages. Firstly, it’s really cost effective. Don’t compare the cost of making your own bottle with that of the cheapest you can find in town. Instead, consider the fact that you are producing wine of a higher quality and, therefore, it has a greater value.
In addition, if you make your own wine, you can reuse your wine bottles instead of simply throwing them out or recycling them. This is the greenest option of all! You can even use your experience to teach your friends and make a regular social event out of it if you like.
Or, if you want to enjoy more of a return on your investment, you could teach basic wine making classes once you’ve mastered various techniques. You can also be sure of exactly what’s going into each bottle. If you struggle to trust different winemakers, for whatever reason, this is a DIY approach for your peace of mind.
Common mistakes to avoid
One of the biggest mistakes that newbies make is that they try to hurry the process along. Think of any other alcoholic beverage (whiskey, brandy, beer, vodka, etc.) and consider how each of them requires the right amount of time in order to achieve the best flavor. The same goes for wine. If you rush things, you will notice that the wine will be fizzy or carbonated. This can be remedied by stirring, racking, or using a vacuum pump but this means unnecessary effort.

Light colored wines are also common if they are excessively clarified. To solve this problem, you could blend the wine with a darker one to even out the color. Red wines may benefit by adding grape skin powder to enhance the color. Remember, the color will become deeper all on its own, over time.
See also: How to Make Alcohol: 3 Easy To Follow Recipes
However, it’s never a good idea to leave your wine too long before enjoying it. The longer you wait, the greater the chance of it losing its most delicate and appealing properties. Some make the error of buying equipment that’s too small and doesn’t allow enough air movement during the process, while others fail to keep their equipment squeaky clean. While it might be tempting to stir the yeast into the must, this is a big mistake that should be avoided because it can cause the yeast to suffocate as a result.
Wine making process and equipment
Before you begin making your way down this fruity adventure, it’s important that you are fully prepared in terms of equipment and understanding. By learning about the process and the time required, you will be less likely to rush or make any of the common mistakes mentioned above.
What you will need
The equipment you will need will usually constitute a once-off investment. Many first-timers choose to buy a kit with all the necessities already included and, should anything wear down or break, each individual item can be purchased separately.
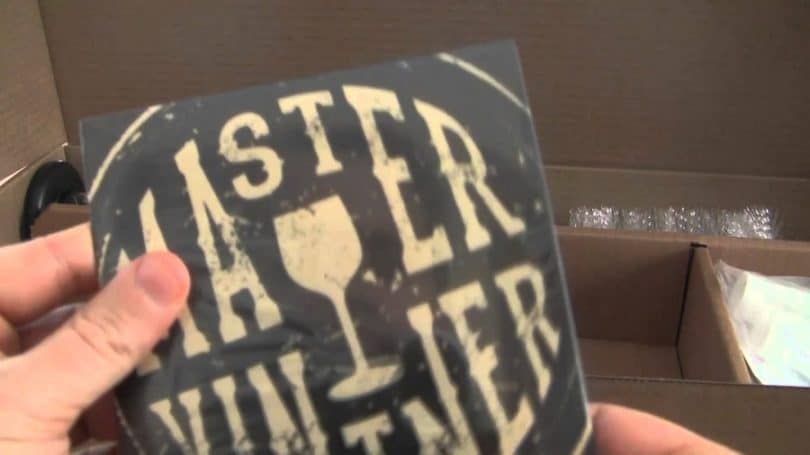
There are a number of great kits available, and your choice will depend on your budget as well as the amount of wine you wish to produce.
- This Master Vintner Kit is great for beginners and includes everything you need from the jars and tubing to a corker and corks!
- If you are most concerned about the actual ingredients, and you don’t mind buying extra parts of your kit separately, then this 1 Gallon Wine From Fruit Kit might be just what you’re looking for. It includes most of the basic essentials as well as all the various additives you will need to create the best quality wine you can!
- Alternatively, if you’re looking for a kit that will allow for larger scale production, then something like this Ultimate Wine Making Equipment Kit is a great option.
- The one thing you might notice is missing from this kit, however, is a bung. Not to worry, though, because they are easy to source and can be bought separately. This set of 2 is very reasonably priced and, no matter the kit you choose, buying a couple of these won’t break the bank.
- Corkers are also not always included in certain sets, but this might not be such a bad thing. There are a number of different corkers on the market and some work better than others. For example, this plastic corker is highly effective provided you soak your corks overnight. It’s a handy trick to keep in mind but not something that everyone has the time for.
- Other corker models are less compact, more intricate, and often praised as being very easy to use. This plunger style corker uses a double lever design to make corking simple and fast no matter how much or how little experience you may have.
Inspect the fruit
As briefly mentioned above, it’s important to check your fruit before you begin. While most wines are made with grapes, you might find that you enjoy adding other types of fruit as well. It all depends on the flavor you are trying to achieve and your taste preferences. The fruit you use must be ripe. You can test the fruit by squeezing out some of the juice and measuring the sugar levels with the help of a hydrometer.
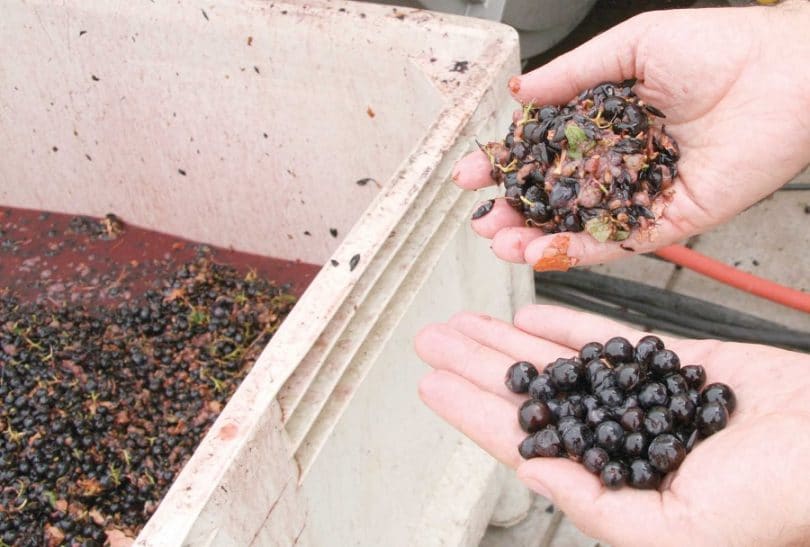
With a 22° Brix sugar density, you can expect to achieve 11% potential alcohol. When tasting the fruit, it should have the right texture, it should be sweet, and it should also have a slightly tangy taste. Any fruit that looks even slightly decayed or damaged must be discarded. Check for insects and dirt while you remove all the stems too. The stems can make your wine bitter which is why you need to remove them.
Cleaning time
Whether your equipment is brand new or you’ve used it before, it should always be cleaned and sterilized before each use. Even if you clean everything after you make a batch, you should clean everything again before you make the next batch. Dust has a way of sneaking into all sorts of gaps and spaces. You wouldn’t want anything to contaminate your wine. Boiling water is a great sterilizer, and a strong sulfite solution can be used to rinse off equipment that comes into direct contact with the wine.
Press the fruit
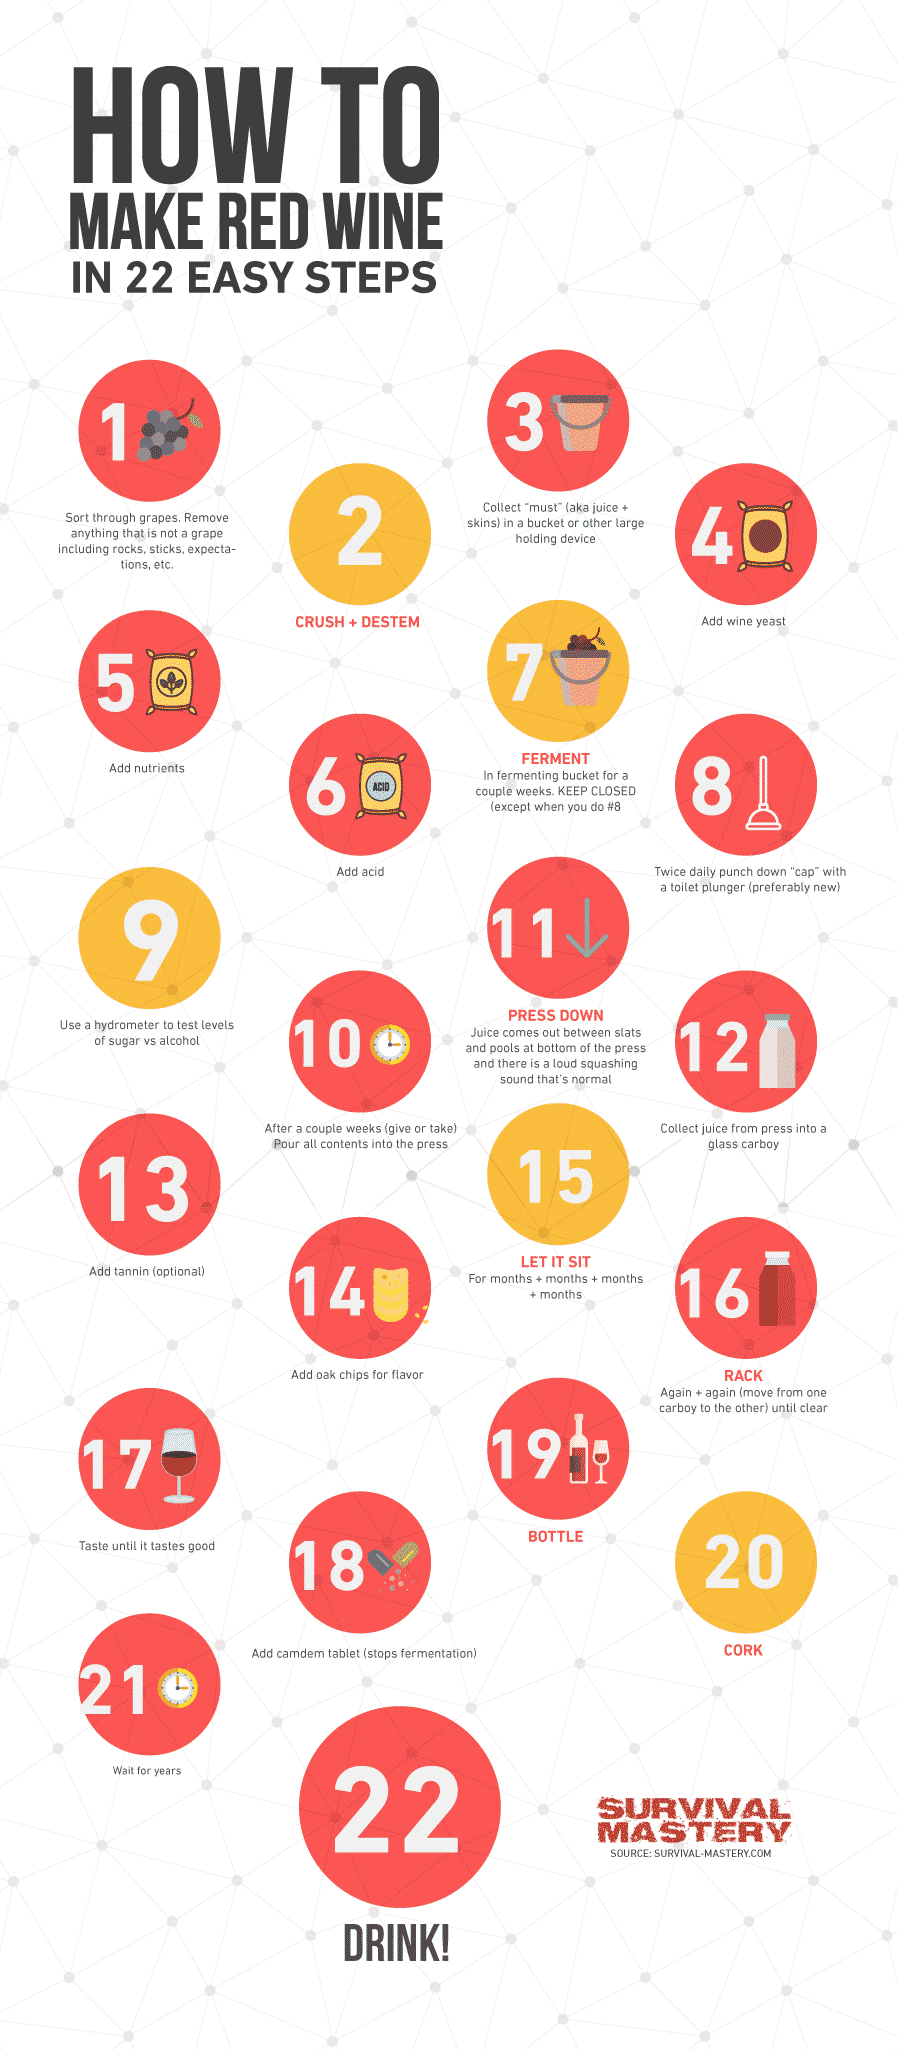
You will need to choose the right kind of fruit press for your needs. Different types work in different ways, and you will also need to select the right size. It’s good to remember that red wines are fermented before pressing whereas white wines are produced by pressing first and then allowing the must to ferment. If you are planning on making smaller quantities of wine, then you won’t need a huge press.
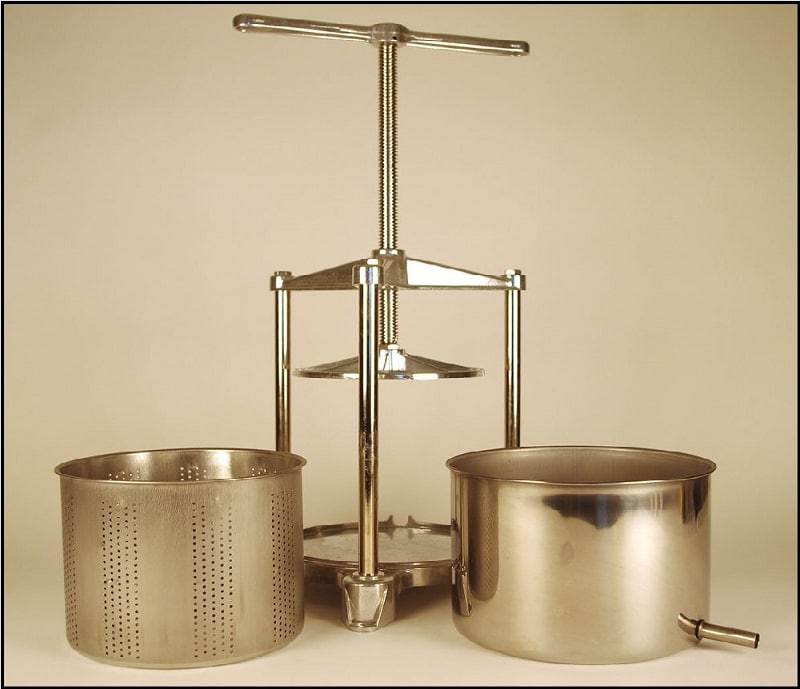
This 3-liter stainless steel press is an excellent compact option and, it is also really easy to clean and disinfect.
Juice flavor adjustments
This is one of the most important steps of all. Once the juice is pressed from the fruit, the liquid that remains is known as must. You will need to start by measuring the acidity levels of the must. Ideally, you’re looking for a level of 6 or 7 grams per liter when producing a dry red or 6.5 to 7.5 grams per liter for dry white wines.
[the_ad_placement id=”in-text-2-type-a”]If the must measures just 5.5 grams, then you should add 1 gram of tartaric acid for every liter. This will raise the level of acidity to 6.5 grams. After each addition of tartaric acid, you should check the acidity levels again.
The sugar levels also need to be monitored with the help of a hydrometer. Red and wine wines should have approximately 22° Brix. If the sugar levels are too low, you can raise it by making sugar syrup. Dissolve one cup of sugar into a third of a cup of water. Bring this mixture to a boil in a saucepan before removing it from heat. Allow the mixture to cool down before you add it to the must. Only add one tablespoon at a time and check the sugar levels after each addition of sugar.
Remember, the sugar level will determine the alcohol level. So you don’t want it to be too high or too low. If you find that the sugar level of the must is too high, you will need to add water to lower the sugar content.
Temperature is another important factor to monitor and may need adjusting from time to time. The yeast you add to the must will only become active under the right conditions. This means that the must cannot be too cold or too hot, or the process will not work. If the must is too cold, you can warm it up, but you need to do so very gently. You should never cook or boil the must.
White wines are usually fermented at a cooler temperature while 70° F is the standard temperature for reds. In some cases, reds ferment at temperatures as high as 80 or 90° F. You can warm up the must by wrapping an electric blanket around the pail. If you need to cool the must down, you can use ice packs around the pail but remember to always keep a close eye on the temperatures. You can pitch the yeast when your red wine reaches 70° to 75° F or when your white wine reaches 55° to 65°.
Racking
The term “racking” does not refer to storing the wine on a wine rack. It actually describes the process of transferring fermenting wine out of the initial holder and into a clear one. This is done in such a way so that the wine is removed and the sediment stays behind, and you will end up with a clearer final result. To do this, insert a clear plastic hose (about half an inch in diameter) into the fermenting wine and place the other end in a sanitized jug. Siphon the wine into the clean jug, top it off, and use a bung and fermentation lock to complete the process.
https://www.youtube.com/watch?v=5zvxxEaN0OI
Remember, this step takes time, and you really don’t want to rush it! If you do, you could end up with too much sediment in your wine, and this is never pleasant. The siphoning method is specifically used so that the upper layer of fermenting wine can be gently moved without disturbing the lower layer of sediment. Adding sulfites is really up to you.
If you don’t add any preservatives to the wine, it usually will not last longer than one month before it starts to lose its flavor and attractive properties. You will also need to monitor the wine fermentation to ensure that you halt the process once the sugar has all turned into alcohol.
Bottling time
This might seem like a complicated step, but it’s really the easiest of all. It can be somewhat time-consuming but taking your time is what winemaking is all about. You will need to make sure that your wine bottles are clean and sterilized. They should not be damaged or have any odor inside. You will need to siphon the wine out from the jug into each bottle. Leave approximately 2 inches of space for air (in the neck of the bottle). Once each bottle is ready, it’s time to slip in the cork.
Remember, corks also need to be sterilized because they come in direct contact with the wine. If this is your first time inserting a cork, you might want to practice on some empty bottles first, just so that you get the hang of it. It also might be worth your while researching the corker you plan on using. Run some searches online to find out what other customers have to say. Perhaps their mishaps can be useful learning curves to prevent you from making the same mistakes.
You should also take the time to consider the pros and cons of natural cork versus plastic alternatives. For many, the jury is still out on this one, so it’s more a case of personal preference. That said, the type of cork you use will impact the kind of corker you buy so think long and hard about your final choices.
Proper wine storage
After all is said and done, it’s time to bottle your batch and store it until you’re ready to sit back and enjoy.
Storage conditions are extremely important to maintaining the quality and freshness of your wine. It’s important to remember that glass bottles are best, and plastic should always be avoided. It’s also essential that you inspect each bottle for damage and sterilize them perfectly before each use.
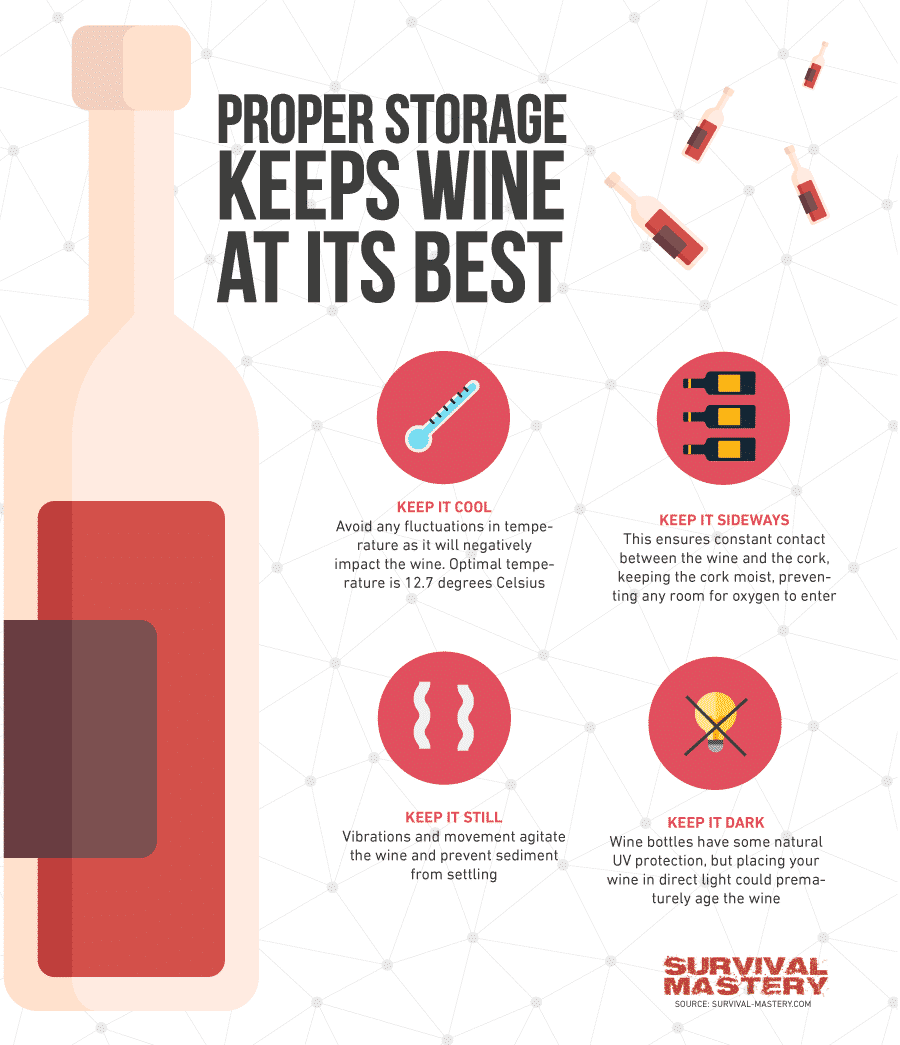
White wine is often stored in clear glass bottles while red wines are stored in green bottles. Keep all of your bottles out of direct sunlight and at a moderate temperature. If you are using traditional corks, you should store wine on its side and rotate gently from time to time. This will keep the cork moist, pliable, and prevent it from breaking into tiny pieces when you open the bottle.
[the_ad_placement id=”in-text-3-type-a”]Keep an eye on the humidity in the room since this can also affect the cork. Store your wine in a manner that’s easy to comprehend. In other words, much like supermarkets, you should make the older bottles easier to access than the newer ones (if you have more than one batch). You should also keep your different types of wine separate for easy access and don’t forget to label them! You could even keep notes regarding wine and food pairing for easy reference.
Swirl, savor, and enjoy!
Once you’ve made your first few bottles, it’s time to pair them up with the right meal or snack. Remember that the flavors and aromas tend to build up inside the bottle so you should allow the wine to aerate before you enjoy. Do this by decanting the bottle and allowing it to stand for several minutes at least. The older the bottle, the longer it will need to stand.
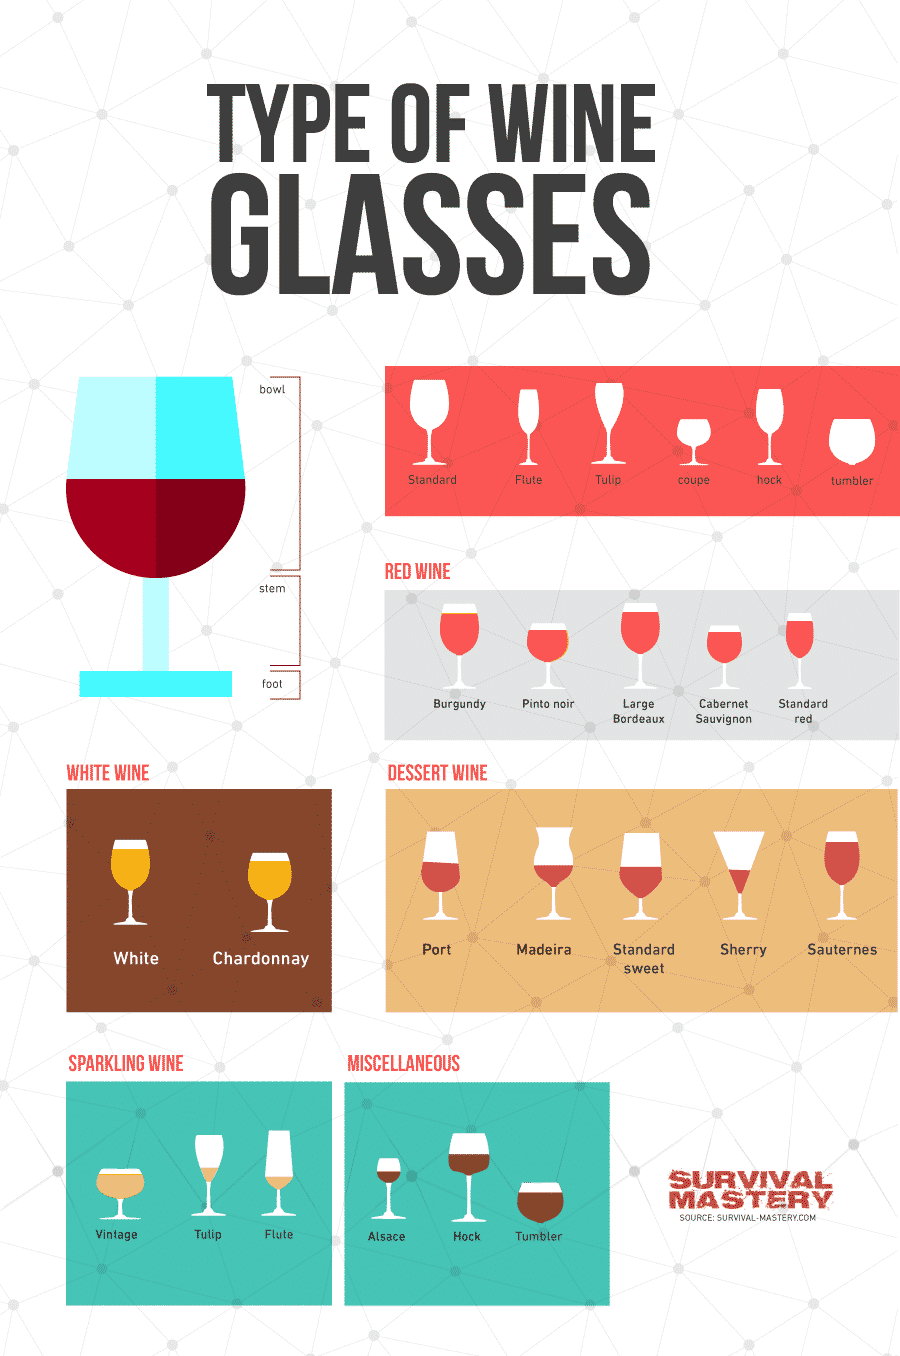
When testing the quality of your work, you should pour a small amount of wine into the appropriate glass, hold it up to the light, swirl to aerate, check for sediment, smell, and taste. Swirl, smell and taste two to three times in order to determine the quality of the wine and let it really roll over your entire pallet.
Check out our article with instructions on how to make rum for your added knowledge – it’s a great piece!




Can you use wine made with this method for food preparation? I had people tell me home made wine should not be used for food prep as it can make the food taste sour.
Using homemade wine for food prep is okay. The wine should be fine as long as you follow the recipe correctly.
The Ultimate Wine Making Equipment Kit – 6 Gallon Glass Carboy is a good kit for beginners like me. The equipment and components in the kit worked well. The first wine I made with this kit tasted good which is great because I was initially concerned that the process would be too complicated for me. But every step took less than an hour to complete. However, I did replace the corker in the kit with a Portuguese floor corker.
The secret to good wine making is having the right equipment, materials, and skills. Therefore, regardless of everything you need the aforementioned items are absolutely important.