
Like most types of alcohol, rum is made by distilling specific ingredients. Different types of alcohol require different ingredients and, in some cases, the process can differ depending on what you wish to produce and the quality you wish to achieve. Learning how to make rum can be fun as well as useful. It’s not just about the final result but rather the learning process that you will be able to tell all of your friends about as you let them enjoy a taste.
[the_ad_placement id=”in-text-1-type-r”]
Rum is usually made from sugarcane byproducts. Molasses is a good example of a popular main ingredient. Commercially, rum is largely produced by Latin America and the Caribbean, but many other countries around the world have followed this popular trend. Not to mention those who enjoy making their own rum at home.
The history of rum
Rum has a long and fascinating history. It is believed that the first rum-like drinks originated from countries like India and China. In these countries, there is evidence that alcoholic beverages were produced from sugarcane juice. The Malay people are also known to have produced a drink called “brum” which dates back thousands of years. The first documented cases of distilled rum date back to the 17th century.

This Caribbean rum was manufactured on sugarcane plantations as the molasses that remained as a byproduct of sugar refining was (and still is) perfect for making rum. While various historical accounts and records indicated slightly different origins of this drink, it’s hard to ignore records of rum production in Brazil in the1620s; as well as a bottle of rum found on the Vasa (a Swedish warship) which sank back in 1628.
Clearly there is some truth behind rum being favored by sailors! Rum gained, even more, popularity over the years in North America, during the colonial period, and the demand for this drink became so great that they set up their own distilleries. New England was known for its great production output, and this was one of the industries that helped build and shape the nation.
Benefits of drinking rum
When you enjoy your first taste of rum, it’s quite easy to understand why this particular drink has stood the test of time. While the excessive consumption of alcohol is quite obviously not recommended, moderate drinking of rum can prove quite beneficial.
- Rum does not contain any fat or carbohydrates. The energy your body gets from this drink is due to the alcohol content itself.
- According to various studies, moderate and responsible consumption of rum can add 2 to 5 years to your life!
- Rum is known for thinning the blood and increases HDL (good) cholesterol. This helps prevent peripheral artery diseases and heart attacks.
- Drinking rum can help increase your bone density. This means that it helps with osteoporosis.
- Alcohol contains anti-microbial properties which help you fight off a nasty cold. It will provide you with warm, soothing comfort and the flavor is more appealing than your average over the counter medication. It’s important to note, however, that alcohol should not be consumed along with medication since this can result in adverse effects. Check out our article on more natural ways to combat a cough and colds, it’s a must-read for everyone.
Proper storage
When you buy a bottle of rum at your local store, it can easily last indefinitely as long as it is stored correctly. This means that you need to keep the bottle in a cool, dry area and it should not be subjected to any direct sunlight. Storing rum is similar to storing any other type of alcohol and even wine. When you open the bottle, you will be exposing the contents to air and, since alcohol naturally evaporates, you can expect some of the flavor to escape if you leave the bottle open.

After pouring a glass, make sure that you secure the top in place immediately. If you want to store a bottle that has been opened, you should make sure that the cap or top has been tightly secured before setting it in the appropriate conditions. If you make your own rum, you will also need to seal each bottle properly before placing in storage. You can seal the bottle by hand or invest in a sealing device that will ensure longer lasting flavor. Remember to always test your rum before adding anything to the mixture or cooking with it.
If, for whatever reason, you notice a strange smell or slightly off taste, it’s best to discard that bottle. Test another bottle from the same batch if necessary and, if it’s up to standard, go ahead and enjoy!
Interesting uses for rum
Rum is most obviously enjoyed as a beverage. That said, like many other alcoholic drinks, there are a number of other great uses to keep in mind:
- Rum acts as an antiseptic which means that you can disinfect your hands if you don’t have any soap.
- Rum can be used as a kind of sleep aid (in moderation of course).
- Some say that rum acts as an aphrodisiac.
- Rum can help soothe the painful sting of a snakebite. Medical treatment should always be the first priority, of course, but this is a safe way of relieving the pain while you wait for help to arrive. For a list of the top venomous vipers, see our article find our more.
- Rum can be combined with lemon and honey in case of a bad cold.
- Rum is great in many recipes. Other than being an important ingredient in many cocktails, it can also be used in savory and sweet dishes.
Making rum at home
Before you begin, it’s important to understand the entire process and what you will need in terms of ingredients, equipment, and other supplies.

Preparation is essential whenever brewing any kind of alcohol and rum is no exception.
Gather your ingredients
To make a batch of about 0.5 to 0.8 gallons, you will need the following ingredients. If you wish to make a larger quantity, you need only multiply the batch while maintaining the same ratio.
- 5.5 lbs of molasses
- 5.5 lbs of processed sugar
- 5.2 gallons of distilled water
- 1.5 ounces of hydrated yeast
- Extra distilled water for diluting the final solution
- Spices for extra flavor (optional)
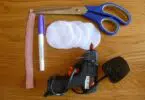
You will also need the following equipment:
- A boiler for processing the mash
- An airlock for the fermentation process
- Hydrometer for testing the mash
- A still
- Tubes for siphoning and a siphon fixture attached
- Glass collection vessel(s)
- Oak barrel (optional) OR oak chips and cheesecloth
- Bottles, caps, and bottle cap sealer
Preparing the mash
Start by placing the 5.2 gallons of distilled water into a clean boiler. The boiler needs to be perfectly clean and void of any impurities. Any kind of contamination can ruin your batch. All of your utensils should be sterilized in boiling water to get rid of any dangerous germs. Add the sugar and molasses to the water over a medium heat. You will notice the sugar will dissolve first, and the molasses will take considerably longer.
[the_ad_placement id=”in-text-2-type-r”]
Don’t let the water boil but rather let it heat up slowly. When you notice small bubbles start to form, turn the heat off. Allow the mixture to cool to about 82 degrees Fahrenheit before adding the hydrated yeast. To make this part of the process easier, remove a few cups of the mixture and place n a large bowl or jug. Dissolve the yeast in this smaller quantity and wait for it to start to foam before adding it to the main mixture.
The fermentation process
The solution should be kept at a temperature of 77 degrees Fahrenheit. Watch the pot closely for when the airlock stops bubbling. Yeast requires heat to convert the sugar into alcohol. If need be, place a heater in the fermentation room so that a moderate temperature is maintained. The airlock on your pot will allow carbon dioxide to escape without letting any oxygen in. The fermentation process should take approximately 24 – 48 hours.

Once the bubbling stops, you should let the mash sit for 3 to 7 days. Use a hydrometer to test the mash regularly. This handy piece of equipment allows you to measure the density ratio of a liquid to that of water. Measure daily until you reach the desired ratio. To do this, you will need to remove some of the mash and place in a cylinder. Place the hydrometer in the cylinder and swirl it around gently. Keep a record of each reading and, when you notice that the reading remains unchanged for three consecutive days, it’s time for the next step in the process.
At this point, it’s important to lower the temperature of the mash so that the yeast does not remain active. If you do not do this, your rum will most likely end up smelling and even tasting really bad. The ideal temperature to achieve at this point is between 50 and 57 degrees Fahrenheit. Siphon the liquid out of the pot and into the still for the next step.
Distillation
Place your collection vessel under the valve from the distillate before doing anything else. You always need to make sure that your system is prepared and that all connections are secure in order to prevent spillage or accidents. You will need to connect the coolant input to a water source since this helps to cool the alcohol vapors. As the vapors cool down, they will condense and form liquid ethanol. This liquid then drips down into the collection vessel. Once everything is connected and you are ready to begin, it’s time to siphon the mixture into the still.

Do so very carefully from the top of the mixture. The leftover yeast and other solid particles will remain closer to the bottom of the boiler and you want to avoid siphoning anything except the liquid itself. For making rum, you should bring the mixture to a slow boil and, once the liquid reaches about 122 to 140 degrees Fahrenheit, it’s time to run the cold water for the cooling process. You will notice the clear drops start to make their way out and into the collection vessel.
It’s important to discard the first 3.38 fl ounces. This is for safety reasons because it is usually highest in methanol which means that it can be extremely harmful or even fatal if consumed. Discard the first few ounces and proceed to gather the rest into a larger collection vessel. Continue with the distillation process until the temperature reaches about 204.8 degrees Fahrenheit. Turn off the heat followed by the cold water. Make sure that you open the lid of the still so that you don’t create a vacuum inside the still.
Completing the process
An optional part of the process is to age your rum in oak barrels. Professional commercial producers usually age rum in oak or toasted oak barrels for about 10 years or more. This helps give the rum a deeper color and flavor. If you don’t want to wait 10 years to enjoy the fruits of your labor but you still want that oak aroma and taste, you can add toasted oak chips to your rum. Allow them to soak for three weeks before filtering the mixture using something fine like a sheet of cotton or cheesecloth.

Depending on your still, your rum could initially be 95% alcohol. This is extremely strong for any kind of consumption, and it’s important to dilute the alcohol with distilled water. Depending on the alcohol content, you will need to add enough water so that you end up with a reading of about 45% alcohol.
Anything stronger is quite dangerous, and if you water it down too much, you will sacrifice the flavor. Your rum is basically ready at this point but, if you like, you can add some extra flavors to spice it up.
Good examples of ingredients you can add include cinnamon, cloves, and ginger. You should allow the spices to soak in the rum for about 1 or 2 weeks before removing them. Avoid using the powder form! Use the whole cinnamon sticks, whole cloves, and large pieces of ginger. Some even like to add small quantities of caramelized sugar to the mixture in order to improve the flavor and give it a deeper, richer appearance.
Bottling and storing
No matter how much rum you make, it’s always a good idea to store smaller quantities in individual bottles. Pour the batch you’ve made into several bottles and seal each of them properly with a sealing machine. This is far more effective than simply securing the bottle cap by hand. Now, when you want to open and enjoy your rum, you need only open one bottle at a time!

If you store your rum in a large vessel, it will be exposed to oxygen multiple times and the seal may not be as perfect as it should maintain a high level of quality.
Important considerations
Before you start distilling your own rum, it’s important to make sure that you adhere to the local laws. Different countries and states are governed by different regulations, and it’s important to abide by them. Always use quality equipment and don’t settle for second best. By buying the correct tools, you will get much more use out of them and a better, safer product. Distil your rum outdoors.
Due to the flammable nature of any alcohol, fire is always a possible risk. This is why you should not distil in your home, and you should always keep a fire extinguisher handy. Inspecting your equipment on a regular basis is crucial. Even the smallest leak can cause loss and damages if a fire results.
[the_ad_placement id=”in-text-3-type-r”]
Remember to always stand by your still when in operation. If an accident or malfunction should occur, you need to be there to solve the issue immediately before it escalates. When collecting the finished product, you should always allow it to flow into a glass bottle or container of sorts. This ensures that the flavor is not affected, and it’s the safest for storage purposes as well.
Drinking and cooking with rum
Now that you have made your first fresh batch of rum, it’s time to put it to good use! Rum can be enjoyed in various cocktails such as daiquiris, the Dark and Stormy, El Presidente, and Pina Coladas. Of course, many rum drinkers enjoy a simple blend of rum and cola or rum straight up.

As for cooking, rum can be used to flavor a number of cakes and desserts as well as savory dishes that include chicken as a prominent ingredient. Some delicious examples include bananas cooked in rum and served with vanilla ice cream, chicken and pineapple kebabs (using rum in the marinade), and even raisin biscotti soaked in rum!
Check out our article on how to make wine at home to learn more useful skills.


How much sugar is too much sugar?
I read that some people had health issues caused by homemade rum with way too much sugar in.
We are certain that the article will help you make rum without too much sugar.
It is unfortunate though that in the United States, under Federal Prohibition-era law, it is not legal to manufacture spirits at home even for personal consumption. However in New Zealand, home distilling has been legal since 1996. Only a handful of fires have resulted and it has been proven as safe as home cooking on a stove.
Yeah. It really puts the illusion of freedom in perspective.
You get to have a taste of your own making for a change, because you control what goes into the rum.
Brewing and distilling drinks, such as rum, is a great skill to learn, but you should always take extra precautions.