In today’s modern world, hunting with a bow and arrow can be seen as primitive. However, the bow is one of the oldest hunting tools. It’s been used for many centuries by our ancestors, and in some more primitive tribes on Earth, it’s still used to this day.
Knowing how to make a bow can be invaluable if you want to be better prepared in the wilderness. If you need a tool for hunting or if you get lost, this knowledge may literally save your life!
Safety is also important, and we will include that in this overview.
Table of contents
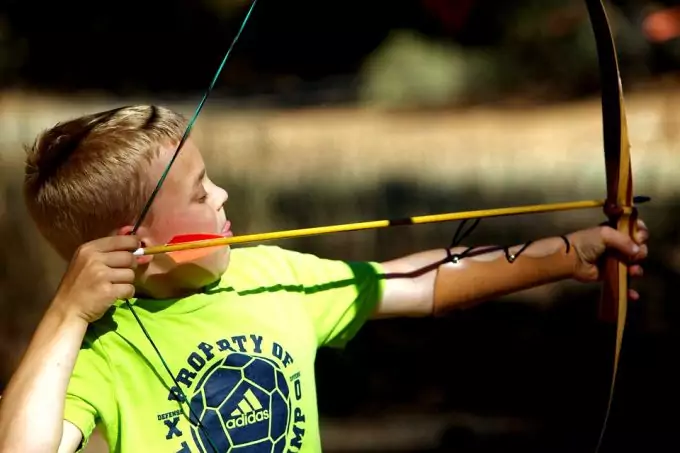
The Initial Steps on Your Homemade Bow
Before you make the bow and arrow, you need to assess what kind of wood piece you’re going to use.
Find a slightly flexible branch like an oak tree, hickory, teak, or black locust. The branch should be dead and dry but not cracking or entirely unusable. It should be about 6 feet (1.8 meters) in height.
As an alternative, you can use bamboo. Bamboo canes tend to be thick, so if you want to use bamboo, make sure it’s thinner than usual. Younger stems are a better option, as they tend to be more flexible than mature bamboo canes.
Additional Homemade Bow Steps
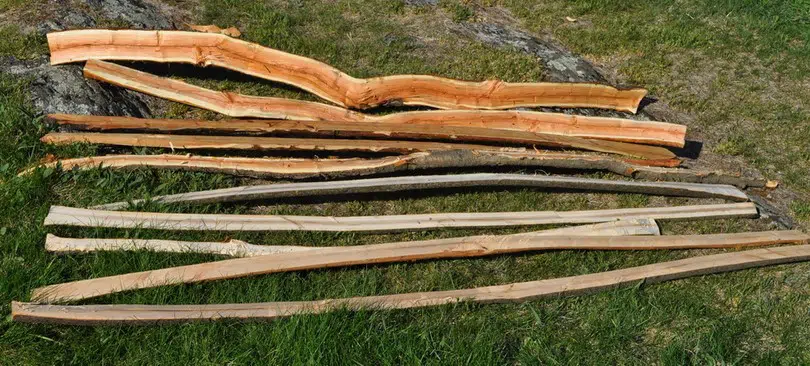
- Determine the wood’s flexibility and natural curve. Place the wood on the ground and press your left hand on the middle of the branch. As you do this, pull up one end of the branch with your right hand, so the branch starts to curve. Do this carefully and pull lightly. Even the most flexible wood can fail, and you don’t want to break it.
- Estimate your handhold on the bow. If you’re in a heated situation or need to react quickly, you don’t want to look for where to hold your bow – it needs to be obvious immediately.
- Determine the midpoint of the branch and measure three inches up and down from that center point. On these two places (above and below the center), set marks (either cut small indentations or mark with a felt-tip marker). Make sure they are permanent and visible.
- Determine the less flexible spots on the wood. Place one end on the ground and hold the other end with your hand at its top. Start curving the branch, holding the bottom end with your leg. Determine which areas seem to be less flexible and shave wood off of them. Cut carefully and in small bits. This will help you to create an evenly loose bow.
- Keep an eye on your progress. Shaving off too much of your branch can ruin the entire wood piece. The bow should have a balanced diameter, curve and be flexible evenly across the branch.
- Keep the center area (for your grip) the hardest, don’t remove any thickness from this area of the branch. Shave wood only on the sections above and below the hand-hold area.
- Shave wood only on the softer areas of the branch, preferably the ‘belly’ area. When you shave the wood, remove only bark, not the branch’s inner wood. Otherwise, you may compromise the bow, and it may break easily. Even if you have to shave bark at the handhold area, it should remain the thickest and strongest area, the least flexible.
Finalize Your Bow
- Work in symmetry. Each bow’s limb should be equally long and flexible, making a smooth arc when you curve it. The arrow flies because the pressure is placed on each limb, twisting them and pulling the arrow back on the string. The goal is to make the limbs flexible while keeping them strong enough to withstand bending.
- Polish the entire bow with sandpaper. This will remove problematic areas on the surface that can hurt your hands. Begin with the roughest one grit sandpaper you have (the lower the number, the coarser the grit), and gradually increase the grit (220 grit is excellent for polishing surfaces).
- Prepare your bow for the string. Cut two notches at each end of the bow. This is where you’ll tie the bowstrings. Be careful not to cut the wood too deep for the notches, or you will compromise the bow’s strength.
- Next, you have to choose the bowstring. Bowstrings have different properties, but there are several options. The string must not be elastic. The strength of a bow comes from the elasticity of the wood limbs, not the string. When you’re in the wilderness, you may have difficulty finding a suitable substitute for a string, so preparation beforehand is the best option. Hemp cord, twine, rawhide, or finishing line all make great strings.
- Look for light, strong string. The best on the market is made of polyester (Dacron B-50). Preferably, use several strings and tie them to each other along their length. This will thicken the final bowstring.
- Finally, use the notches to tie the string around each bow’s end. Make a knot at each end and loosely tie part of the string. You’re aiming to keep the bow and string taut. This can be achieved by having less of the string’s length untied than the bow’s length.
Now, test your bow. Stretch it several times. Place the bow on a branch so you can pull the string down and test its strength. Be careful, of course, not to pull too hard and break it.
The bow must be able to hold the distance from your outstretched arm to your jaw (when you’re in an archer’s position, ready to shoot).
Related Article: Best survival knives
The videos below also provide helpful information.
Steps on How To Prepare and Make the Arrow
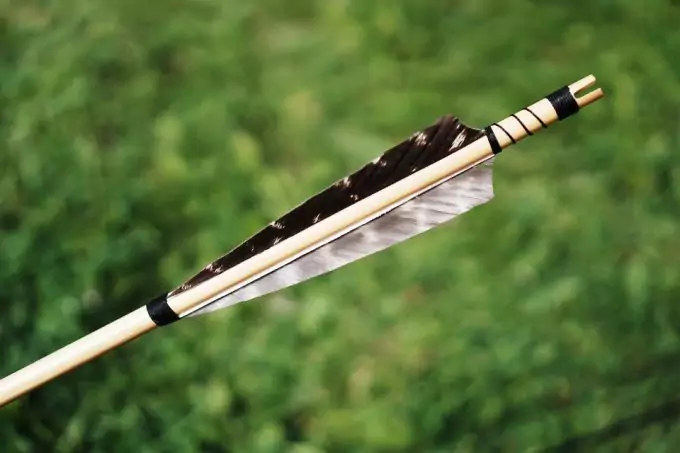
You’ll need different types of wood to build a good arrow.
- Find branches that are as straight as possible. Visible curves can change the trajectory of the arrow when shot.
- Assess the arrow at the bow’s full potential when stretched. If the arrow is shorter than the distance from your jaw to your stretched arm, keep looking.
- Use slightly dried greenwood. You can quickly dry it by placing it above the fire. The best procedure for drying the arrow is to leave it inside your house for several days. This is called ‘seasoning.’ After that, it is safe to remove the bark.
- Mullen and goldenrod provide good wood for arrows. They are solid and straight and can be found in open areas and fields. Other good options are plum trees, dogwood, and hazel.
- Completely straighten the arrow using fire. Don’t burn the arrow, though. It should be slightly exposed to solid heat without damaging the structure of the wood. When it cools down, keep it perfectly straight. Put weight on the arrow to flatten it out.
- Carve the tip of the arrow with a knife to make a sharp point. Place the point above a fire for a short time, so the tip hardens. Don’t burn or darken the wood. Carve a notch at the end of the arrow, where it comes in contact with the string. This way, when you place the arrow, it will comfortably meet the string and not shift sideways.
- An optional step is to make an arrowhead. You can use different objects, like stone, glass, bone, or metal, for the arrowhead. Use stone to chip the object for your arrowhead and make it sharp and pointed. Then, with a hammer or sharp stone, make a notch in the arrowhead. Place the arrow (wood piece) in the notch and tie the arrowhead with string or some other cord.
- You can attach fletchings to your arrow. This won’t significantly change your hunting experience, but it does improve accuracy and speed. Use almost anything light and thin to create your fletchings. Feathers are the best option. Carve the back end of the arrow to slide in the fletchings, or glue them and tie them. If you don’t have feathers, you can use thick paper (even plastic). Cut three triangles (shape should be like cutting a rectangle diagonally). The triangles should be evenly spaced on the back end of the arrow.
Useful Tips When Using the Bow and Arrow
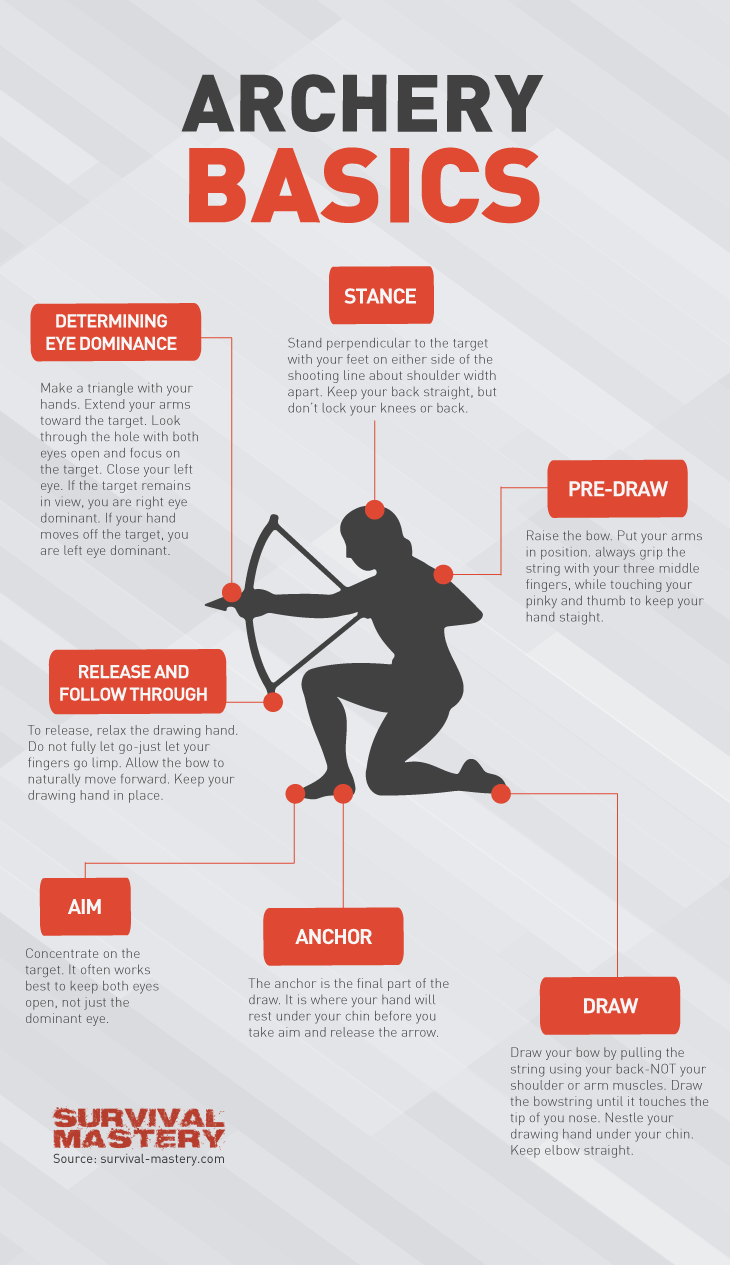
- Never keep the bow and arrow too close to your face when aiming and shooting. It is easy to hurt yourself if you’re inexperienced.
- Do not fire unnecessarily and without an arrow (called ‘dry fire’). This shortens the bow’s life over time.
You can also check out our article on shooting a bow and arrow.
The bow you make will have a lifespan of no more than several months. With time, the wood dries out and is more susceptible to breaking.
Get used to making a new bow and arrows every 3 to 5 months. It is also good to carry a string or cord whenever you go camping or hiking in case your cord breaks.
Four Main Reasons Your Bow Will Break or Become Damaged.
- Too much wood carving at a particular spot. This can easily compromise the bow’s strength and durability, which causes the bow to break.
- Natural imperfections and flaws in the wood. You may not notice these, but pay close attention when choosing your wood.
- Bad preparation of the bow, like sanding, polishing, etc. If you don’t burnish your bow, it may have a shorter lifespan. Burnishing gives the bow additional strength and protection.
- Tying the strings. This can be easy to mess up so pay attention.
You’ll need a lot of practice to avoid making the mistakes above. You may have to try many times until you’re certain that the bow’s limbs are bending and flexing evenly.
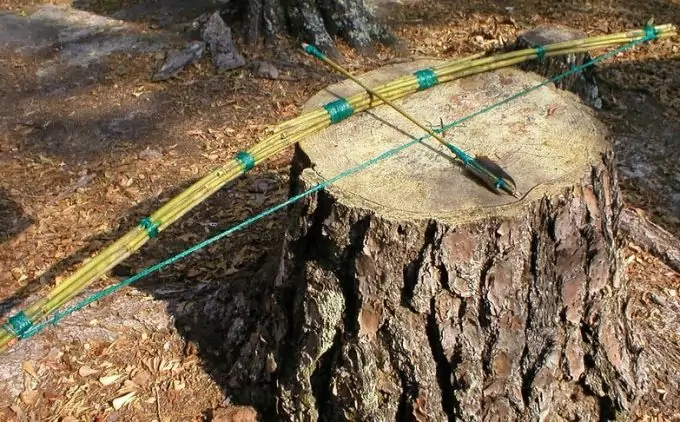
Another tip for your bow’s health is to unstring it when you’re not using it. This relieves the strain on the wood and gives it time to settle back into its initial form.
The longer the bow stays strung, the more it will bend naturally into that position, reducing its shooting power. Remember that the arrow will fly faster if the wood puts more pressure on the string.
Be sure not to give your bow to inexperienced people. There are straightforward ways to damage a bow by just not knowing how to handle one. If you don’t want yours ruined, don’t let other people use it.
A word of caution: this bow is a lethal weapon and shouldn’t be taken lightly. Make sure you abide by local hunting laws.
Don’t let anyone else use your bow, and keep it put away and out of the reach of children when not in use.
A bow and arrow are hard to use. Practice as often as possible to make sure you are prepared when you are in a survival situation.
Additional Resources
This book provides thorough and easy-to-understand instructions. It is well written and has all the information you need for your projects.




Crafting my survival tools has always been a pleasure for me. It needs patience and an eye for details, just like any other creative process. I think it is great to develop the skills to create the tools you’ll need to survive.
You are absolutely correct. Especially in a post-apocalyptic scenario, you need to know how to make tools that will help you survive.
Bows play a huge role in survival, as the only projectile-based weapon a person can use in the wild where guns are not an option. With animals that move very fast when under attack, a reliable supply of arrows is something you should consider. One will need to obtain a bow and a constant supply of arrows to traverse the landscape during nightfall, explore caves, and thrive in the game that is survival.
Arrows can be recycled, you just need to make sure that you can retrieve them after firing.
Hi i Just made a bow today. I used a wood not from a tree, is that why my arrow doesn’t go far? Also, how do you make your arrow straight?
There are a few factors involved in keeping your arrows
straight, including: moisture content, elasticity, training, storage, gravity
and the consistency of handling.
Great instructions going to try it
You should certainly try to make your own bow; it is unbelievably easy with the guidelines provided in this posting. This is one of the crucial survival skills when you lose your backpack in the wild and you have nothing else but a knife, a lighter, and a compass. You will need a bow to hunt small game for food.
Wood selection is important, red oak is good to use for the first bows because it is cheap, you can really find it anywhere, and most importantly it makes decent bows. I believe that weaker woods such as pine and willow need to be avoided in favor of hickory, oak, and maple, after all you put effort in making it, so it should be a strong durable bow.
You can’t possibly claim to be the best archer, if you have never attempted to make your own bow and arrows from scratch. It’s a simple skill really, and all you need are the right materials and skills. We hope this article will be helpful as far as bow and arrow making goes.