Smokeless fire tips are straightforward, and smokeless fires have been used for thousands of years. If you understand how fire burns and choose suitable fuels, you can benefit from smokeless fires.
Although there are many commercial options for smokeless fire pits and fireplaces, knowing how to build one in the wild is also an essential skill, so I’ll briefly go over these also.
This article explains how smokeless fire is created, discusses the benefits of a smokeless fire, and describes several different methods for building smokeless fires.
Table of contents
How Does Fire Really Burn?
To understand how to make smokeless fire, you must first understand the chemical reactions that cause fire and smoke.
Fire occurs when oxygen and fuel combust at high temperatures. More oxygen usually results in a hotter and more efficient fire, with impurities and a lack of oxygen causing smoke.
A very efficient fire produces water and carbon dioxide. An inefficient fire also produces hydrogen, carbon, and oxygen. These are introduced with your fuelwood, paper, moisture, etc.
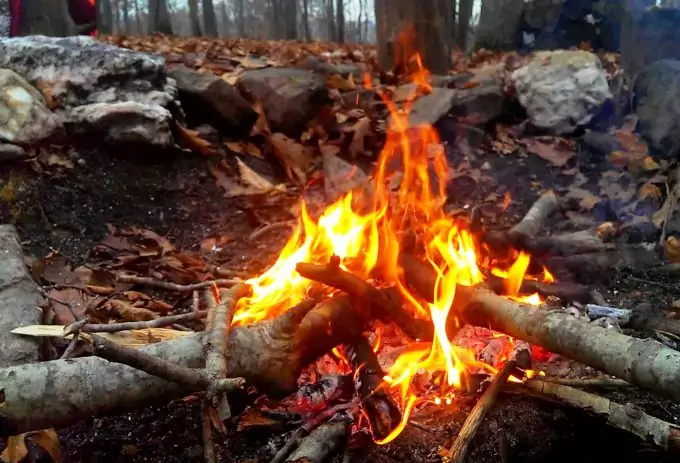
Best Fuels for a Smokeless Fire
Fuel often determines how much smoke your fire is going to produce. There are a few considerations when choosing fuel. Some of these can be purchased, and some can be found naturally in the wild.
- Anthracite – This is very hard coal that is over 90% carbon and produces almost no smoke.
- Coke – Coke is derived from Coal and also very high in carbon, producing very little smoke.
- Wood – Use the driest hard wood you can find. If the wood around you is damp or wet, scrape off the bard until you reach dry wood on the interior.
- Dried Animal Droppings and Dry Grass – These types of tinder or fire starters also produce a minimal amount of smoke.
- Oxygen – Ultimately, this is going to be the best fuel for your fire. Make sure the fire receives plenty of oxygen and there is air circulating to fee the fire.
- Gel/Ethanol – These are good synthetic fire starters that can be used to start smokeless fires.
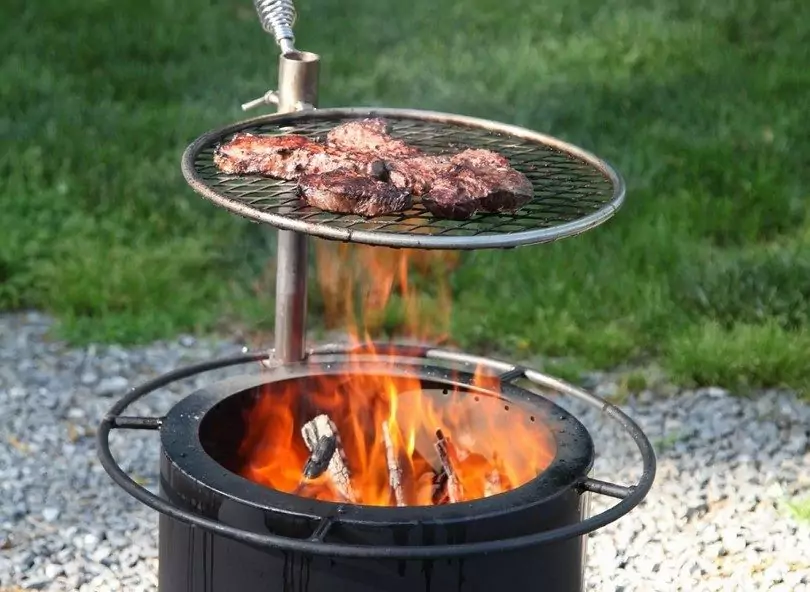
When Do You Need a Smokeless Fire?
Smokeless fire has its advantages.
Stealth – A smokeless fire will allow you to enjoy your fire without being seen. If you don’t want all your neighbors coming over for a free meal, or if you wish to remain unseen in the backcountry, there are always times for no smoke.
Pollution – Fires can cause pollution through gaseous pollution (carbon monoxide) and particle pollution. This can have short and long-term effects on even healthy people.
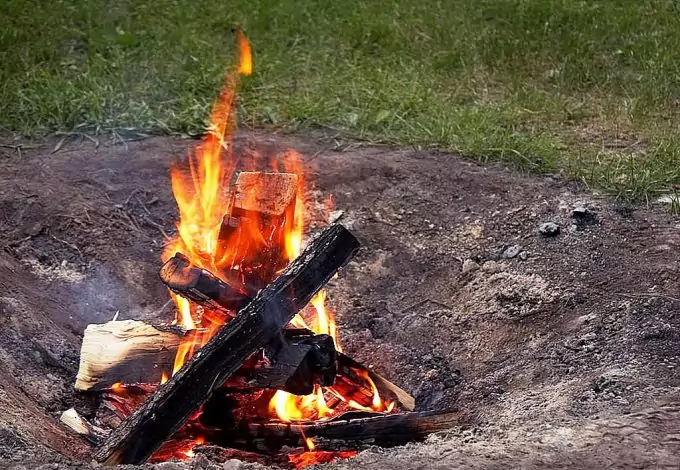
Efficiency – Smokeless fires are usually hotter fires. This means they burn hotter, faster and require less fuel.
Health – Gases and particulate matter from smoke can cause chronic health conditions. Cardiac and pulmonary conditions (heart, lungs, asthma, etc.) are all associated with burning fires.
How to Make Smokeless Fires
There are several ways to make smokeless fires. I’ll discuss how you make them when you are backpacking or camping and would like to remain more stealthy.
I’ll also review how to minimize your smoke at home.
Smokeless Fires When Camping & Backpacking
I don’t often use campfires when camping and backpacking. Conditions are usually too dry, and by the time I stop hiking, I’m ready to make camp, eat and go to bed.
In addition to usually being ready to settle in for the night, I don’t want to send any signals to nearby people and animals that I’m in the area.
Some conditions require fires, though (weather, temperatures, some cooking), and below are a few examples of how to build fires and minify the smoke.
Upside Down Fire
An upside-down fire may create some smoke initially, but eventually, this will stop. The fire burns from top to bottom, and as the layer underneath begins burning, the gases passing up through the fire burn off. This is a hot and long burning fire.
Supplies: Tinder, Kindling, small logs, larger logs
- Make sure you have a clean fire pit and clear out any debris.
- Build your base layer first, with your largest logs. Place the logs parallel to each other, using like-size logs so you have a good level base to build the rest of the structure.
- The next layer of wood up will be smaller than the base and cris-cross the level below it in the opposite direction. The wood needs to be big enough to generate enough heat and coals to burn the wood beneath it. You also need to space out this layer so there is plenty of space between the logs for air.
- The next two or three layers should each cris-cross in the opposite direction of the layer beneath them and also spaced. This will give your fire plenty of oxygen. Each layer should also be slightly smaller than the one below it.
- The next three layers of the ones in steps 1-4 will be the same, smaller than your thumb and decreasing in size. They should also cris-cross in opposite directions.
- The final three layers will continue to decrease in size with your last layer being tiny twigs.
- Tinder is going to be critical. it needs to burn long and hot while also being easy to lite. Some good tinder includes birch bark, dryer lint, dry grass, dry pine needles, cotton balls with vaseline, cattail fluff, dry birds nests, etc.
- Light your tinder, blocking any wind or breeze if needed. A well-built upside down fire should burn for at least an hour and the best thing is that you will have some beautiful coals for cooking food at the end!
Stealth Fires
Building Stealthy fires to prevent yourself from being seen, especially when moving quickly and not carrying fuel, is not hard.
Supplies: Tinder, Kindling, Small Tigs, and sticks
- Clear out a small spot on the ground so you don’t have a lot of debris that will burn and cause smoke.
- Gather some grasses, birch bard, or dry inner wood shavings for tinder. Build a small pile and lite.
- Place very small, dry twigs on the fire once the tender catches. Add them very slowly so there is not much smoke. There will be a little smoke until the fire gets hot and then it will go away.
- Keep the fire small and add small, very dry wood to keep it hot and keep the smoke at a minimum.
- If you want to keep smoke from spreading and force it up, you can place a flat stone behing the fire and other stones out from the sides of the flat stone. This will create a small ring that pushes up the smoke.
How to Make a Dakota Fire
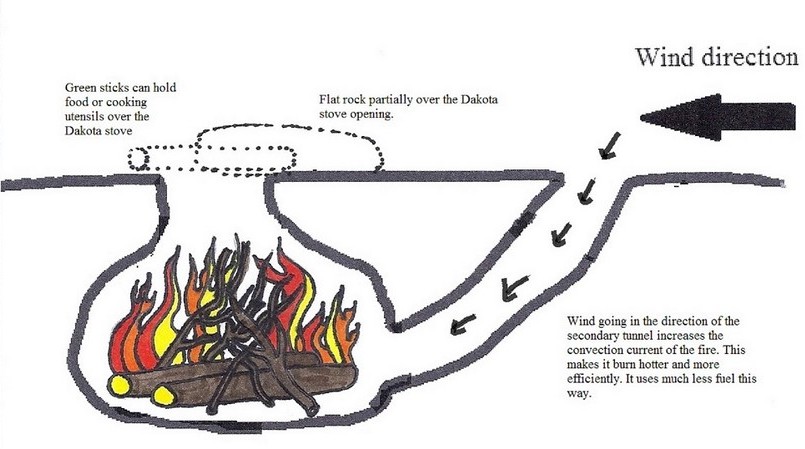
A Dakota fire is a very efficient fire. It doesn’t require much fuel, and most labor involves digging the holes. The efficiency comes from the concentrated stream of air pulled into the fire.
This is an ideal stealth fire. It is an efficient fire that produces very little smoke since it requires so little fuel, and when you are finished, you can fill in the holes and cover it up, so nobody knows you were there.
You have a vertical hole with the fire and an angled hole that feeds air to the vertical hole with the fire.
Supplies: Tinder, small kindling and twigs, rocks
- Locate a place for the fire holes. If you want to make sure the smoke is dispersed, locate the cooking hole near a tree. The slanted hole should be located to advantage of the wind, so make sure you know the wind direction.
- The vertical hole should be 12 inches deep and a little larger than your cooking pot. You can place stones around it to set your pot on it. Leave some space between the rocks so air can circulate through the hole.
- The slanted hole should be about 8-10 inches in diameter and slant down to the bottom of your vertical cooking hole. This hole will draw oxygen via air into your cooking fire.
- The rocks should be placed around the edges of your vertical hole and your pot should rest on these.
- When you are finished, cover the holes and make sure the area looks undisturbed. This will include repairing the dirt, grass and leaves you removed.
Smokeless Fire in Your Backyard
There are many modern fireplace solutions, but we are sticking with the outdoor theme, so I’ll go over some tips, along with solutions currently on the market. You can use these in your back yard – around a fire pit, on your back porch, deck, etc.
You can use the upside-down fire method above in your fire pit, but use dry hardwood with no bark to minimize smoke in general. This will help reduce smoke after the fire heats up.
You can use also use a Smokeless Firepit. I could go through and give you a list of what I think are the best fire pits, but that is not the point of this article. So instead, I’ll say I like SOLO.
I’m biased because I’ve used everything from SOLO’s backpacking stove on hiking trips to the big fella in my backyard – the Yukon. They are pricey, but the craftsmanship is excellent. You get what you pay for in this case.
There are many options, though, so do some research and find what works for you. While doing that research, here are a few tips to keep in mind.
- Heavy – These fire pits are HEAVY, so find one that allows you to empty the ash without tipping over the fire pit or having to rinse about a bunch of messy water.
- Burning – Just because they can sit on your deck does not mean they won’t burn it. Plan on getting a heat barrier if needed and move you and your furniture away from flying embers.
- Pellets – Pellets burn pretty clean, but they create hot fires and burn fast, so they can be expensive.
- Spark Screen – Watch those embers! There may not be smoke but it does not mean embers won’t fly. Spark Screens are nice to have.
- Ash Pan – Shoveling out ashes is a pain. A ash pan is definitely nice to have.
- Lid – A lid will keep out the rain. The water from rain and ash mixing can be corrosive and damage your fire pit, so keep it covered.
Fire Starter
A good fire starter is an easy way to start a fire, and it won’t fail on you like a lighter may, especially if you are in the backcountry. So even if I carry a lighter like the Survival Frog Tesla (cool little lighter), I still have a fire starter kit.
If I need fire, it is generally for an excellent reason – cold, food, etc., so I can’t afford a fire starter. I could rub sticks together, but I would probably need a flame a little faster.
Final Thoughts on Smokeless Fires
Whether you are on the run and need a smokeless fire in the backcountry, or having the neighborhood over for a barbecue, many of the same principles apply.
Make sure you have dry, clean fuel and a good oxygen source for your fuel. Smokeless fires are not only enjoyable, but in a worst-case scenario, they may even keep you alive.




This is nice. I’ve always liked my burgers with a smoky flavor until my wife’s friend warned her about the dangers of charred meat which lead to the banning of grilled products in my house. I’ll show her this article so she’ll understand the benefits of using smokeless fire. Thanks for the great article!
Well, when you grill your food you should avoid burning it. The open fire has an amazing way of cooking the meat just right, but you must know how to do it.
Dakota Fire pit is actually a good way to make a smokeless fire. It is not actually smokeless, but it produces less of the thick, white smoke. The fire pit burns hotter, that makes it an ideal way to grill your food. Be very careful of the roots especially if it is dry. Mostly, digging a fire pit can easily catch tree roots structure, these sorts of fire can smolder for days before tree catches and causes the first fire.
Thank you Marcus for sharing you experience with us.
Smokeless fire appears to be the best option for barbeques and chicken grills. The materials needed to make and sustain such flames are newspaper, dry wood, firelighter, bricks, charcoal, and water. There are two major types of smokeless fire places like dakota fire pit and modern fireplace like chimneys. These chimneys could be movable or static. Some of the models are fancy, renovated, grates, and classic fireplaces.
Smokeless fire offers you the following benefits: stealth, null smoke pollution, no disturbance to the neighbors, efficient cooking, faster & longer, less fuel, and multi-purpose fuel.
My brother and I have been spending quite some time camping. For that reason, this article appeals captivating to me. Smokeless fire has been a great advantage in terms of cooking and grilling, no doubt. Nevertheless, does it have any positive feedback in terms of driving away insects, especially mosquitoes? If not, I guess we still need to build ordinary fires while camping.
We are using smokeless fire all the time; all we have to do is to look around. Starting from our kitchen place with that gas fired cooker and the little chimney core that we call fireplace. Gone are the days that dried leaves and twigs were used to produce fire accompanied by smoke. Now, it is just plainly fire without smoke, less eye irritation and smell. Nevertheless, are there any instances wherein smokeless fire could churn out bad odor?
It goes without saying that there are many benefits to smokeless fire. The most significant benefit of smokeless fuel/fire is the amount of useful heat produced and how long the fire burns. This means less refuel and reduced fuel cost. As far as bad odor is concerned, it depends with the type of fuel. For instance, smokeless coal is associated with sulphurous smell.
Talking from experience, smoke is a natural insect repellent, especially when you spice up your fire with sage. Therefore, I believe a smokeless fire wouldn’t do much as far as keeping biting insects away. So, you might need to start that smoking fire.
More specifically how this works. The fire heats the air around it which then rises. This rising air creates low pressure which draws in the cooler air surrounding the fire. Any object near the fire that gets in the way of this cooler air being drawn towards the fire creates a vortex of lower pressure between that object and the fire, which is subsequently filled in by the smoky, warmer air. That’s why the smoke always seems to follow us no matter which side fo the fire we move to! So, placing a tall rock nearer the fire than we would place ourselves stops that pesky smoke from following us, and puts the rock in the crappy spot…
Great article with practical examples, especially the Dakota fire pit, if you are endeavoring to be stealthy. Something to consider: Apart from reducing visible smoke, Dakota fires enable better light discipline when you don’t want others to know where your camp is. Another important benefit of the Dakota pit is that it greatly reduces the danger of wildfire in windy/dry conditions.
No fire is absolutely smokeless, however. On several occasions I have located smuggling groups in the Arizona border area who had built cooking or warming fires at night. What they didn’t realize was that the smoke from their fires accumulated in a thin temperature inversion layer, sort of a floating puddle of smoke a couple of hundred feet above their camp. They couldn’t see it, but it was visible from several miles away.