Have you seen all the people walking around nowadays with those funny rope bracelets? You’ve probably actually seen a lot of people with these bracelets but didn’t really know what they were or why they were wearing them. If you’re like a lot of normal people you probably just assumed it was some kind of fad, like wearing rubber bracelets was a couple years ago. The truth is that these bracelets have become a fad, but they actually started out with a very real purpose. That purpose is a great reason for you to have one of those bracelets as well.
[the_ad_placement id=”in-text-1-type-r”]
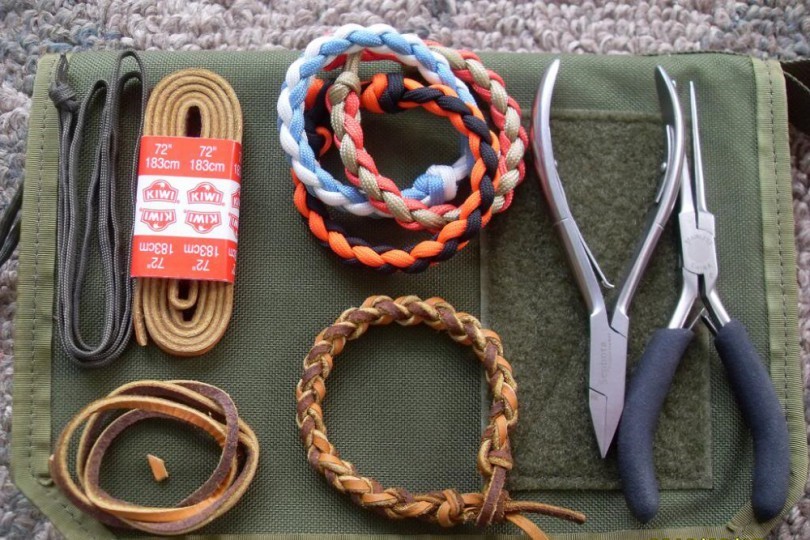
The bracelets that you’ve been seeing around are actually not made of rope but of something called parachute cord and they are actually quite simple to make. You don’t need a lot of artistic skill or a lot of dexterity in order to do it.
So, you’ll be able to express your individuality through some color choices, and you’re also going to be protecting yourself (which we’ll talk about a little bit later). That’s because there’s actually a purpose to these bracelets, or at least there was before they started taking off as a fashion piece. Now, not all parachute cord bracelets are even useful for what they were designed for. Some just have the design and none of the purpose.
What is the use of parachute cord bracelets?
A parachute cord bracelet was actually created as a simple way of ensuring that you always have rope with you in case of an emergency situation. It’s been used by soldiers, firefighters and other outdoor enthusiasts for several years but only recently has it started to catch on with regular people as a simple fashion statement.

The true purpose of these bracelets is that the wearer has enough cord that they can effectively keep themselves alive in an emergency situation until help can arrive. In total, there is usually about 10-12 feet of cord in each bracelet which translates to plenty for your survival needs.
The parachute cord in one bracelet can help you build a bow and arrow, fishing line or traps for catching food, start a fire to keep warm, create a tourniquet or splint in case of injury, and serve as makeshift boot laces, belts or suspenders.
You can even use the cord to help create your shelter and mend gear. If you make or purchase an official parachute bracelet you’ll also be able to use the metal clip on the bracelet for things like shackle locking your backpack or mending tools. If you’re the type of person that travels a lot there’s really no reason not to have one of these tools with you at all times.
You can read more about this type of bracelets and their uses in our in-depth article on paracord bracelet uses.
Why make your own parachute cord bracelet?
If you really want a parachute cord bracelet then the best thing you can do is make your own. Sure you can buy them pretty much everywhere but you don’t really know what you’re getting when you buy one (unless you buy from an outdoor supply store).
Not only that, you’re going to spend a lot more when you try to purchase a pre-made bracelet than you will if you just purchase the supplies and decide to make your own. Some people think it’s just too much time and effort but you’ll see when we start talking it over that it’s really not that difficult at all. Making your bracelet will only take a few minutes of your time.
Step one: gathering your materials
In order to make your bracelet you’re going to need about 12 feet of parachute cord. The best type to use is what’s called 550 paracord. This is the best option because 550 paracord has 7 inner strands which means you have a rating of 35 pounds.
The outside part of the paracord, what’s called the sheath, is rated to 300 pounds. This means you’re going to be able to lift a lot of weight with your cords and you won’t have to worry about them breaking. The higher ratings are what most professionals (such as soldiers) use in their bracelets. You can choose any colors that you want for your bracelet as this is going to have no bearing on the overall uses.

Another piece you’re going to need is a buckle. You can choose from a variety of different buckles but the most common one for the average person is the ones you see on children’s belts. You can get these in either plastic or metal based on what you want for style. These buckles aren’t going to be helpful to you in any other purpose than holding your bracelet together so you don’t need to worry about getting a metal one just because you want to use it for tools. These types of buckles aren’t going to be used that way.
Last, you’re going to need scissors to cut your cords with and a lighter to bind the ends once they’re cut. Because of this you can’t allow your children to make these bracelets entirely by themselves (though children really like these bracelets). You’re going to have to help them at least with some of the parts at the end where they will need to suture the ends of their paracord. They will, most likely, be able to create the design for themselves.
Step two: starting out
The first thing you need to do is attach the buckles to your paracord. You want to fold the cord in half and then thread it all the way through the first side of the buckle. You’re going to make a slip knot around the bar at the base. So once you’ve slid your doubled over piece through the buckle you just put the loose ends of the cord through the loop you’ve made and pull it tight.

To attach the second half of the buckle you’re going to slide it over the loose ends of your cord. Wrap the cord around your wrist and move the second piece to where it would need to be for you to latch the bracelet. You can make it however loose or tight you want on your wrist. Once you’ve done this you just fold over the rest of the cord so that it’s facing towards the other half of the buckle. You’re ready to start weaving the bracelet together.
Step three: bringing it all together
What you want to do next is take those loose ends and separate them. So let’s say you’re looking at the image above. On the left side you have the two loose ends of your cord. You’re going to separate them so that they are on one side of your bracelet. So the cord that’s on the left side is going to go to the left of the bracelet and the cord on the right side will go to the right of the bracelet. Now take the two cords and make a single knot behind the two core strands. This is what’s going to hold your bracelet together.
[the_ad_placement id=”in-text-2-type-r”]
Once you’ve tightened your knot (by pulling on the two loose strands) you want to cross the right cord over the two center pieces so it forms the cross of a “T.” Pull the left cord straight so that it crosses over the top of the right cord then bring it up under the two center pieces. There will be a loop on the right side where the right cord crosses the center, bring your left cord through that hole and pull both loose cords tightly to tighten your new knot.

Step four: keep it going
Your next step is going to be to do the same thing on the opposite side. That means, this time, you’re going to take the left cord and wrap it over the center pieces so that it forms a “T.” Now take the right cord and bring it straight down, over top of the left cord to cross. Bring that same right cord up behind the two center pieces and through the loop that was made when you formed your “T.” The knot should look opposite of the one that’s in the image above. Then all you need to do is pull the two cords tight.

In order to create an entire bracelet you just want to keep alternating between knotting the left and knotting the right. You’ll be able to continue the pattern all the way down until you finally get to the bottom of the cord. Look over the entire bracelet to make sure that your pattern looks right. If you forget to alternate the side that you’re crossing and tying on you won’t have a consistent pattern and you’ll be able to tell where you went astray. It’s very simple to undo the knot (this type of cord does not stay tight on its own) and try again.
Stop knotting when you get to the very end of the bracelet. You should have only a little bit of extra cord (not enough to tie off another knot anyway). This is when you want to take the two loose cords and pull them through one of the knots on the back of the bracelet. This will help to keep them tight and ensure that the bracelet doesn’t fall apart while you’re wearing it. At the same time it doesn’t seal the bracelet too well so that you can pull it apart if you need to use the cord.
Step five: tying it off
The last thing you need to do is make sure that your cord is not going to unravel. After all, the cut end of a piece of paracord is not very sturdy at all and it will start to unravel quite easily. So you need to cut off the extra ends of your cord (down to about ½”). Once you’ve trimmed the ends you want to actually pull them open. The ends will look frayed but this is exactly what you want in order to get your cords sealed the right way so they won’t unravel in the future.

Next, look for the inner strands of your cord. These are generally going to be white, compared to the colorful cord you’ve used to make the bracelet. These inner strands are also going to make it more difficult for you to seal the cords so you want to make sure that you cut them out. You don’t need to unravel the entire ½” of cord that you left. You only want to pull apart the very end and then cut out a small section of the white string on the inside.
Once you’ve pulled out the white, center section of your paracord you’ll be ready to burn the edges together. This is a step that an adult will definitely have to do as you will need to use the lighter as well as actually touching the burned and heated edges of the cord. Make sure that you are taking over during this step if your children are making their own paracord bracelets as it is very easy to get burned during this step if you’re not careful of what you’re doing or how you’re doing it.
Step six: closing the ends
Take your lighter and burn the ends of your bracelet so that the loose strands start to melt. The cord will not catch on fire so you don’t need to worry about the entire bracelet burning. Instead, the outer coating of the paracord will start to melt. This is why it’s important to burn only the strands on the loose ends. Once the ends start to melt you want to turn off the lighter and press those ends together and against the side of your lighter or another hard surface. Be careful what you use as the heated cords could melt your table or any type of plastic.
You want to be careful as well that you don’t burn your fingers which is very easy to do with the heated cord. Make sure you are pressing the strands together as you hold them so that they will melt together. If they don’t you’ll have to carry out this step all over again so make sure you’re getting it figured out the right way. Once the cord is melted together and cooled (this will only take a few seconds) you have to pull it off the lighter (since it will melt to the side of your lighter). All you have to do is twist the lighter slightly and the paracord will pop right off.
Making it unique
If you’re interested in creating something a little different from what most people are wearing you can check out some additional bracelet projects. This tutorial is just to make a traditional paracord bracelet, but there are a number of additional patterns that you can try out and designs you can use to make the bracelet different from what most people are wearing. We have a great tutorial on paracord knots and how to learn to make your own using the basic techniques. What’s great is that your bracelet is still going to be just as useful if you create it in different patterns, it’s just going to be a little more unique.
[the_ad_placement id=”in-text-3-type-r”]
There are actually a whole lot of different ways that you can use paracord bracelets and a bunch of different ways that you can create them. Different patterns and styles are available and you can find more versions and ways to mix and match different colors or designs by searching online. Some versions may provide you with a little bit more cord because of the needs of the design, but overall you’re going to have similar ability for use of the bracelet no matter which one you choose.

The first bracelet you make is probably not going to be all that easy. You may actually end up spending more than a few minutes on it but it’s not going to take long. Once you get the hang of how to make these bracelets you’ll actually be able to make them very quickly. That means, if you have a child who really loves these bracelets just for the design aspect you’ll be able to make them several in all different colors. Don’t forget to explain the purpose of these bracelets too. It could really be important for them someday.
Making a parachute cord bracelet can actually be a lot of fun for you and your children. Plus it’s a tool to help you stay safe if you ever have an emergency. Have some fun with this and create your own designs or patterns. Experiment with different colors. Enjoy yourself. These bracelets really could be a lifesaver for you someday, but in the meantime, they’ll be a lot of fun to make and they’re going to look pretty good when you wear them too.


Making paracord bracelets is a fun way to discover my limits, learn new skills, meet amazing people who share my passions and exchange experience with them. I created a few good looking design all by myself; I’m so proud.
Hi Raul,
The Paracord is the most resourceful gear that you must have. It will certainly save your life in more than one occasion, as long as you know how to use it.
Parachute bracelets look amazing and provide you with a multi functional tool. Paracord can be used for different purposes, and these bracelets first became popular in WWII when a lot of soldiers found them to extremely useful.
I used to wear paracord in my backpack but switched to wearing a bracelet because it looks good, is more accessible and saves up room i my backpack.
We appreciate your opinion, thank you Rodney.