Anyone interested in finding new ways to save energy or come up with an alternative that will provide your entire home with electrical energy regardless of the circumstances (think electric restrictions and natural disasters such as earthquakes), will tell you that solar panels are more than handy.
[the_ad_placement id=”in-text-1-type-r”]
Although there is a minor disadvantage in using solar energy as you will only be able to use and “collect” solar energy if there are actual sunlight emissions, solar energy is by far one of the greatest alternatives that comes with modern era.
Many preppers rely on solar energy as an alternative to electrical energy, enjoying the perks of lower bills and ecological energy. On the other hand, majority agrees that installations for fully functional solar panels are bit pricy, so not everyone can afford using solar energy.
In that spirit, we are presenting a brief and easy-to-follow tutorial on how to make your own solar panels and start providing your home with eco-friendly and cost-effective alternative that could even come as handy in many SHTF scenarios.

You will be able to build your DIY solar panel in no time by following our instructions and suggestions. Let’s start!
Solar cells
The first step towards making your own solar panel is getting your hands on cost-effective, but functional solar cells. Solar cells are one of the most important materials for making your solar panels.
Now, there are lots of things to consider here: first you need to plan your budget so you would know how much money you have to spend and then you can move onto picking out solar cells. You can buy them online or in one of the local stores (if available), but we advise you to be careful and choose the cells that are quality and guaranteed to have long lasting life.
Solar cells made in China may seem very tempting because of the affordable price, but the fact is that those cells are not as long lasting as you need them and practically there is not a company from China offering a warranty for the cells you are purchasing.

Another fact is that you really need solar cells in order to make your own solar panel, so you might as well pick the ones that are a bit pricier but which come with warranty, having guaranteed quality to support your investment. Cells made in USA could be the perfect choice although pricy – but you get what you pay for and you want quality.
You will also need to calculate how many watts you need, so that you could have an estimated price for the cells you are buying. 200 watts should just be enough for a medium sized DIY project.
Making your solar cells
Yes, you can also make your own solar cells before starting to make your own solar panel. That might save you some money and that way you can also make sure that you have got yourself lines and lines of solar cells you wanted without having to check for quality or question the origin of solar cells. Note that the instruction on how to make solar cells is only reserved for experienced craftsmen. Otherwise, success is not guaranteed. You also must understand how a solar panel works as an item so it may not be a bad idea to take a look at our in-depth tutorial available here.
By making your own solar cells, you will be practically creating an imitation of photosynthesis. How? As plants use the sun’s energy to create energy which is food for them, solar cells are using the same energy drawn from the sunlight in order to create electricity you can use to provide your home with electrical energy and power anything that runs on DC current once your DIY solar panels are done.
Glass plates
Glass plates are maybe the best solution to have around for making base for your solar cells. The best glass plates to purchase for this purpose are glass plates used for microscope. You will need to take two glass plates for starters as you are testing your crafting skills.
You will first use ethyl alcohol to clean the plates thoroughly and once you are done with cleaning, you will need to use the leads of the multimeter to check conductivity on both plates. For each solar cell you want to make, you will need two glass plates and you will be arranging them in accordance with conductivity you read with the multimeter. The plates should be arranged by sides, after you determine which side is conductive. So, one conductive side should be facing down and the other should be placed up.

Now that you know which sides lack conductivity, you will tape those two sides with transparent tape. Conductive sides should be coated in titanium dioxide and before you start applying this solution, you will first add a layer of tin oxide onto two conductive sides, both, up and down.
Next is separating the plates as you will need to remove the titanium dioxide from the down plate and bake the up plate. You will prepare a natural dye made of hibiscus tea or raspberry juice (natural, no sugar of course) and soak the plate (up side) that still has titanium dioxide on it, while you will clean the other that you have removed titanium dioxide from. You will then again have to test the clean plate for conductivity and mark the side that has none. Suggested mark would be a sign +.
[the_ad_placement id=”in-text-2-type-r”]
You will then cover the entire surface of the clean plate with carbon. Take out the other plate from the dye and wash it with de-ionized water and rinse with a tissue before blot drying it. You will now need to merge the two plates so the coating sides are touching. You can use clips for keeping the plates in place, offsetting the plates slightly (5 mm).
Once you are all settled, the next step should be applying the iodide solution. The both coated surfaces should be soaked in iodide. You will use 2 drops of this solution and let it go through both coatings. Iodide will make electrons flowing possible, going from one coating to another and it actually makes an electrolyte. After you are done, wipe off the remaining solution off the plate.
Testing the solar cells
You will need to test and activate the solar cells before moving onto making your solar panel and go on with making more solar cells if you have made your first one successfully.
You will need to use your multimeter again by attaching the alligator clips onto the both coated sides of your solar cell. The black wire will go on the dyed plate, the one coated in titanium dioxide, which makes a negative side of the solar cell. You have already marked the plate coated with carbon, with a + sign, so you know that this plate is the positive side of your solar cell. You will clip the red wire to it.

You will then place the negative side of the solar cell somewhere where it is exposed to the sun, so you would be able to measure the voltage as well as the current of your solar cell. After you have measured the voltage, repeat the measuring after removing the solar cell from the point of the light exposure.
You should now have a fully functional solar cell. If you prefer making over buying solar cells, you will need to repeat this process until you reach the number of cells you need for your DIY solar panel.
The voltage should not go under 12 volts so you could be able to have enough power and charge batteries and collect the power you need. The voltage should also not go above 24 volts as it might become dangerous after that point.
Whether you are buying or making solar cells, make sure that you have more cells than planned for the solar panel you are making as solar cells are naturally very fragile and some may even be broken, so you will need to have a backup.
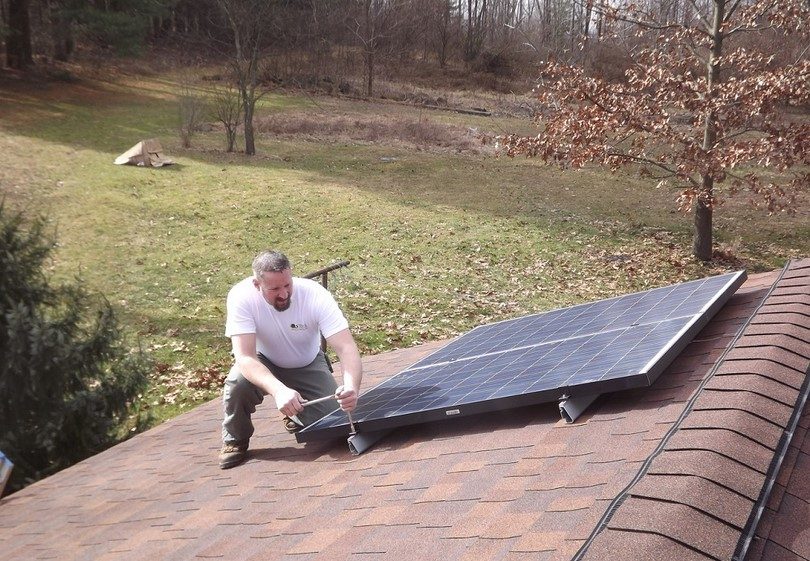
How to make a solar panel
You will of course need adequate tools for building your own solar panels. The basics you need to have around for measuring are a ruler and a pencil of course, but you will also need a solder flux or a soldering iron, multimeter, a hand saw and some boards, preferably wooden.

You will use the solder flux for removing the grease out of the solar cells you have and a hand saw is obviously very needed as there will be lots of cutting involved. You will also need to build a frame for your solar cells and the frame will be the base for your DIY solar panel, so that is where a hand saw will come as more than handy. For regular measuring, you will use your ruler and to make sure that amperage and voltage are also measured, you will need to use that multimeter of yours.
Having a staple gun and some plywood and cardboard instead of a wooden board can also serve well as the base for your solar panel. Wearing a protective mask and gloves will help you make sure that you are safe, so you can add those to your item list as well. Now that you have everything you need, we will guide you through your project with steps and tips on how to make a solar panel.
Make your template
So, practically, this is the base of your solar panel and there will be some measuring involved as you need to make a template of where your solar cells will be placed. You will need to use a ruler and a pencil to draw the lines so that you would later know how to separate your solar cells and get the maximal efficiency out of your material.
After you have planned how far from each other the cells should be placed, you can proceed with making your template. You can even make your template waterproof by using some water resistant paint and paint the board you are using as a base for your solar panel. If you choose to do so, let the paint dry before you proceed.

Next on is making a frame for your board. You can use some plywood or wooden boards to make the frame. Measure carefully and use your saw for cutting. Be precise and careful. After you are done, clean the dust so you could proceed with the next step.
Assemble the solar cells
You are already half way through now that you have your template. The next step should be assembling the cells. Regardless of how many cells you are using, you will need to pay attention to your safety as you are now working with voltage. The cells should be connected in series and that is where you will need your solder iron or flux in order to “glue” the cells to one another.

Another thing to pay attention to are the sides of the solar cells as your solar panel won’t work at all or won’t be working properly if the cells are not connected in the following manner: the bottom of the cells is positive and the top is negative. In order to assemble the solar cells properly, just like with linking batteries, you will have to connect negative with positive sides.
Each cell has to be in the range between 12 and 24 volts as this is the safe voltage area. 12 volts is therefore just enough to get your cells working. Exceeding the voltage of 24 is dangerous, so do not try to go over that number so you could be safe and avoid a potential danger.
Before you start arranging the cells, linking negative to positive parts as you go, you might consider making little frames in the number of cells you have and inside of the main frame of your template. Why? Well, simply because it might occur that some cells won’t be working, so to make the entire construction simpler to work with, maintain and assemble, you can build little frames for solar cells and make replacements easier.
That way you won’t have to remove all the cells if only one or some are not working. Use your multimeter to check for voltage and amperage, so you would be sure you are on the right track.

Now when you have frames and when all the cells are arranged and connected, you will need to put some wires through the lines of cells you have. In accordance with the number of lines of solar cells you have aligned, you will need the adequate number of wires. The best type of wire for this purpose would be the wire called “bus wire”.
You will use the bus wire to connect all the cells and you might also want to drill some holes into your template so that you could secure the wire as it goes across the template and connecting the cells. The bus wire should then go at the end of each line of solar cells, so that you could get one long line made of several solar cells across the longitude of the main frame. The bus wire should be curled up as installed, but going across the entire length of one line of solar cells.
Drilling the holes
The holes you will be drilling are meant to support bus wires that will connect all of your solar cells. Once again, you will need to measure carefully by using your ruler. To make sure the holes are drilled in the right spots, you will have to mark where the cells are supposed to be installed. So after you have tried out where the cells are supposed to be standing, remove the cells and start drilling the holes.
[the_ad_placement id=”in-text-3-type-r”]
To give your main frame extra support, you might want to make another frame and have the holes drilled on the second frame. The frame with holes should then be connected to the main frame. Afterwards you will be able to connect all of your solar cells as previously described, connecting each line of the cell with bus wire.
Gluing
You have your frame ready and the holes are drilled, you have connected all the cells in several lines to match the length of your main frame.

That means that now it is the time to glue all those lines of cells to the main frame and across the perforated frame. You will be using the silicon to glue all the solar cell lines. Make sure you are careful and precise.
After you are done with gluing while connecting the wires, you can again use the multimeter to measure voltage and amperage again. It would be good (and safe) to measure voltage after every connection is done. That way if something is not going in accordance with the original plan, you can fix everything before your panel is ready to be installed and used.
After you are done with gluing all the lines of solar cells you have, you will need to solder the wires you have connected. You can use the solder iron and make sure that all the lines have fairly strong connection, so your construction is strong and safe to be used.
Charging
Before you take your solar panel out and place it where planned, you will again need to use the multimeter to test the amperage and voltage of your solar cells. Once you are sure that cells are operating with more than 12 volts and less than 24 volts, where 18-19 volts would be just perfect, you can then charge all appliances and even your car battery as long as everything that you want top charge and provide with electricity runs on DC current.

In order to be able to actually use your solar panel, you will need a pack of batteries and an inverter that have to be connected to the solar panel. Basically, you can use any type of battery there is, but just be safe that you will actually be able to have a functional solar energy system, it is better if you decided to buy batteries that are specifically designed for storing power. In order to find the right battery, you also need to know how solar energy actually works and you can read about this in our article here.
The type of battery you are looking for is deep cycle battery, so for connecting the panel and making it functional you will need: deep cycle battery, inverter and one charger controller.
Another option that comes as an alternative for connecting the solar panel to your system without having to use deep cycle batteries is connecting the solar panel to an Uninterruptible Power Source computer, also called UPS. You will have to handle it with care and you also have to know that using UPS may be a bit complicated as you will need more power to collect and that means that you will need more panels.
Of course, you can follow steps on how to make solar panels until you make as much panels as you need, connecting all the panels in the same manner until the power you want and need for powering your home is reached. If you don’t know how much power you need for your home, take a look at our article here.

To make your job easier and help you visualize how building a solar panel should look, we are adding a couple of videos to walk you through our tutorial:
Whether we are talking about economical crisis, power outage or shortage, living off the grid or dealing with SHTF of any kind, it is certain that solar energy is one of the best and most practical ways of using electrical energy and providing your house with electricity.
You can start and use almost all the appliances in your home as long as all the appliances run on DC current and the best thing is that your electric bill will become significantly lower – you might not even have an electric bill to pay!
You will save a lot of money by going through this DIY solar panel project and making your own solar panel, too, as solar energy systems usually cost a lot of money. At the end, when you are finished with your project, you will have your piece of mind knowing that you have a backup plan for providing your home with electric energy.


Wow! I thought this would be easy but I guess this project would test most of skills. Hmm… What about the drainage though? I heard that commercial solar panels have a drainage system for extracting moisture between the panels? Can I use the same principle?
Usually it’s best to avoid moisture getting in between the panels. That’s why everything is well glued together and covered with a protective sheet. However, if you find details regarding this concept, you can definitely use it.
Just providing my input, in order to get your daily electric consumption, I would suggest getting the average from your electric bill for the past three months. This way, the historical data will add more value to the average rather than just basing off your current usage. You can actually use more than three months data if you want.
Nice one , but I prefer InpliX to learn about eco DIY
Thank you Norman for sharing your opinion with us.