Living off-grid and knowing how to build an outhouse is a pretty essential skill. Nothing is much more essential than an outhouse. However, that does not mean the outhouse must be totally “basic.”
This article will provide an overview of what you will need to consider when building your outhouse, how to maintain it, and some good-looking options.
Table of contents
Is Building Your Own Outhouse Legal?
There are a few things to check before building your outhouse.
- Check with your local town or municipality and make sure that you are allowed to have an outhouse on your property. Certain areas of the country have specific regulations for outhouses.
- Generally, outhouses won’t be allowed in cities, but they will be OK in rural areas.
- There are also regulations in place to ensure that outhouses are not built close to water sources or other environmentally sensitive areas.
Check your Design Plans
You have a few different options when building an outhouse.
- Purchase an outhouse
- Purchase plans for building an outhouse
- Design and build your own outhouse
Whichever you choose to do, there are a few basic things to consider.
- Climate – It is important thing is to make sure that your design is appropriate for your climate. It is very wet, cold or hot? Do you need extra insulation or ventilation?
- Capacity – Make sure that you consider the number of people that will need to use the outhouse in a given timeframe.

- Style – Outhouses come in many styles, some are simply a hole in the ground while others have actual seats.
- Toilet Paper – It’s important to have a place to set toilet paper.
- Sanitation – Always consider sanitation when building your outhouse. Soap and hand sanitizer should be readily available.
- Light – If you do have access to solar, do you want to have a light in the outhouse for nighttime use, or maybe keep candles in the outhouse.
Building Your Outhouse – An Overview
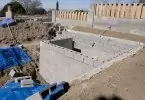
Start With the Foundation
- Before beginning, ensure that the ground is level and your wood is properly treated.
- You’ll need to dig a 4 ft by 5 ft hole (or bigger).
- Add a foundational frame over the top of your hole. Often, this structure will be made out of wood and tar paper, to keep out moisture.
- Concrete bases should be at least 4 inches thick for stability.
- You will need to make a form out of wood to hold your concrete in place while it sets.
- It’s also important to have steel rod reinforcement to ensure the concrete stays in place while hardening.
Preparing the Base
- We recommend using pressure-treated wood, as it’s less likely to break down over time.
- Start creating the frame for your outhouse. Begin with a simple square platform covered with plywood.
- Nail this platform into the frame to keep it from moving off of the base.
- Then, cut holes where the seat will be placed. Now, you’re ready to begin building upwards.
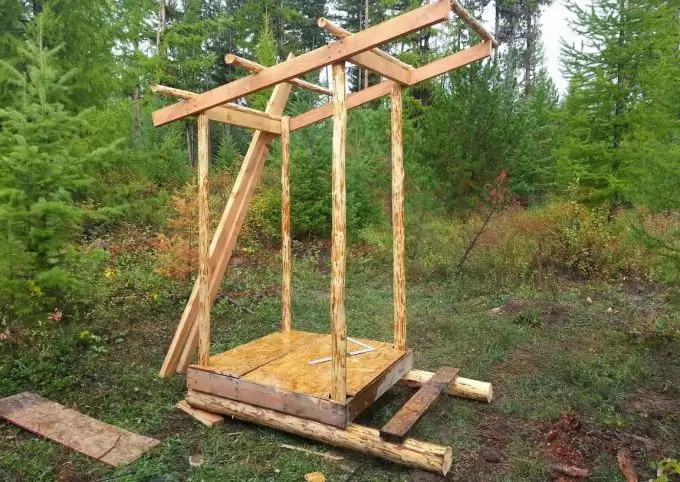
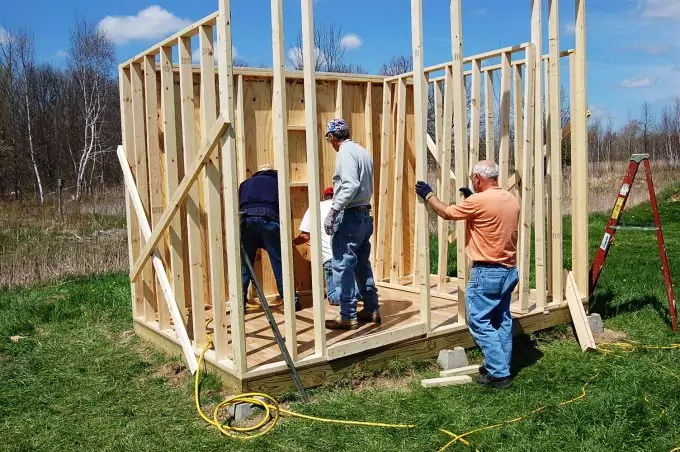
Building the Frame
- The frame of the structure will be made out of 6-inch square timbers.
- Solidify your corner posts. Then, add top and bottom bracers to make sure that the structure won’t fall as you build it.
- As you work, create a frame with 2 x 4’s, and then use plywood over the outside to make it solid. If you’d like, add diagonal braces before adding your 2 x 4’s to increase the stability of the structure.
Building the Roof
- The roof should be built using plywood secured over the tops of your braces.
- Make sure the roof is larger than the structure you’ve created.
- Cover the top with either rolled roofing, metal panels, or shingles.
Adding a Seat
- If you add a seat to your outhouse. Simply purchase a toilet seat or create a wooden box at the desired height. Make sure that your seat is accessible to all people, including children or those who are heavier.
Adding Ventilation
- One of the most important steps when building an outhouse is to create ventilation. The best way to do this is to cut a hole in your door, using a screen to keep pests out.
- Ensure that your screen mesh is small enough to deter flies.
Keeping Up the Outhouse
Your outhouse will need to be cleaned periodically to minimize odors. The best way to do this is to toss sawdust into the pit after every use. The sawdust will help with decomposition and add a slightly more pleasant smell.

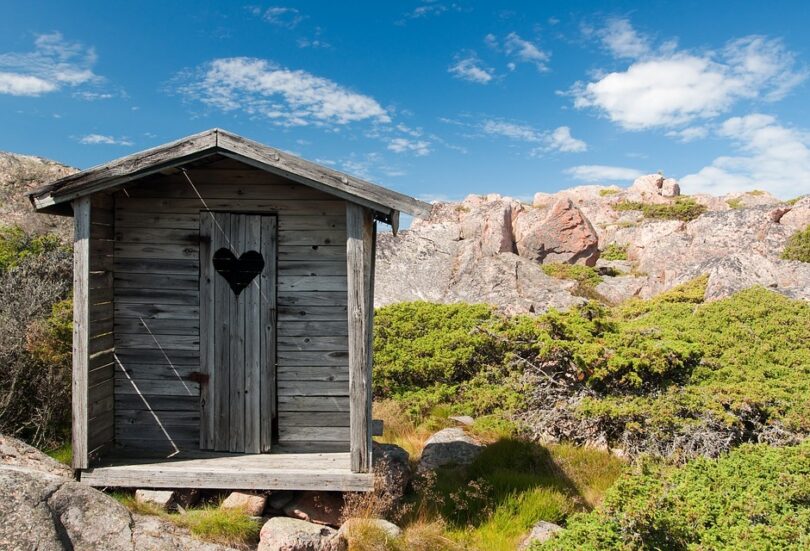
If you’re using your outhouse a lot, you may need to add an extra ventilation shaft to create a cross breeze. Think of the traditional half-moon door found on classic outhouses- it’s used for this purpose! Although the hole doesn’t need to be large, a small area for ventilation will allow for a good cross breeze.
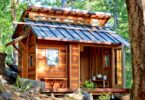
Stylish Outhouses
Outhouses can be a bit of an eyesore. Most folks don’t want to have them in view of their backyard (or worse, their dinner table).
However, there are many ways to make your outhouse look a little bit more inviting.
Consider dressing up the roofing of your outhouse structure. Add shingles, gables, or other accents to make it look more like a shed. Add curtains to the windows and paint the wood a nice color.

Additionally, an attractive flower bed around the outhouse can help it smell better and look more appealing. Make sure you don’t pick flowers with long root structures.
Using Your Outhouse By-Product
As a survivalist, you’ll quickly learn the importance of growing your food. However, this is easier said than done. One way to ensure high-quality crops is to use a good fertilizer. The composted byproducts of your outhouse are a great option.
If you’re going to use your outhouse waste as compost, there are a few things you’ll need to consider. First, add a chimney to route from the base of your pit up through the outside. This ensures enough air is getting down there to help with decomposition.
The extra ventilation will also reduce the concentration of bacteria and pathogens in the waste product before you put it near your crops.
Finally, it’s essential to use the sawdust method described above to aid decomposition. If you’d like, you can use hay, leaves, or woodchips, too. Without decomposition, your product will not be useable for much of anything.

Cleaning Out the Outhouse
Regardless of what you do with your outhouse byproduct, you’ll need a way to remove it. One method involves using a bucket to remove waste through the seat box. However, this method can be messy.
Another method involves building the structure of your outhouse into a hillside. Then, create a door, which opens outward, in the back of the hill to access your pit. This way, you can easily dig the hole under the outhouse without underground.
In the end, it’s a lot easier to get the waste material out. Use a rake or shovel to access and remove the material.
Why You Should Compost
Composting is good for the environment. Compost from human waste and vegetable or fruit byproducts get broken down with organic materials such as sawdust and leaves. Once these components are mixed and have broken down, they are mixed into the soil.
The resulting compost mixture is full of minerals and vitamins essential for proper plant growth. The food you grow will be even more nutritious if it has good, rich composted soil.
This kills two birds with one stone. First, you will save money by using organic fertilizer from byproducts of daily living, and you won’t need to buy fertilizer filled with pesticides and chemicals from the store.

Final Thoughts on Building Your Outhouse
Building your outhouse is not easy. The design and construction will take time and planning. In summary…
- Ensure the outhouse is not too far from your home so that you can access it in bad weather and at night, but not so close that you can smell it.
- Keep it a safe distance from water sources, especially if they’re your drinking water sources.
- Create a sturdy foundation and a well-constructed frame with proper ventilation to allow for maximum decomposition.
Building a good outhouse will be worth your time, and I’m sure it will be appreciated by anyone living on your property now and in the future.


The good thing about outhouses is that you don’t have to be fancy about the materials that you will use. It can be wood scraps, fallen logs, thick branches, some pieces of bamboo, etc. As long as the material can cover you then you can use it. Building one using lumber is good if you have the necessary resources but the principles of survivalism calls for you to use whatever material is available.
That’s true, Kevin. However, if you want one that will stay with you for a longer period of time, lumber is the way to go.
I have to agree with Kevin, you have to make do with what you have. :) Also, make sure to place the outhouse away from natural water sources as you can contaminate it with fecal matter making it unusable for drinking and cooking.
For one thing, your outhouse will probably be in this spot for several
years, so you want it to be convenient. But there are safety and
aesthetic issues to keep in mind as well.