When it comes to camping, having the small conveniences of modern living with you can make all the difference. Being comfortable will help to make your camping experience a little more enjoyable so that you don’t have to embrace all of the aspects of roughing it. One of the more difficult areas that people struggle with is going to the bathroom in the woods, as we’re so used to using modern toilets that it can be difficult for some of us to go if we’re not comfortable.
[the_ad_placement id=”in-text-1-type-r”]Many people are fine with just squatting behind a tree and digging a hole, but not everyone is capable of feeling that comfortable using the toilet. That’s why there are the means to build your own DIY camping toilet that not only saves your waste from contaminating the ground, but also makes it easier for you to go when you need to. Having your own toilet built ensures that it can be reused in future occasions, as well as always being there in case of emergencies.
The great thing about making your own camping toilet is that the materials that you need to make it are very cheap and reusable.
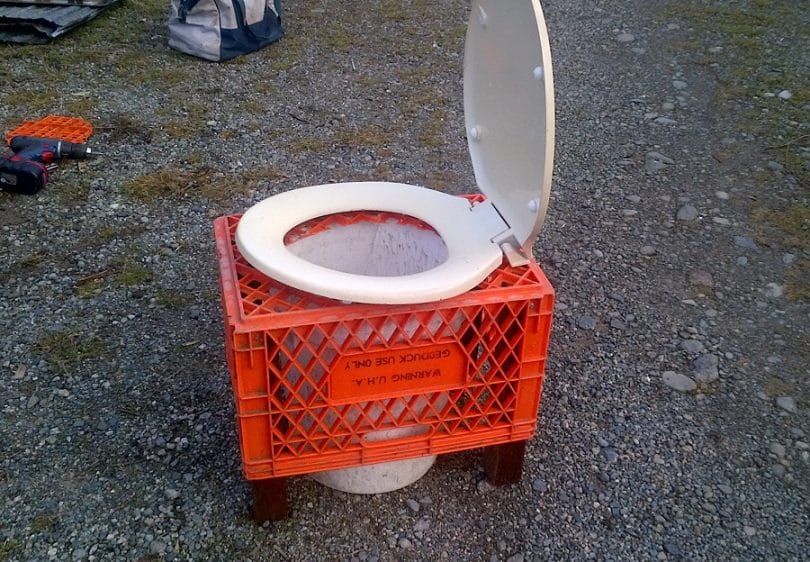
There are plenty of products in the market that you can purchase to make your camping experience more comfortable, but when you can make it yourself with just a handful of items, some of which you may already have around your home, then it’s a much more rewarding experience to know that you made something that works. And with the costs that you’ll be saving, you can even make more than one for each person that’s going with you on your camping trip.
DIY Camping Toilet: Variation One
The items that you’ll need for this project are simple and you can use scraps left over from other projects if you have them lying around. What you’ll need are:
- one five-gallon bucket with a snap-on lid
- a piece of plywood that’s big enough to cover a toilet seat
- a toilet seat from the hardware store
- glue
- caulk
- paint
- fasteners (staples, nails, or screws)
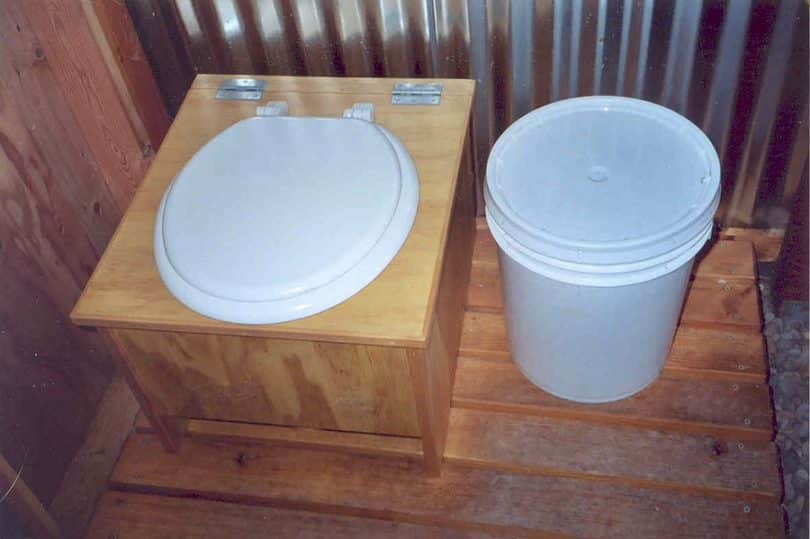
You’re going to need to modify the toilet seat, so you’re going to need to take the one you bought and remove the lid screws, hinges and bumpers. You’re only going to be using the seat portion of the toilet seat.
The next stop is to get the rough circumference of the mouth of the bucket onto your plywood. Turn the bucket over and trace the lip of the bucket along the plywood with a pencil. You should ensure that you have enough space to cover the seat of the toilet Drill a hole inside of your circle that’s big enough for a scroll saw blade to fit through. Cut on the outside of the line so that your circle ends up being a little bigger than the mouth of the bucket.
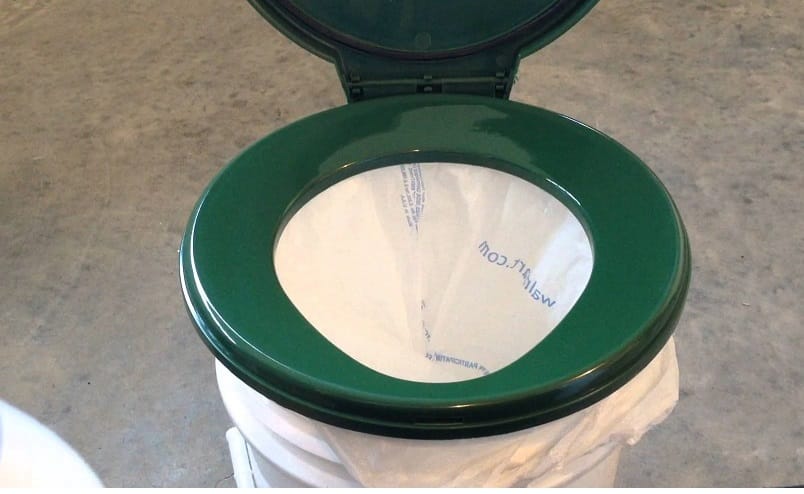
After the hole has been cut out, place the toilet seat onto the plywood so that the hole is roughly in the middle of its shape. Once you’re happy with the placement, trace the outline of the toilet seat and cut around the outside of this line, using your scroll saw or band saw. Once you’re done cutting it out, it’s time to attach them together.
Place some glue to the plywood and affix it to the bottom of the toilet seat. The plywood should be lined up with the seat so that the holes of both are centered. While the glue is drying, fasten the two together using staples or screws, taking care that the fasteners you use don’t go all the way through the toilet seat. You don’t want an uncomfortable experience when you go to sit down and feel a piece of metal jabbing you in the rear.
[the_ad_placement id=”in-text-2-type-r”]Your toilet seat is now mostly finished, but if you want a more complete look, you can choose to sand the edges to make them smoother, and caulk the lip between the wood and seat to ensure that they’re bonded together. For aesthetics, you can paint the wood white so that it looks just like a regular toilet seat.
At the end, you’ll have a nice toilet seat that looks and feels as close to home as you can get without actually lugging an entire toilet with you. It definitely beats having to squat over a tree branch or wear out your knees going against a tree all day. As for getting a bucket with a snap-on lid, it’s important that you keep it if you intend to travel with the “contents” of your bucket back home so that you don’t contaminate the camping grounds. Here’s our piece on the best portable toilet to give you more options.
DIY Camping Toilet: Variation Two
If you’re not that skilled at woodworking, there are other materials that you can use to create a camping toilet that is just as functional and comfortable, and doesn’t require you to spend money buying a toilet seat from the store.
In fact, you might even think that this one’s more comfortable. Another bonus to this version of the camping toilet is that you can bring multiple buckets for each person and transfer the seat to each bucket to ensure that everyone remains comfortable.
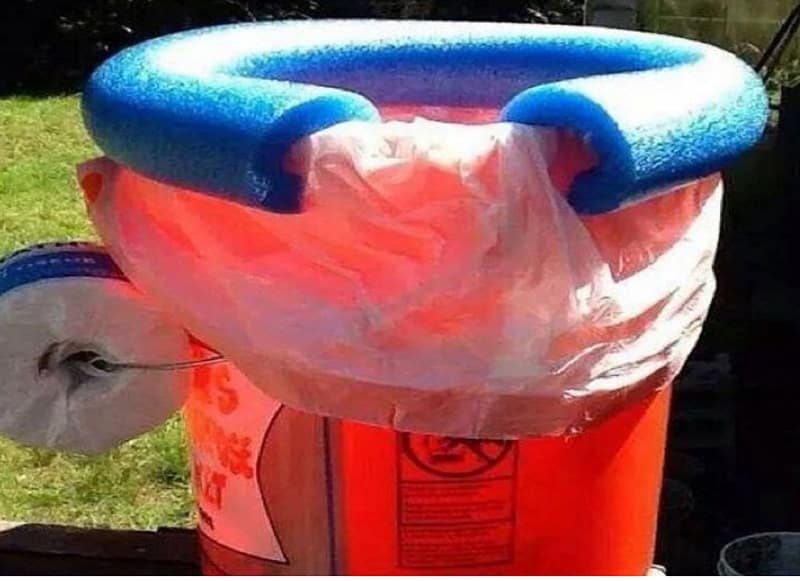
What you’ll need are:
- one five-gallon bucket
- a swim or pool noodle
- pocket knife
- Double Doodie Waste bags
The first step is to cut the noodle lengthwise to open it up into a U-shape. This is going to serve as your toilet seat. Place the opened slit over the top of the bucket and start bending it around the lip of the bucket. It should lock into place.
You don’t want to go all the way around, so cut your pool noodle at the right length so that you have some space in the front. If you have some problems helping it stay on, you can always apply some glue to the inside of the pool noodle to bond it to the bucket so that it says in place.
You can also tape the whole thing down with duct tape. Another thing you can do to help it stay on is to make a downward V-cut on the interior side of the noodle, as well as some straight cuts to the exterior so that it’s easier for it to bend around the mouth of the bucket. Keep in mind that bonding it to your bucket makes your camping toilet less stackable with other buckets, as the noodle can become difficult to remove.
Then, when you’re ready to use it, simply insert one of the waste bags into the bucket and fold the top over the pool noodle. You have a protective seat cover and a means of disposing of your waste. You can repeat the bagging process for each bucket and keep them stacked together until someone is ready to use them, reducing the amount of space being used up in your campsite. Then simply tie up the bag and replace it with a new one.
Here’s a helpful video detailing the entire process from start to finish:
Be aware of where you’re setting up your camping toilet. Scout the area first to make sure that it’s safe. Knowing the kind of plants that are around can also help to ensure that you don’t accidentally expose yourself to some poison ivy or another irritating plant. See our article on the basic guide for protecting yourself from poison ivy for more information. Finding some privacy is good, but if you end up setting up your toilet in an area where there are wasps’ nests and ant hills, you’re going to worry more about not getting bitten than getting your business done. Protect yourself by reading our list of the best insect repellents to keep you safe from bites.
[the_ad_placement id=”in-text-3-type-r”]On your camping trip, it’s important to bring a bag of sawdust with you. Sprinkling a layer of sawdust on your “business” eliminates odor and moisture, keeping the area of your campsite free from any stink. If you’re not keen on bringing your full bucket back home with you, the sawdust helps to dry out your fecal matter and make it easier for you to bury. If you’re using plastic bags with your DIY camping toilet, it’s not recommended that you bury the bags themselves. Instead, they should be disposed of at home in your garbage.
And please don’t forget to bring the toilet paper with you as well. It would be embarrassing to do all of that work and not have the means to keep yourself clean. Your used paper should also be disposed of with your waste to ensure that the contamination is contained in one safe location. Biodegradable soaps are a good idea to bring – see our article on how eco-friendly they are.
Are you camping with your little ones? Then see our parent’s guide when camping with kids for more details.




Instead of the 5 gallon bucket you can get the taller 7-gallon bucket at the hardware store so you wouldn’t have to bend so low. This camping toilet can also be useful during a hurricane emergency. It is also handy to keep a bag of kitty litter so you can reduce the stink of the camping toilet.
If you want to set up your portable loo near camp to avoid walking great distances in the middle of the night, you can use peat moss for cover up or 2 scoops of kitty litter to cover up the smell. Just tie up the bag and dispose properly after use.
As far as portable toilets are concerned, you can easily create one if you have the right skills and material. This article offers you all the tips you need.
Portable toilets have changed the manner in which campers go for long and short calls. You might be kind of skeptical, when you buy your first portable toilet; though.
Wanda, you are so accurate with the statement about emergency use at home due to storms, etc… Where I live we are on well and septic system so having a back up toilet is a life saver. No water means no flushing in the house if the power goes out. I actually built what would be considered an outhouse around our “portable” toilet. Grand-kids think it is cool to use the outhouse when they visit so I have to set it up for them. :-)
An outhouse toilet is a necessary addition to a household setting. You never know when the toilet flushing system will fail. Just make sure your outhouse has good ventilation.
Yes, cut outs at the top around the four sides under the roof ledge. A 50 lb. bag of lime to add to the pit as needed. Ole Grandpa lesson to use lime.
Lime is necessary for a DIY toilet, especially for tackling flies in an outhouse or latrine.
Interesting article, thanks, David. I just wanted to add my two cents regarding disposal of your waste when you’re ready to leave camp or your camp toilet has reached its capacity.
If you plan to discard it by burying it, make sure the hole is deep, otherwise, the next group coming to your site may find themselves sticking their hiking boots into something rather unpleasant.
Secondly, do your business away from water sources, such as rivers or river beds, as often other campers will use these sources as drinking water and although filtered and boiled in most cases, it is still rather unpleasant and runs the risk of spreading disease or making people sick.
That’s thoughtful of you, Cole. You should always dispose your waste properly whenever your camping toilets is full. This way, you avoid messing up the surrounding.