Paracord is a flexible, strong and extremely versatile type of rope that can be used in all sorts of activities. Today we’re going to present you a few fun and easy to make paracord projects that can prove extremely useful in preparing your survival gear. We all know that you shouldn’t cut corners when it comes to the gear you use for survival but if your budget is tight and you are skilled with your hands, paracord can be the answer to your troubles.
[the_ad_placement id=”in-text-1-type-r”]If you’ve never heard of paracord, it proves that you are at the very beginning of your survival training. But don’t worry, no one was born with the knowledge, we all need to learn new things every day. So, paracord also called parachute cord (hints the name) is this type of rope made out of two main elements:
- the core, made out of several nylon fibers (most common commercial version has 7 to 9 inner fibers each made up of 3 strands);
- the nylon sheath, that protects the core and gives the rope flexibility and strengths, is braided from several strands.
This intricate composition is the main reason why this type of rope is used in countless activities that require a good piece of rope. The fact that it is flexible and easy to braid in various shapes, made it perfect for creating various objects like pouches, belts, pet collars, bracelets, and so on. The paracord can be used in both military and civilian activities which propelled it to the top of the most popular types of rope during the last period.
It’s always used in fashion as wearing braided jewelries lately become a trend. People like to weave bracelets, necklaces, and all types of wearable, cute things using different braiding techniques and colors.
Today we’re going to show you how to make useful objects for your survival gear. Objects made out of paracord offer two main advantages:
- they are light, strong and can help you reinforce or protect your normal survival gear;
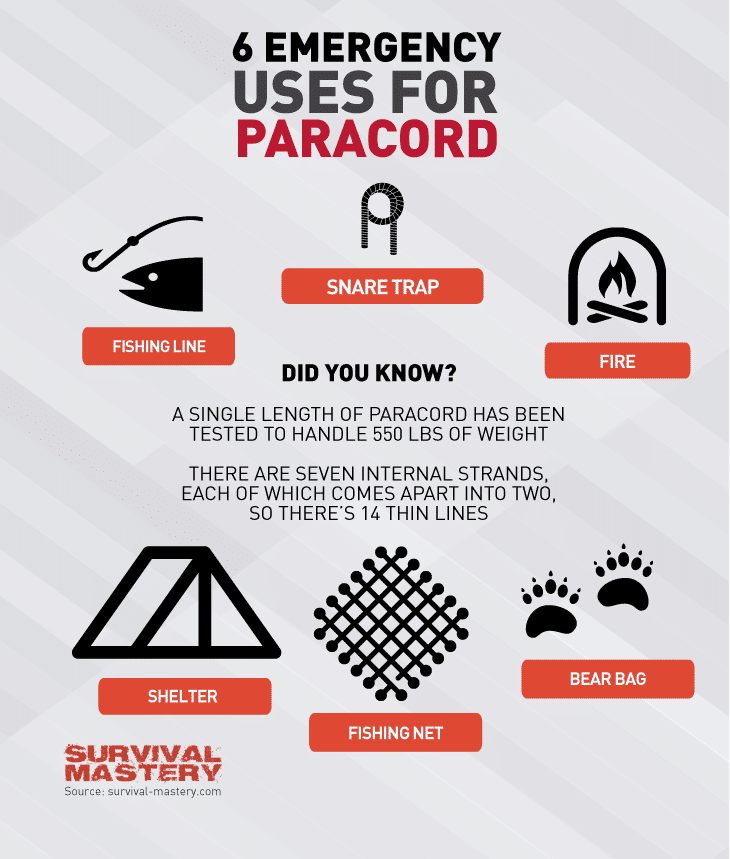
- you will always have some extra rope with you in case of emergencies (objects made out of paracord can also be easily unraveled so you can use the rope). If you don’t know how to use paracord in a case of emergency, learn more from our article on emergency uses for paracord.
Paracord projects basics: types of weaving and knots
In order to start working on your paracord projects, you need to know about the different types of weaving patterns and knots most people use. At first it’s possible to get a little confused as most patterns seem really complicated and difficult to realize but once you start making one, you’ll see that it’s actually very easy.
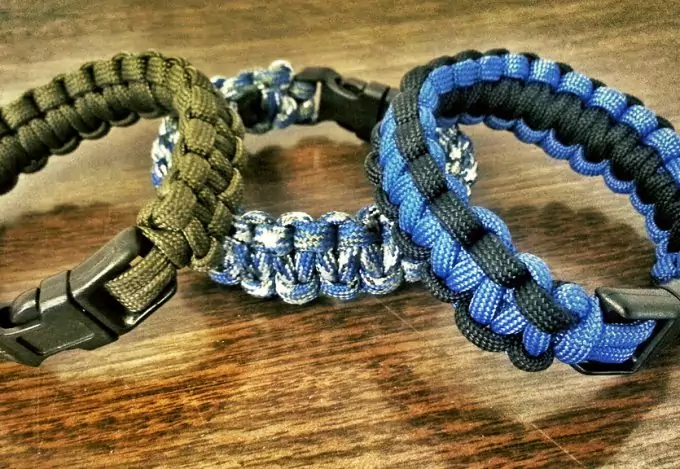
As you can see in the image above, there are a few different types of weaving and each one of them is obtained using a different type of knot. So, to make a list of different weaving patterns, we have:
- King Cobra, Cobra and Double Cobra – using the Cobra knot which is the most basic and easier to understand knot;
- Other snake designs like: Boa, Sidewinder, Viper, Rattler, Mamba – these use a different type of knot
- Different types of braiding – simple, double square, fishtail, and so on;
- Ladder, Sawtooth, Zig-Zag, Helix, Checker;
- Trilobite, Lizard, Solomon’s Dragon;
You can watch here a full tutorial on how to make a snake design with paracord.
This list could go on and on because there are a lot of patterns out there. So, if you know how to braid or if you’re good with working with your hands, creating your paracord projects shouldn’t be a problem. We recommend using the Cobra knot because it’s easy to make and allows the possibility to include more paracord in the objects you’re making.
Hoping we made you curious to learn, here is a tutorial on how to make a paracord bracelet using a cobra knot.
You can see here, that the knot is very easy to make. After you practice the knot a few times, you’re ready to start working on some real paracord projects. Still, if you want to learn more about the different types of knots out there, we have a great tutorial and guide on paracord knots that you shouldn’t miss.
Simple and easy to make paracord projects
Let’s start with a few, very easy projects that you can use when you’re going in an outdoor adventure. First you are going to need a few items that you can easily find around the house. You’ll need:
- a lighter or a candle and matches to melt the paracord at the ends (when you cut the paracord) or to connect two different pieces;
- a pair of scissors to cut the paracord;
- long-nose pliers to tuck in the loose ends;
- side release buckle of various sizes according to the project you’re working on;
- the necessary length of paracord.
Project #1 – paracord belt
Who doesn’t use a belt? It’s amazing to keep your pants up and you can hang all sorts of small things on it when in an outdoor adventure. It’s useful, it doesn’t add any extra weight to your backpack and you have a lot more extra rope with you in case of emergency. Also, it’s flexible and it doesn’t bother you when you move like a leather belt would. So, it’s cheaper than a normal belt, it has more uses, it’s more comfortable and it’s fun to make. There are a lot of advantages here!
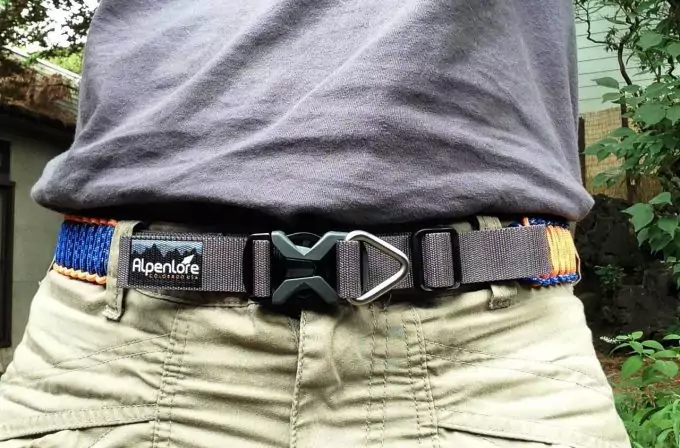
So, after you get all the necessary materials, you can start working on the most amazing belt you ever had. For this project you are going to need a big side release buckle as the belt is wide enough to fit well through a standard pair of jeans’ eyelet. A good idea is to use a buckle that is also a high decibel emergency whistle (you can find one of these in outdoor specialized stores). This way not only you have 50 ft of extra rope with you for emergencies but you also have the possibility to announce other people that there is a problem.
[the_ad_placement id=”in-text-2-type-r”]The amount of paracord you’ll need for this project varies according to your waist size and type of pattern you use to braid it. The process is simple and you need to follow a few main steps:
- Start with putting the paracord through the buckle so you can figure out what length of paracord you are going to need;
- Fix the belt in place with both halves of the buckle and make the initial knot;
- Start braiding;
- Secure the ends in place.
We know this is not much of a tutorial, which is why here we have a great paracord belt video tutorial.
The technique is easy to understand and all you have to do after you get the paracord belt is to add the buckle. This tutorial only uses one type of paracord but if you want your belt to look really amazing, you can mix different colors of paracord by melting their ends together.
If you’re not happy with these explanations, we have a complete tutorial on how to make a paracord belt to take with you on an outdoor adventure.
Project #2 – paracord bracelet
If you’ve manage to do the belt why not try your skills on a bracelet? You can use your imagination and create an amazing mix of colors so your friends could admire your new amazing accessory. The bracelet can’t include as much paracord as the belt does but it’s really good to have around when you need small pieces of rope or fibers for stitching and repairing different things when you’re in the outdoor.
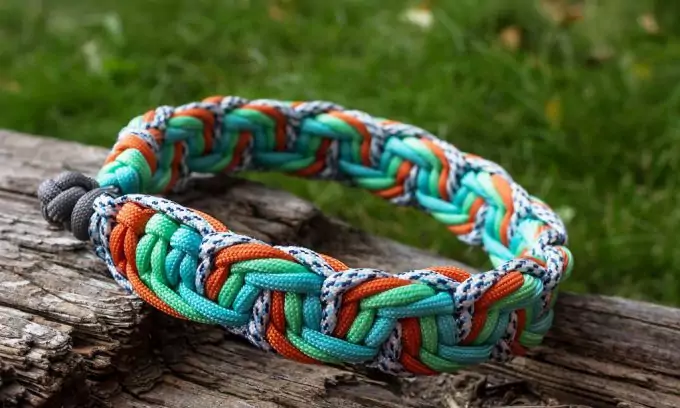
Let’s see what uses a paracord bracelet might have when you’re not in the comfort of your own house:
- You can replace broken shoelaces. If one or both of your shoelaces get burnt (happens a lot to firemen) or they get ripped while you are on the road, you can unravel your paracord bracelet, cut the required length, secure endings by melting them and move on;
- You can stitch a ripped tent or tarp. If you’re tent gets through an accident and now you have a big hole in it, you can remove the sheath from a piece of paracord and take a string from the core to repair it;
- You can secure your backpack by tying it with the paracord in your bracelet. Sometimes it’s hard to keep everything in place on your backpack so you can use the paracord to tie everything up;
- You can make a trap in the wild by transforming the paracord bracelet into a trip wire;
- You can replace or fix your suspenders;
- You can use it to tie your tools to the backpack.
There are a lot of uses for a small piece of paracord and it’s always best to have some on you (in the wilderness or not).
Making a paracord bracelet is quite easy and you should check our easy DIY tutorial too. This will get you started with a wide range of models and styles.
Project #3 – paracord pouch
This project is a little bit more difficult and you should have some weaving skills already developed to be able to do this well. It’s not a project we would recommend for a beginner but it’s really cool when you actually manage to do it. You can use different colors of paracord, to make it look more stylish. The main question now is: what uses does a paracord pouch have in the wild?
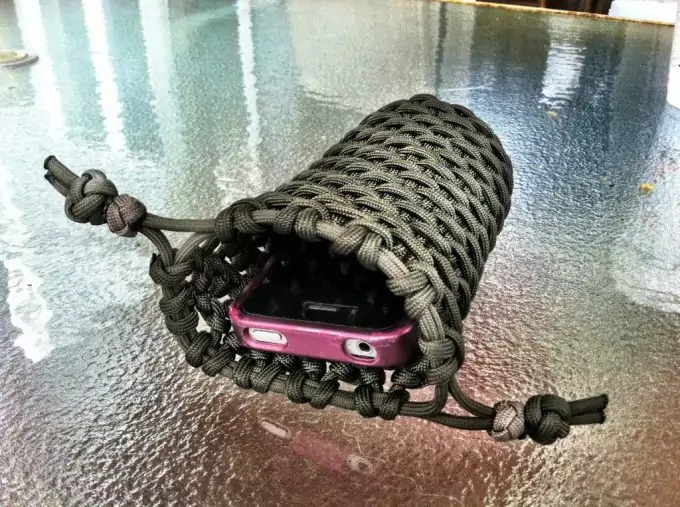
How is this little bag-like piece of equipment going to help me in an emergency? Well, in an emergency, you get to use the paracord used to make it but otherwise the pouch is very useful for various things:
- To hold your money, keys, and papers in a safe, tight place. If you make a pouch that can be tighten at the mouth, you can put your small valuables in it and they will be safe;
- You can hang it by the belt and keep snacks in it so you don’t have to reach to your backpack any time you want a bite.
- You can deviate a bit from the pouch idea and make a bottle protection or harness. This way you’ll keep the water temperature constant inside the bottle and it’s easier to carry it.
- To keep everything that is small and most likely to get lost in the backpack among bigger things (for example your multi-tool).
- To make a protection case for your survival tin box. You’ll be able to put more things in it and due to the pouch, it won’t pop open.
- To make a protection case for your phone.
Lots of uses for the pouch as well, as you can see, and if you’re the inventive kind you will definitely find more. Now, that we’ve shown you how cool it is to have a paracord pouch, let’s see how to actually make one.
In this video tutorial you can find paracord pouch technique is thoroughly explained.
Project #4 – paracord handle wraps
This paracord project is absolutely great! You can make a wrap for anything you can think of; from axes to knives, from your strap bag to your backpack, everything can be in need of a handle wrap. The best way to use this type of paracord project is on tools. Let’s make a small exercise of imagination: you’re in the woods and you want to use your knife to carve some branches for a bushcraft project. You hands are sweaty and the wood is pretty hard to carve so your hands keep sliding on the handle.
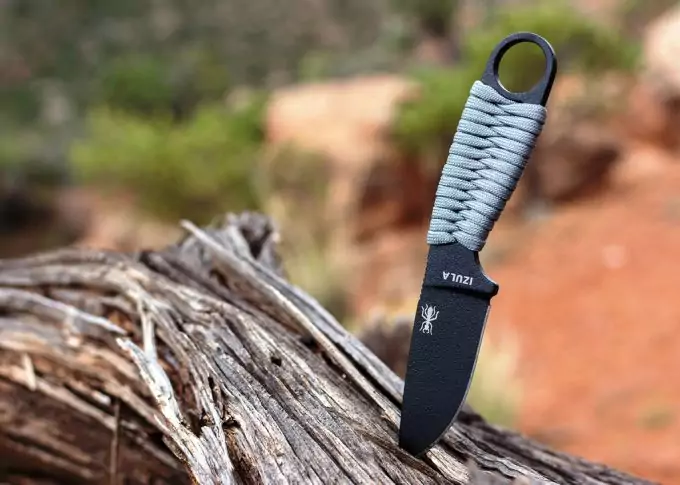
Even if you have a professional knife you can hurt your fingers without the proper handle wrapper. We consider this to be the best example to understand how useful a paracord handle wrap can be. Of course, you can replace the knife with an axe and the branches with an entire tree that you are trying to chop down.
Having your tools’ handles wrapped in paracord is very useful because the rope absorbs the sweat, allowing you to get a better grip of the tool you are using. Also you add an extra layer of protection for your hands.
[the_ad_placement id=”in-text-3-type-r”]Another way you can use a paracord handle wrap is on bags. Simple travel bags usually have a very slippery handle, made out of some sort of nylon weaving that digs deep in your fingers if the bag is heavy. To make your life easier, wrap the bag handles in paracord. It will strengthen the handle and you will get a better grip when carrying a big load. This is one good example of how we can use paracord in our day-to-day life and not just when we’re on an outdoor adventure.
And, to follow the trend of this article, we found a great video tutorial on how to make a paracord handle for a knife.
These are just a few ideas and examples of how you can improve your survival gear and your day-to-day life using paracord. There are many other ideas out there and we encourage you to start looking for other DIY paracord projects; they are fun to do and you develop your coordination and other skills while doing them. Here is a short list of what else you can do using just paracord and a few other items:
- Key chains, lanyards, and straps that you can attach to different objects like flashlights, tools, camera photo, compass, etc. We have an in-dept tutorial on how to make a paracord keychain that you should consider reading.
- Wallets and other types of containers for papers and small objects;
- Harnesses for different objects like water bottles, your laptop, dog harness, chest side for your backpack, and so on;
- A really cool looking watch strap that won’t break after a few weeks – here is where you can read the step-by-step tutorial.
- Self defense weapons like monkey fist, sling shot, the string of an arrow,
- Slings for your weapons (riffle, shot gun);
- Pet collars and dog toys that can be chewed as long as the dog wants;
- You can weave nets to help you carry clothes and to put water bottles in it;
- You can weave yourself a hammock to put in your back yard or to take it with you in the forest and hang it between two trees.
Paracord is extremely versatile and can be used in all sorts of activities. You just need a bit of ingenuity and the ideas will come pouring after your first paracord projects. Just start making a bracelet or a belt and once you finish them you’re going to be hooked and wanting for more. Anyways, regardless of your choices of how to use the paracord is always better to have some extra in your survival gear just for emergencies. You never know when you get an occasion to use it.
Start improving your survival gear today, with a very small money investment and a great deal of patience. As a beginner you have to be patient in order to see results when weaving paracord. The knots are not extremely complicated but you need a bit of time to get used to them. Don’t worry, after the first few projects your hands will know instinctively which end of the rope to use for the loop and which one to use to go through. If you don’t feel like learning by yourself, ask some of your outdoor adventurer friends, they will definitely know how to help you learn.


Paracord is a wonderful thing to have. In the skilled hands, it can save lives. I think the Cobra Knot is so frustrating to untie and uses a lot of cord. Anyways, even having a paracord around my wrist while in the city works as a constant reminder that disaster could strike anytime and anywhere.
I agree Bobby, disaster can strike anytime and having something that will remind us of this fact helps me get through the day as well. Thank you for your input.
David
These are so cute! I love how the paracord are woven like containers or attached to stuff (like the knives) and how it can only mean that paracords can be fashion items, too (yes, this is a bonus especially to girls). For instance, I’m practicing the snake and diamond combo knot because not only does it use quite several paracord (meaning I have more that I can use for emergencies) but the end pattern also looks trendy. Thank you for the project ideas though!
Hi Sam,
The best way to learn Paracord projects is to start simple as you develop your skills.
Hi, David. Have you tried bigger paracord projects? My camping buddies wanted to keep several amount of paracord at hand but due to their bulk, they should serve a sort of covert purpose until needed. For example, I found a beer basket made from paracord but I’m concerned at how long these projects usually take?
If you like practical crafts, then survival projects are for you, and you can attempt any bigger projects.