Fishing is a nice relaxing activity done almost entirely in the wilderness while you’re surrounded with the beauty of nature. On the other hand, nature may be a bit harsh if you’ve gone hiking, but lost your track and you need to survive while on your own. You will need to have certain skills and knowledge in order to catch and prepare your own food. Here comes the need to know how to make your own custom fishing rod. It may mean the difference between life and death. See our tips on survival fishing to learn more about it.
[the_ad_placement id=”in-text-1-type-r”]In this article we will share with you methods and ways to make a custom fishing rod, which you can make using items at your hand, mostly of natural origin. This means that you won’t necessarily need to have special items in your backpack, although they can be of great help. As you go through these methods and how-tos, you will learn what items are needed, and which of them nature can provide, and which you need to have already pre-packed.
And of course, you don’t have to be hopelessly lost in the wild to make a fishing rod. You may simply want to have a custom piece, so that you won’t have to purchase it yourself – you can make it at home.
How to make a fishing rod from a bamboo cane
Here are a few simple ways of making a fishing rod with some items straight from nature plus several more you will need to get before you begin.
To begin with, find a bamboo pole, being no more than 10 feet long and a couple of inches in diameter. Prepare several pieces, in case one breaks or is no longer useful to you. Take a sharp knife and use it to trim the pole. Remove any rough parts, nubs and leaves there are on the surface of the pole.
Also, look at the thicker end of the cane and cut a joint around it, to signify the butt of the pole – this will be the closed thicker end of your fishing rod. If you can get a sand paper you should definitely smooth the rod all over its length and surface area. This will make it much easier to manage and use when it’s ready.
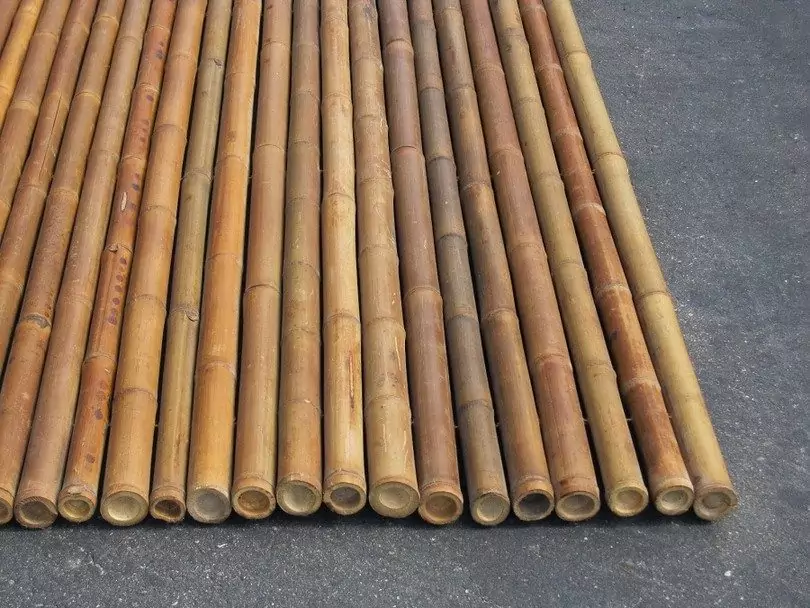
Next comes the drying phase. A properly dried bamboo cane will make a much more reliable fishing rod. If it’s bending or has cracks after it’s been dried, then there’s the risk that it may break while you go fishing. This is one of the reasons why we pointed out above that it’s best to prepare several pieces, so you can have back-up versions.
Suspend the bamboo rods from a ceiling and attach a heavy object at the thinner end so that the canes dry completely straight. Make sure they are not close to direct sunlight otherwise this will make them brittle and prone to cracking. Bamboo canes dry out better slowly. Sunlight will dry them too quickly and make them unreliable. To make sure your bamboo fishing rods are ready you need to let them dry for a month or so (up to several months). You should aim at a tan color when they are done.
When you believe the canes are ready, test them by swinging several times with them. They shouldn’t bend or crack/break at any point. Also, look for curves and bends on your canes – if one or several bamboo rods are slightly curved (in a stationary position) then use heavy objects to straighten them by placing the heavy objects on top of the rod(s).
It’s time to attach a fishing line. We offer you to use a Dacron line (up to 20 pounds). The thicker end of your fishing rod will be the handle. Keep the fishing line attached above the handle then stretch the fishing line to the thinner end of the fishing rod to see how long it needs to be. Make sure to leave a bit more of the line for extra managing. Attach the line on 2-3 places along the rod and don’t forget the very tip of the fishing rod.
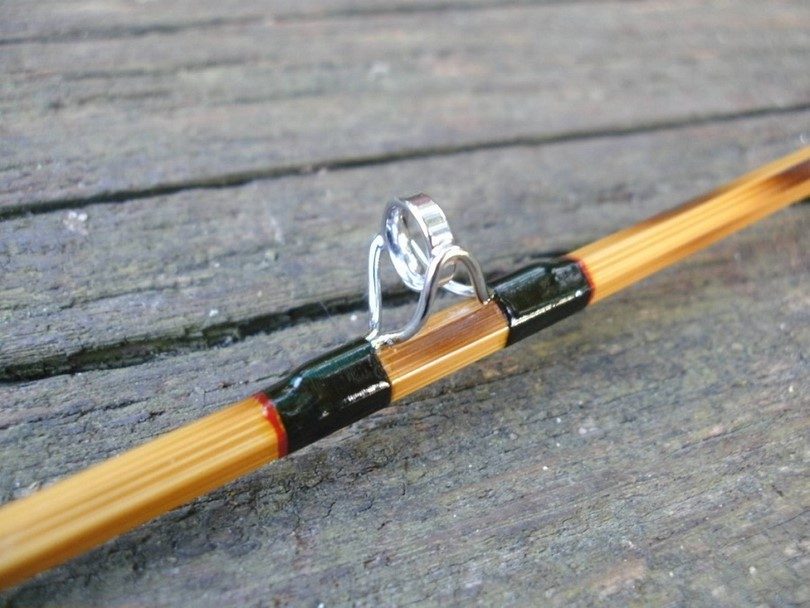
If you don’t have a Dacron line you can use a hemp cord. It’s usually a very sturdy and durable cord, so you can rely on it to provide you with stability. You can also use it to wrap around the handle area, so it’s softer to hold on to.
Also, make sure that the fishing line isn’t too tightly attached to the rod, otherwise this will make it hard to use in the first place. After all, you need to control up and down the fishing line. If too loose it will dangle and even get tangled here and there, rendering your fishing rod useless. If too tight, you may not be able to use it either.
Finally, you can attach all the needed hooks, sinker and bobber to your fishing rod, thus finishing your project. Any excess fishing line can be wrapped around the handle if necessary.
Extra work: you could either purchase a reel, or make your own. You can take a metal can with a small opening and use a wooden stick with a length slightly longer than the entire height of the metal can. Attach a second wooden stick to the first one, so you have a handle. It’s a bit of an additional work, but you can then have your own fishing rod, entirely made by you. You can find instructional videos on YouTube, but above YouTube video shows in practice the above instructions. Should you wish to purchase, see our article on the best fishing reels to give you more options.
How to make a fishing pole using PVC
This method doesn’t use any organic or natural products like wood or similar. You need PVC pipes, cutter, fishing line and sandpaper to make the initial fishing pole.
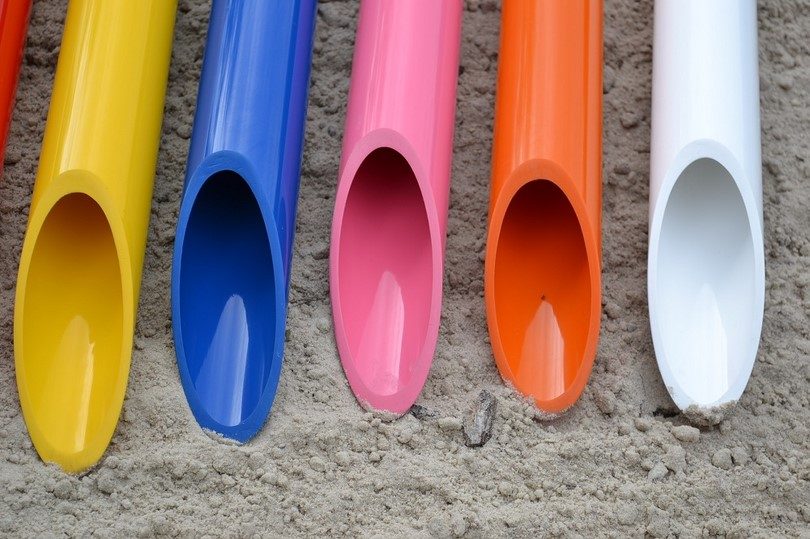
Prepare two PVC pipes – one with slightly larger diameter than the other. The difference in diameter should be half an inch. Use a cutter/saw to cut the pipes to the length you need. Both pipes should have equal length. Both pipes should amount to the desired length of the entire fishing pole, so keep that in mind. For example, if you need your pole to be 10 feet total, then each PVC pipe should be of 5-foot length. When you have cut the necessary pieces, take a sand paper to polish and smooth the cut surfaces, otherwise they may injure you or the user of the fishing pole.
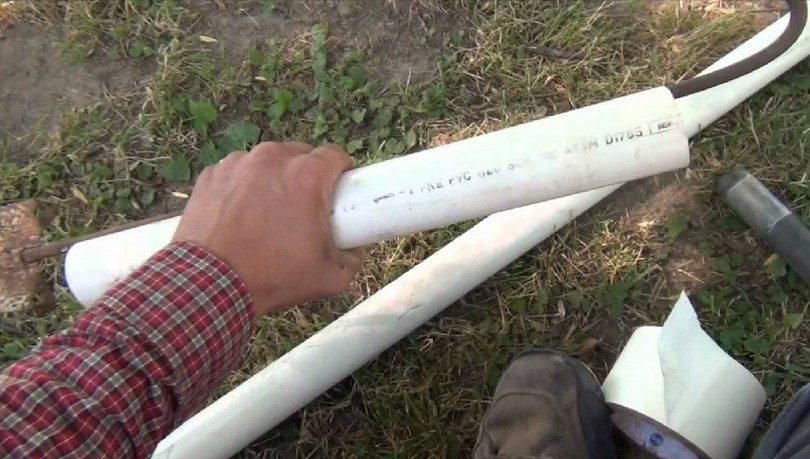
Next, prepare several threaded connectors. One pair (female/male) should be of diameter fitting both PVC pipes (one small and one larger). The second pair should fit the larger pipe and you need to prepare two female threaded connectors. These items sell very cheaply. Use them to connect the corresponding pipes, but remember not to use any glue or duct tape. Just connect the pieces.
Your next step would be to prepare a hand drill with a very small drill bit – as thin as 1/10 of an inch and use it to drill from 3 to 5 holes in the thicker pipe. The holes need to be evenly spaced all along the pipe. Depending on what length you’ve picked for your fishing rod you may have to make more than 5 holes. This is just fine, as long as the holes are, as we advised you, evenly spaced.
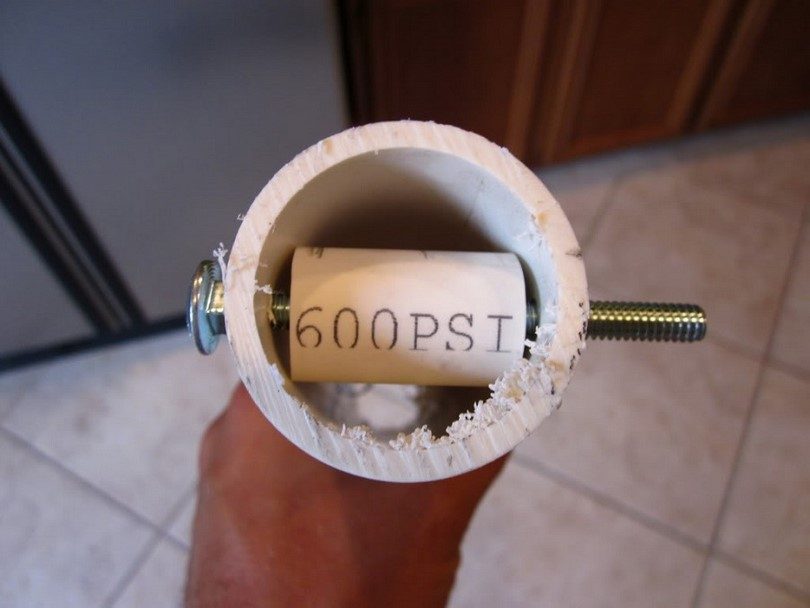
The third step is to attach eyelets/loops. Prepare as many binder clips as you have holes on your PVC pipe. You may have to remove the wire from the binder clips. Roll the wire so that the ends meet and you can have a loop made out of them. The ends should point towards each other. Do the same for all the remaining binder clips. The idea with the wires is that you have eyelets where the fishing line will be threaded through.
Moving on – prepare a fishing line and attach it to the thicker pole. Then also prepare a pre-made reel and fix it to the line. Use the hand drill from earlier and drill two holes at either side of the PVC pipe, then attach the reel and line to the holes.
You final step is the easiest – simply screw the pipes together and thread the line through the wire loops (eyelets) you made earlier. Get the necessary bobber, hook and sinker to complete your fishing rod.
How to make a pocket-sized fishing pole
It may sound strange at first but having a smaller version of a fishing pole can be far better and even more useful. You won’t have to carry a heavy fishing rod, and you won’t worry that it may break. Also, a small pocket-sized rod can be much easier to access – you can literally pick it out of your pocket and go fishing within less than a minute.
Once you see water nearby, just take it out of your pocket and dip the fishing line in the water. Of course, you’ll have to prepare it at home, because there are items you can’t find naturally in nature, like a pencil, antennae, etc. So, here is how to assemble this fishing pole yourself.
Prepare the following items: radio antennae (it should be able to expand), pen, binder clip (one is enough), 3 small washers, thin wire for attachment (length isn’t of any concern at this point), thin bolt, 4 medium washers, two square nuts (hexagonal would work also), 1 small nail, glue, fishing line, swivel to attach the hook, the hook itself and as a final touch and an optional item is a worm. You can prepare worms later, when you’re ready to begin fishing.
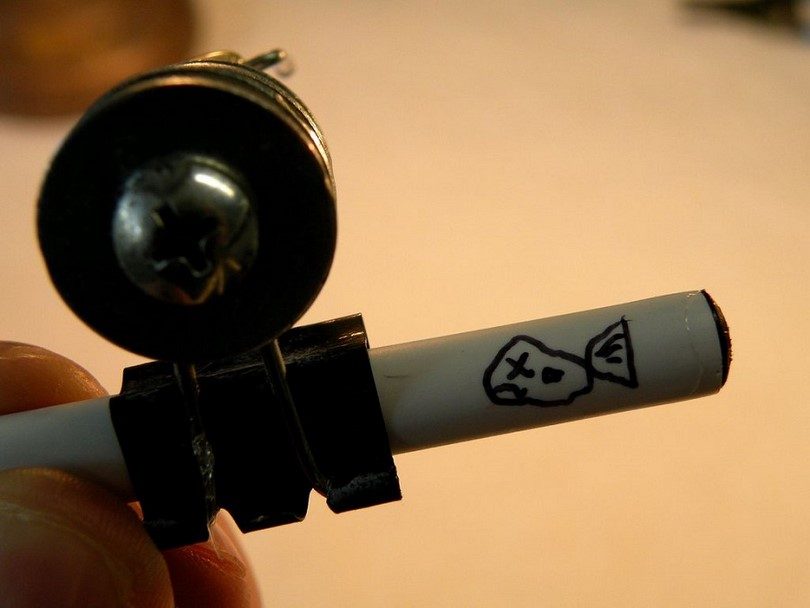
Begin by disassembling the pen by removing all the inside items so that you’re only left with the outer pipe. Optionally you can find a PVC pipe but it needs to be very thin and light. If you stick to the pen, use pliers if the ink tube is hard to remove (which may be the case). Make sure the outer pipe/tube is entirely empty so it’s free to be used further to build out fishing rod.
Next, use the pen tube and secure it vertically in a vice/clamp. Prepare some hot glue and sip it in the pen. Immediately after that push the antennae inside the pen and add some more glue to top the antennae. You may have to remove the excess glue with a towel and clean the item.
To make the eyelets you have to take the three small washers you prepared earlier. Their main purpose will be to thread through them the fishing line. So, first prepare a wire and bend it in to. Thread a washer piece through the middle of the wire, exactly where it’s bending – the washer should be held inside the wire. Begin rotating the wire as a spiral along its length – the washer will stay firmly in place.
Next, use the other two ends of the wire to attach it to the antennae. Then, using hot glue, attach that wire joint to the antennae – the glue will keep it in place and it won’t move or detach easily (if at all).
[the_ad_placement id=”in-text-2-type-r”]Of course, since you’re working with very small items and dimensions make sure not to put any glue on your hands, otherwise, hot glue can damage you and will be very hard to remove from the skin. Repeat all of this with the remaining washer items. They should be attached at equal length along the antennae. Basically, each section of the antennae should have one washer piece.
The final challenging task is to prepare the fishing reel. It’s usually a tricky part of the fishing rod, but it’s the last one, so if you’ve made it to this part, then you will be able to finish the reel. So, take the binder clip and the two medium-sized washers. Take one of the washers, lay it on the table, put hot glue on it right around its hole and press one of the binder clip’s handles to it. Repeat the same with with the other binder’s handle and the second washer. The washer’s hole and binder’s handle should allow for a bolt to go through those.
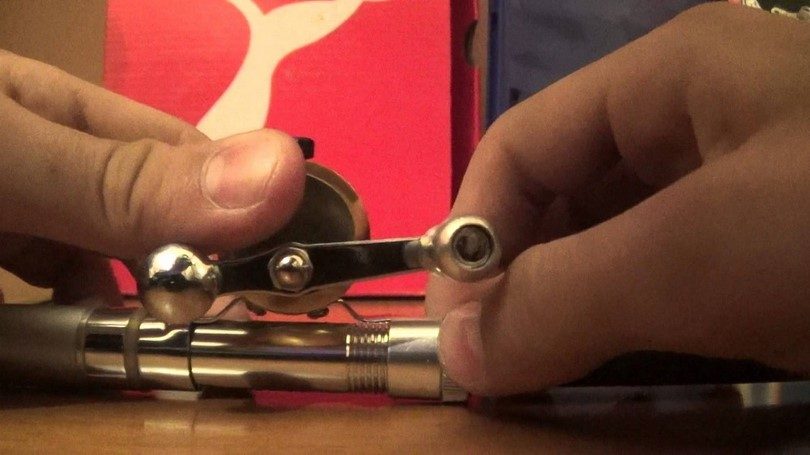
Take the bolt and let it slide through one of the washers (binder’s handle) and arrange the remaining two washers through the bold (between the two binder’s handles). As for the binder clip itself – you can put the pen right through its clipping part, thus holding it securely to your mini-fishing rod.
Finally, use the two nuts you prepared to screw them on the bold and tighten the reel. You can also use glue to attach the two nuts together to be absolutely sure nothing can fall or get destroyed by movement or shaky fishing. Before you put the glue, you can attach a bent nail (bend it 90 degrees in half) onto the nuts – this can be your reel handle so you can roll the cord while fishing.
Next, it’s best to use glue on several places to be sure nothing will detach or fall. Place glue on the binder clip where it holds the pen. Then place a bit of glue on the loose washers inside the reel. Keep the washers apart from each other – all four washers should be evenly spaced. Also, if you haven’t done so, place glue on the bolt where it meets the two nuts.
The next step is to get the fishing line/cord and roll it on the bolt, right in the middle, between the two glued washers. Begin by making a double-knot and then continue rolling the cord on the bolt. Make sure there is enough left to thread through the eyelets. As you reach the other end of the cord, you can attach a swivel to it. Then prepare the hook and attach it to the swivel. Your mini fishing rod is ready.
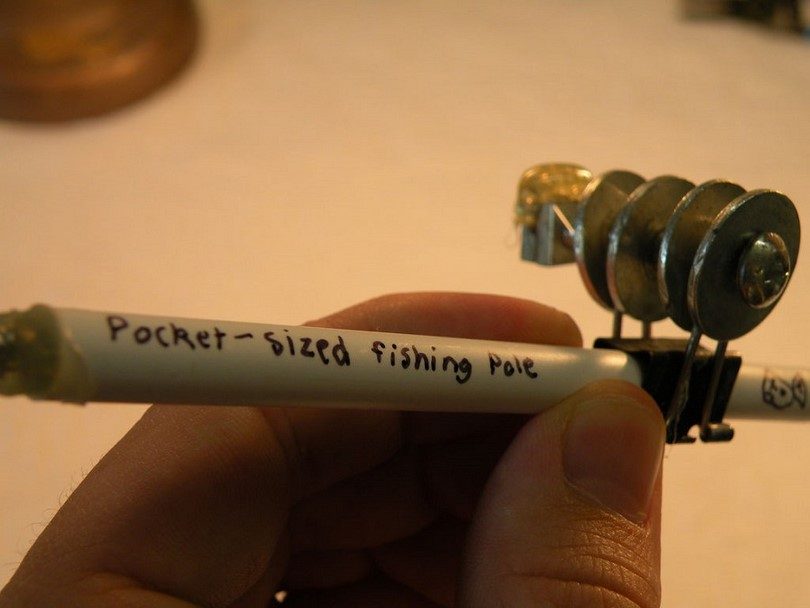
If you find that making your own reel is too much, you can purchase a separate fishing reel and attach it to your pen and antennae fishing pole.
Easy fishing rod made of ordinary wood stick
You can also make a very quick fishing rod by simply getting yourself some wooden stick (but make sure the wood is flexible enough, or it will quickly break upon bending).
Get some fishing line or a hemp cord and begin by tying it to the base of the wooden stick, right where you will be holding it while fishing. If you tie it at the other end the stick may very quickly snap, if you catch a larger and heavier fish. Now, if you don’t have any type of cord or fishing line at your disposal, you find some green vines. You can find them around bushes or in the underground and overall, on ground level.
To make sure the vine is reliable for your purposes, it needs to be green. If it’s brownish, this means it’s probably too dry and may easily snap. You can also double the vine, if you think that will give it more strength and also length.
Then continue to wrap the fishing line along the stick’s length. You can play by adding some eyelets made of wire, just like in the above tutorials, but that is entirely up to you. For now, winding the line along the wooden stick is perfectly fine for the simplicity of this particular fishing pole.
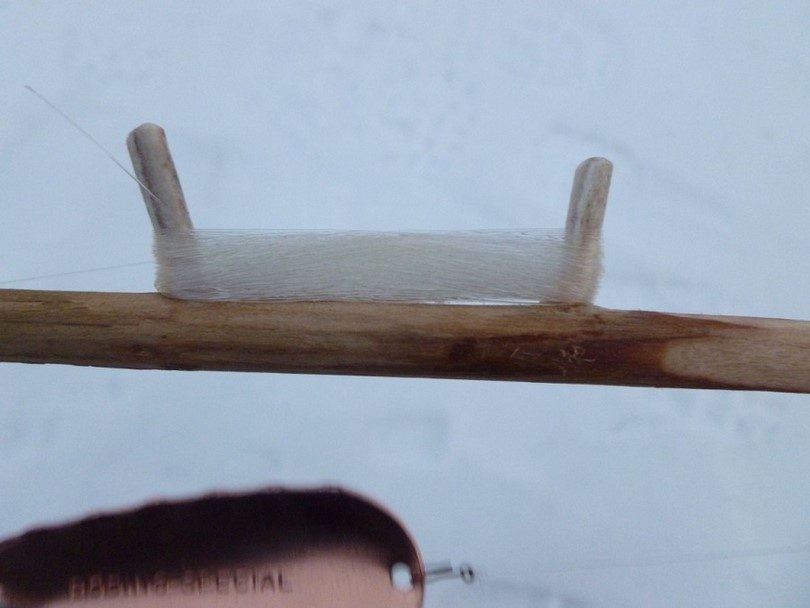
When the fishing line has reached the other tip of the stick, tie a tight knot. Make sure you tie another one at the other end – the handle, or the base of the fishing rod.
[the_ad_placement id=”in-text-3-type-r”]Since this is a primitive fishing rod, you won’t need to attach a reel or similar item. This fishing rod is quick for emergency situations. Of course, don’t forget to attach a hook, or some bent wire at the end of the cord/line, or your fish will never catch. When it comes to bait, use worms or insects. These are usually very easy to find.
If you have trouble making a hook from any wire (you may not have any at your disposal), use your pocket knife to carve a small sharp hook-like shape from a thin wooden piece. It’s enough to have a V shape in order to work as intended.
Here is a very quick video tutorial on how to make the above fishing rod. It’s one of the quickest methods and can be applied in the wilderness, in case you have to catch a fish as soon as you can, and if you don’t have any other already made fishing rod.
Final tips and considerations
When you pick wooden branches or bamboo sticks, make sure they are young and green. Brown and cracked branches are obviously older and thus, much drier. It’s best to cut a fishing rod from a tree, rather than picking already fallen branches, as they are already drier than the alive branches.
Also, if you often go hiking and spend a lot of time in the wilderness, it’s always a good practice to carry a fishing line in a metal box, just so you can already set up your own fishing pole quickly. Keep the cord/line looped and tucked together using a duct tape. Red yarn can be used to more effectively attract your dinner. And of course, don’t forget your pocket knife. It may be more important than anything else. After all, you can prepare almost any item using a pocket knife while in the wilderness.
And finally, before you go out there, make several of the above fishing rods and test them in a safe environment. See what works and what not, and improve it. Don’t expect that the above tutorials are enough to get you a fish for dinner, without being sure that they work as they should. Yet, if you follow the above explanations and instructions you should be able to make an efficient fishing pole and be sure to catch fish with it.
To help you on how to select the best type of fishing rods, see our must-read article on this important topic.





I think it is great to be able to create your tools because you can’t depend on modern equipment all the time. If when you prepare with the right skills and knowledge, you’ll worry less and survive any situation.
Creating your own tools, for me, is a skill that everybody should have. Knowing how to create one and use them effectively, these are the skills that will ensure your safety during SHTF scenarios.
Hi! The DIY rods here are really cool but I think the pocket-sized rod is the most interesting as this is the first time I’ve heard of it. But are these rods easily breakable since they are so small? Can they only be used for a few times? Can they handle bigger fishes?
You should base your attention mostly on the material. The best big game fishing rods are made of graphite or fiberglass.
It is crucial to choose your materials right. Many first time rod builders are uneasy when it comes to selecting the right components needed to build their own fishing rods. Material, length, handle style depends on what fishing rod blank you choose, also the manner in which the rod will be used as well as personal preferences will come into play when building your own fishing rod. This article has a in depth explanation on how to start building your first fishing rod, after you go through some trial and error to see what works and what can be improved you will definitely like the sensation of making your own tool.
Well said, John. Also, choosing the right rod blank for your fishing performance is easier when you have a wide variety of options to work with.