
Making a taser can be interesting and an excellent way to learn about electricity and circuitry.
This project is often assigned in beginner engineering courses. However, the parts can be found in gadgets, refurbished devices, or second-hand tasers.
These instructions are accessible, use easy-to-find parts, and will not take days to complete.
Table of contents
Instructions for a Homemade Taser
Below are several DIY taser projects. All projects are for educational purposes only.
When handling electricity, you should consult a professional. Electricity can cause serious harm and potentially be lethal.
BBQ Lighter Tasers
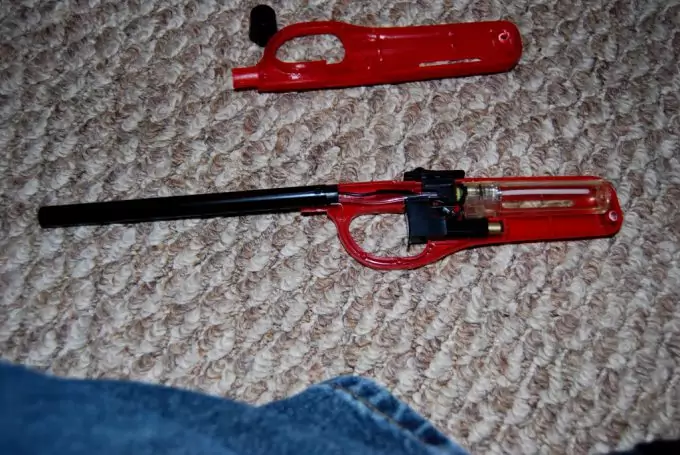
How to Construct the BBQ Lighter Tasers
Items Needed: Barbecue lighter, Scissors, Duct Tape, Ordinary Pen
Time Needed: 30 Mins.
- Dismantle the lighter and pen. Remove all tape and screws on the lighter so it can be opened safely.
- Locate & Prepare the Lighter Cables. Locate the small black container that holds the two cables. These are what create the spark in the lighter. Cut these wires, so they are the same length as the pen. The small metal ends of the wires should be slightly longer than the pen. Remove the plastic insulation off the top of the two cables by an inch or less.
- Prepare the Button. Stretch the two cables, so they are facing away from the button of the black container you extracted from the lighter. When you need to use the tasers, you will press the button as you do with a pen.
- Prepare the Pen. Dismantle the pen, so you only have the casing or tube left.
- Combine the Lighter and Pen. Attach the black container and wires to the pen with duct tape. The wires should run along with the pen, so the two metal ends of the wire hang over the end of the pen but are not touching.
- Complete DIY Lighter Tasers. The taser button will be where the original pen’s button was located. You will depress this button just like you would the pens. The electricity is not very high voltage, so that the shock will be moderate.
Review the video below for an excellent visual description of the instructions above.
Disposable Camera Taser

How to Construct a Disposable Camera Taser
This next project is more advanced. It doesn’t just use the tiny electrical parts of a lighter but several camera components.
This taser does not use alternating current and can be deadly, so consult a professional.
Disposable cameras contain a value capacitor, or a “super cap,” meaning they can store a high voltage charge so that the camera produces a bright flash.
If you press the capture button, you’ll hear the snap inside. That sound is the capacitor charging up. This makes them suitable for homemade tasers.
Items Needed: Camera, Wire, Duct Tape, Velcro, Screwdriver
Time Needed: 1 Hour
- Disassemble the Camera. Remove paper and open the camera. Keep in mind that if you try to disguise the taser to look like a camera, it will fool anybody, so don’t leave it where anyone has access to it. Remove the battery and DON’T touch the circuit board.
- Discharge the Capacitor. Use an insulated screwdriver to touch the “Super Cap” or end of the capacitor. When you see sparks and hear a pop, then the energy is released.
- Disassemble Circuit Board. Remove the circuit board and take the flash box off the circuit board. Double-check that the capacitor is discharged.
- Attach the Wires to the Capacitor. Remove the top plastic insulator and wrap the exposed ends of your two wires around the capacitor. The two wires should NOT touch each other. The two wires should protrude from where you used to have the flash box.
- Secure the Wires. Tape the wires tightly to the sides of the camera with the ends of the wires exposed. This is what will shock intruders. Don’t touch the wires.
- Test the Taser. Place a battery in the camera and hold the button. Hold the wire ends to an inanimate object like a (metal or plastic). As you hold the button, you will see sparks and hear a popping noise.
- Creating the Case. Use a bright color that warns of danger. Use velcro to make a sticking flap around the exposed wires. A good idea is also to make a small attached battery holder. The battery should always be removed when not in use.
The video below provides a good visualization of the process above.
Bug Zapper Taser

How to Construct a Bug Zapper Taser
The bug zapper I’m using looks like a tennis racket. They use electricity to zap insects, and we are interested in the handle.
Items Needed: Bug Zapper, Screw Driver, Electrical Tap, Hot Glue/Gun
Time Needed: 1 Hour
- Dismantle the Racket. Remove the battery before starting. Remove the screws to open the handle and remove the head of the racket. Disconnect the two wires that are attached to the head of the racket. You can throw the head away.
- Prepare the Wires. Tie together the two wires you disconnected from the head of the racket. Use pliers to expose the third wire. It will be a different color – maybe red or black. Tie each exposed wire around a long nail.
- Prepare the Nails. Glue the nails to the inside of the handle and screw the handle back together. The nails should be pointing away from the handle.
- Replace the batteries. Once the batteries are replaced, the electricity is active. There is no on or off switch.
- Test the Zapper Taser. Test this taser as the tasers in the other projects were tested.
The video below provides a good demonstration of the process above.
A Few Words of Caution
Tasers, including the DIY tasers in these projects, are not toys. Seek a professional and consider purchasing a taser if you have no experience constructing them yourself.
Check the laws and regulations in your country, state, or region. Some of these devices may be illegal.
Keep these items away from children and animals. It’s best to keep the taser in a case with the battery removed when you are not using it.
Finally, don’t play with tasers. These tasers may use a constant current, which can cause permanent damage to your body and be lethal.
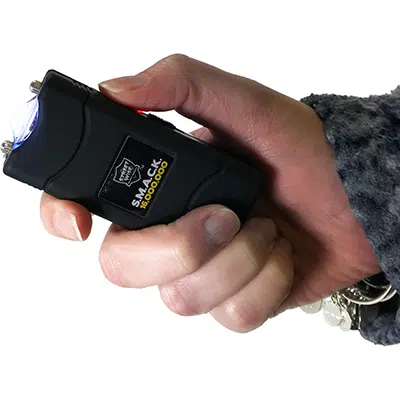
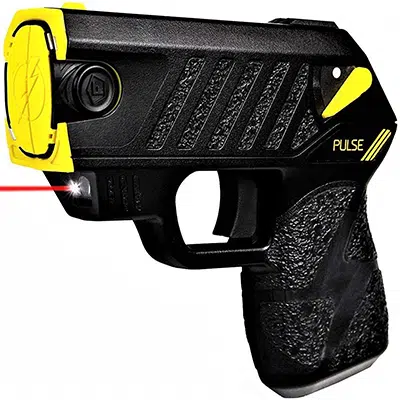
Taser & Stun Gun Options
If DIY is not your thing, below are several tasers and stun guns from The Home Security Store.
The Home Security Store has good products and excellent customer service at reasonable prices.
-
-
 Shop Here
The Jolt tactical flashlight is powerful, compact, and has a bright flashlight that is definitely good to have at night. 2.15 uC, 3 protection levels (on/off switch, safety switch, stun button), 200-lumen flashlight, military grade aluminum, li-ion battery, rechargeable, Weight: 0.68 lbs., Dimensions: 7.75" tall x 1.5", wrist strap, holster, Lifetime Warranty


I know about the camera tasers as I have seen some in movies but the lighter taser is very interesting and seems easy to make. The stun baton is also easy to do but like most things, extra caution should be taken as DC is sometimes deadlier than AC.
It’s always wise to be cautious when handling tasers.
Between a camera and a lighter taser, a camera taser is usually more effective. A stun baton; on the other hand, is a little bit risky. You have to be careful with the charge.
It is interesting how electricity works. The stun gun is useful in survival situations like rape, but it can be dangerous in the wrong hands. I know some people who use it for “fun” on their friends!
Ben,
Playing around with tasers (homemade or not) is never a good idea! Incidents like these should be reported to the authorities immediately and should not be condoned. Proper education on how to use it efficiently should be taken first before purchasing or creating one.
David
When I was 14, I accidentally got tazed. I was at a party that turned into a fight and the cops busted in. One officer stumbled me and pulled the trigger, caught me in the left arm.I would be maced again rather than having a shot of it.
Did you fight off the cops? Well, the taser effect can be severe in some situations. So, you should be careful not to be on the receiving end of the taser effect, next time.
Thank you for sharing your opinion with us.
Im a young woman living in not the best of neighborhoods. Im kind of relieved that there are so many ways to make a taser. But my biggest worry is handling that much power made from home. It could go wrong so easily.
There are a few words of caution in the article that you should take into consideration, which includes: use of protective gear when handling the circuit; confirming laws & regulations; and avoid toying around with your DIY taser (only put it to good use when an aggressor attacks you).
I bought my wife a taser for safety purpose when I was not at home, but I ended up being tased myself (an honest mistake). It stung like hell and I was like totally dizzying for the next 30 seconds.
Ha-ha, that’s cool. Hey she knows how to use it, which is a very good thing. That means next time when a real aggressor advances, she will definitely have a way out of the encounter.
This handmade gun can help you stay safe and survive life threatening situations like rape and other physical assaults. The taser made for defensive purposes could become a deadly device if operated by inexperienced folks like children. Are you not going to exercise caution during the production and handling of this weapon to avoid accidental discharge of bullets to the wrong targets?
Anyone in possession of a taser should make sure that it does not fall into the hands of children.
A great read! This is my first time seeing a method on how you could make a taser using common tools. I might try to make one using a lighter this weekend and if it doesn’t go well I can always go to the market and just buy a taser.
Making your own taser is fun, but there are some safety concerns that you should be aware of. Always make sure you wear protective gear, and do not play around with the device. Keep it away from children’s reach.
Hello David, I just want to ask if there is a way to check if the taser I made is working without turning it on first (example is if the connections or wiring is correct). Because I am afraid that it might just blow up or shock me.
If you follow the guidelines correctly, the taser you have created will work just fine. However, I would strongly suggest not to test the taser on your body. You should wait and test it on an actual attacker.
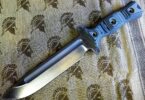
A stun baton is nice to have since it provides not only the electric part but you will also have a baton to defend yourself with. This is very helpful when your stun gun is out of juice and you are face-to-face with an attacker.
The stun baton taser is a very good idea. It is quite easy to build, by the way. You need a few items to make one for yourself, such as a PVC pipe, electrodes, and charging device, or you can just simply buy one at Amazon.
Very well written and explained for those of us who don’t understand electricity or even circuits intuitively. In answer to those who prefer to buy than make anything, why would you, other than convenience? The only way to truly understand and be able to re-create something is to experience it. Sometimes watching works but confidence comes from doing. That is why experience counts for most jobs. Learning first hand what works and doesn’t, even just in laying out materials and planning workflow.
Commercially made tasers are definitely effective, but it is always good to learn the skills first hand. You never know when you might need a DIY taser. Great thoughts, Terre.
How many volts does the bug zapper one and the lighter one produce?
The model we used (bug zapper )is rated at 2200 volts, checked the link for details.