Backpacking can be considered an art among hikers and campers. Most trekkers tend to pack almost always the same types of foods, either dehydrated or prepared (canned food, etc.) but it doesn’t have to be so boring and bleak every time you sit by the meal and chew on some dried jerky.
[the_ad_placement id=”in-text-1-type-r”]Or wonder if the freeze dried lunch will be as tasty as it would be fresh.
Here we’ll give you ideas on how to enrich your camping or hiking experience and your meals along the way.
Best backpacking food for you and your family
Marinated tofu
It takes little time to prepare the tofu before you go camping, but you’ll love the taste. Here is the process: cut the tofu block in smaller blocks, so it can marinate easier and quicker. One block should produce about 8 smaller blocks. Next place the blocks on a towel and fold the tofu in it. Place something heavy on the tofu blocks so that the juices and water content is removed somewhat. It won’t be perfect, but it is better that way. Let the water drain easily.
Meanwhile, in a bowl, place the following ingredients for the marinade:
- lime juice (from 1 lime)
- olive oil (2 tbsp)
- 1/4 onion (cut to small cubes)
- 1/2 chopped jalapeno
- salt and pepper (for each 1/2 tbsp)
- optional: tequila (1 tbsp)
Mix these well so they are a homogenous mixture. Now you’re ready to place the tofu blocks in the marinade.
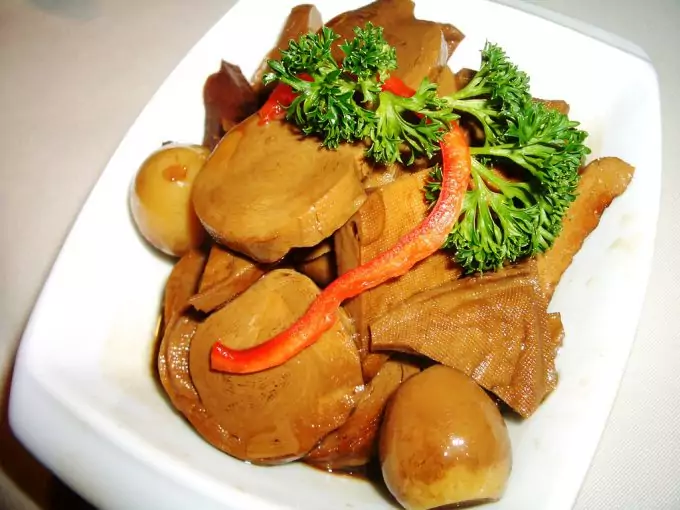
If you’re in a hurry and you’re preparing this right before your trip, let it stay about 15 minutes. For the best results though, leave it to soak for 15 minutes and then place it in the freezer until the day of your trip. Tofu unfreezes much quicker than meat. Once it’s unfrozen, you can cook it however you want. You can sauté it in cooking oil or you can even eat it straightaway mixed with some fresh vegetables.
As you can see, this recipe requires some cookware which is usually difficult to carry, especially in a backpack. That’s why we recommend you take a look at our camping cookware reviews and choose the ones that suit you the best.
Homemade granola bars
If you like nut and granola bars you may be delighted that there is a very easy way to make them at home and forget about all the weird additives and preservatives. Especially if you’re a conscious consumer, this recipe will be just what you need.
Prepare the following ingredients:
- 1 1/2 cups of crispy rice cereal and the same amount rolled oats
- 1/4 tbsp sea salt
- 1/3 cup of dried blueberries (optional: blueberry powder)
- 1/2 cup of shredded coconut
- 1/2 cup chopped almond
- 1/2 syrup (brown rice, cane, maple, etc)
- 1/4 nut butter (almond works great, optionally: cacao butter)
- 1/2 tsp vanilla extract (or 1 tsp vanilla sugar)
Start by turning the oven to preheat to 350 degrees F. Then, place on a baking sheet the almond bits and shredded coconut to bake until you see brown areas.
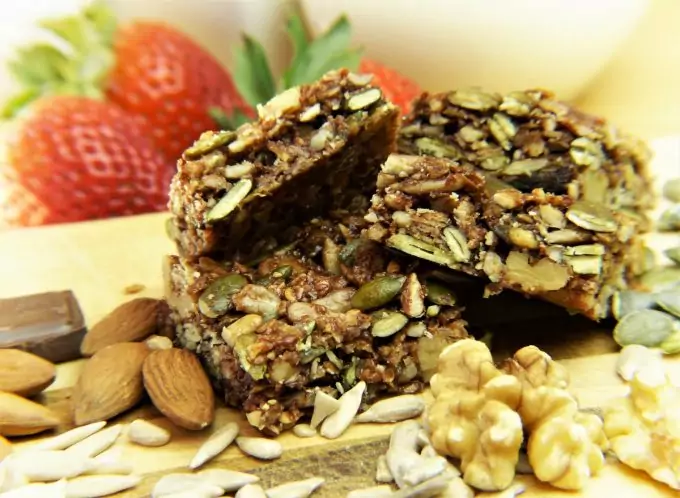
Next, prepare a baking pan and line it with 2 overlapping baking sheets so all the pan’s sides and bottom are covered. Mix the rice cereal, rolled oats, salt, blueberries, coconut and almond in a bowl. They need to be evenly mixed. You will later place them in the baking pan.
Then, in a skillet or a pan, place the syrup of your choice and butter and cook them so they mix well together and make a homogenous mixture. You may look for bubbles; they will indicate when the mixture is ready. At the end add all the vanilla extract (or vanilla sugar) and stir the whole thing. Remove the skillet/pan from the heat and let it cool a bit.
Now back to the oats mixture. Add the syrup and butter mixture to the oats and rice cereal mixture and stir it well to let the syrup and butter dissolve. Pour the whole thing in the baking pan and with a slightly wet hand, press the mixture well, so it’s tight and hard. Make sure the surface is even, and there are no strange protrusions. When this is done, put the mixture in the freezer for 10 to 15 minutes.
Then, remove the pan from the freezer and using the baking sheet, take out the mixture block and place it on the table. You’re ready to cut it to bar shapes. You should end up with about 12 bars, more or less. When it comes to storing them, we advise you to wrap each bar individually in its own wrap. You could also vacuum them in the wrap. Always store them in the fridge. Remove them from it only when you go hiking or camping.
Granola bars are great for a bite of energy, but they are quite a hassle to prepare. If you’re the comfortable kind, who prefers buying instead of making, take a look at our best energy bars reviews.
Mashed potatoes
Potatoes are a staple food for many campers and hikers. It’s very easy to prepare at home and then just defrost and add other foods like ham, vegetables, etc. The following recipe is very easy and quick and it takes little time on your part to prepare a meal.
You need:
- 1 cup dried potatoes (either made by you or purchased)
- 1 cup (freeze) dried vegetable (broccoli is a really good option here)
- 1 cup soup mix of your choice
- bacon bits (the amount depends on your taste)
- 2 cups water
- Crackers is optional
Start by boil the water. As it starts to simmer, add the vegetables of your choice and let it rehydrate for a minute or two. Then remove it from the stove. To this mixture, add the dried soup and potato powder and stir it until it starts turning into a puree. Let it stay like that at least 10 to 15 minutes to fully rehydrate.
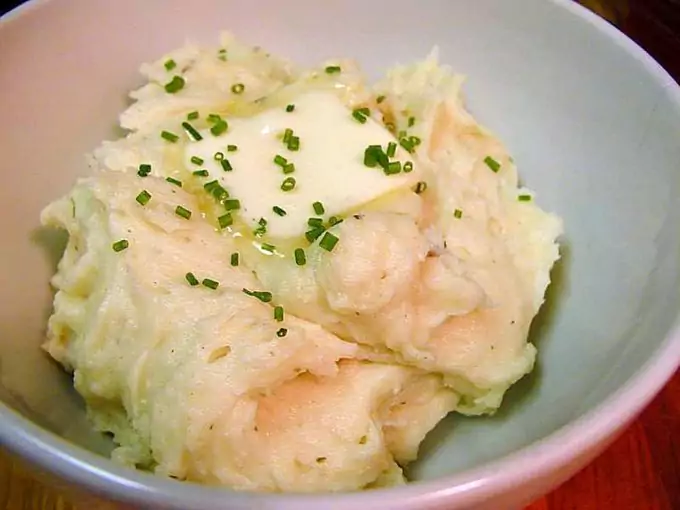
As a finish, you can add the bacon bits and the optional crackers and pack for your camping or hiking adventure. Place it in plastic boxes with reliable sealing cover. You’re ready.
Trout taco recipe
What meal can you prepare unless there’s no meat or fish in it? If you like fishing when camping/hiking, this recipe is for you. You can prepare it either by catching your own fish, or you bring a freezer bag with already caught fish.
Here is what you’ll need to prepare the trout tacos:
- Trout (1 fish yields one portion)
- Olive oil (to taste)
- Lemon drops
- 1 tsp each of pepper, rosemary and/or oregano
- 1 tsp salt
- 1 corn tortilla
- Sauce to your taste
Prepare the fish by cleaning it first. When you’ve removed the insides, season it with a mixture of lemon, pepper, rosemary and oregano, plus salt. Cover the fish by rubbing olive oil onto it, mostly the skin area. You will need a skillet to fry it, so add a bit more oil on the skillet and preheat it. Place the fish and fry until it browns nicely.
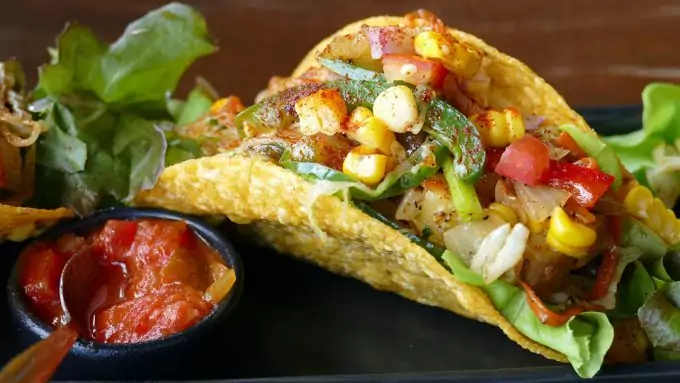
If you don’t have a skillet, you can use a heavy-duty foil. Wrap the prepared fish in the foil and place it at the hot charcoals at the base of the fire. Optionally, you can also use a simple stick on which to place the fish and cook it above the flames (be careful not to over burn it and keep the flames away from the flesh or it will turn black and will be inedible).
[the_ad_placement id=”in-text-2-type-r”]Finally, when the fish is cooked, remove the edible meat and skin from the skeleton and place the pieces on a tortilla wrap. Roll it and you’re basically done. You can add some more to the tacos like ketchup or your favourite sauce. Our suggestions are to try guacamole or Carrot Cayenne sauce.
Korean lentil soup (spicy)
If you’re a fan of spicy and hot food, this recipe will be just for you.
The needed ingredients are:
- 1/2 cup lentils (green or red)
- 4 cups vegetable broth
- onion and garlic, chopped (amount – to your taste)
- half daikon, chopped and peeled (substitute with turnip if daikon is unavailable for you)
- 1 cup chopped cabbage
- 3 tbsp hot Korean sauce
- 1 tbsp cooking oil (or olive oil)
Preheat the oil on an oven and add the Korean sauce. When it’s hot enough, lace the chopped onions until lightly brown. Add garlic and mix it with the onions. Let it stay for a minute on the heat.
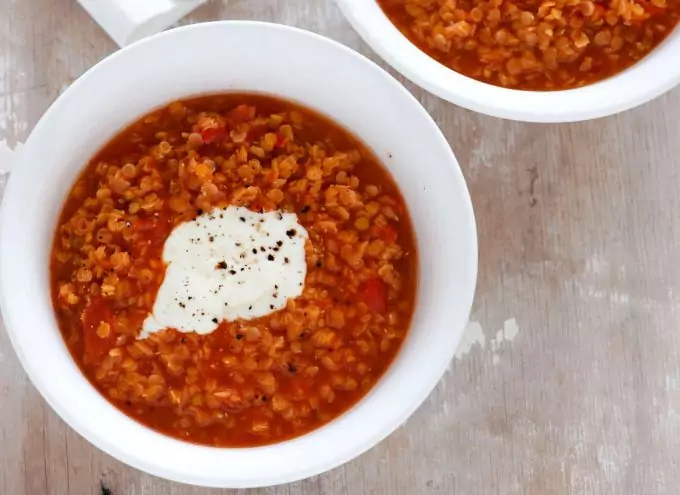
Then move to the lentils. Add some more Korean hot sauce to that, including the vegetable broth. When the water boils you can add the daikon (or turnip) to the meal. Leave the whole thing to a lower heat, so it simmers, and leave it until fully cooked. The lentils will be soft and slightly cracked when they are cooked. You can let them soak in water for 1-2 hours before you boil them, so they will cook faster.
You can add the cabbage while the meal is cooking or after you leave it off the heat. It’s up to you, if you want the cabbage raw, or cooked and softer.
This recipe is easier to prepare if you are car camping and can carry your own stove. Alternatively, you can use a camping stove, which usually small and compact.
Easier backpacking meals for camping and hiking
Broccoli cheese with barley (orzo)
This one is very tasty as the combination of cheese with vegetables is balanced and nourishing. Here are the ingredients:
- Broccoli cheese soup mix (the whole package)
- 1 cup barley/orzo
- 2 cups water
- half cup vegetables (preferably, dehydrated)
- half cup cooked chicken (optional)
- 2 tbsp cheese (parmesan)
- Extra: breadcrumbs, crushed crackers or chips
We highly advise you to dehydrate your own vegetables, as it really adds to the taste and nutritional value. Depending on your taste and preferences, you can dehydrate broccoli, peppers, tomatoes, onions, etc. Make a mixture of them if you have the time and desire to do so, and you won’t be disappointed. If you don’t have the possibility to dehydrate, you should consider buying a food dehydrator – it is a wonderful addition in any kitchen! Take a look at our reviews on the best dehydrators to consider and you’ll learn more about features and prices.

Image credit: preservedhome.com
Now you need to cook the pasta (orzo). It doesn’t have to be perfectly cooked as it will cook again later, one more time. Use an aluminum pouch and pour in it the vegetable soup mix and the dehydrated vegetables.
When the orzo is cooked you should drain the water from it. Then add the pasta into the pouch with the rest of the ingredients and add water, according to the directions on the soup mix package. You’re ready to zip the aluminum pouch and lightly massage the mixture. Let it cook 10-15 more minutes until it’s finally ready.
Serve with topped Parmesan cheese, breadcrumbs, crushed chips, and/or grinded nuts if you want.
You can cook all that on a portable camper’s stove or near the fire (away from the flames).
Banana chocolate muffins
What’s a camper’s meal if there isn’t something sweet for a dessert? Here is another sweet recipe, and the ingredients:
- Flour of choice (2 cups)
- 2 tbsp baking soda
- 1 tbsp salt
- 1/2 cup sugar (best to use muscovado or raw sugar)
- 1/2 cup oil (canola or rapeseed)
- 4 mashed bananas
- 1/4 cup water
- vanilla extract to taste
- 1-2 cups chocolate chips
For this recipe you’ll have to work at home as an oven is required. Preheat it to 350 degrees F. Use muffin tins and brush them with the oil. If you prefer to use muffin cups, there’s no need to grease them, and they are non-stick.

Mix the dry ingredients in a bowl – the flour, salt and baking soda. In another bowl mix the sugar and oil, and a minute or two of stirring, add the mashed bananas. When you have a consistent mixture, add water and vanilla and keep stirring to end up having a homogenous mixture. As this is done, you’re ready to add the flour mixture and the chocolate chips.
You’re ready to pour the whole mixture into the muffin cups (or tins). Don’t fill the cups/tins to the top edge, since they will rise during the cooking process. Ideally, fill them halfway through. Place them in the oven and wait for them to rise. If you place a toothpick in one muffin and it comes out clean, then they are ready and you can take them out.
You can do this recipe if you’re having a portable oven and you’ll be car camping. Otherwise, you can prepare these at home before you go backpacking.
Coconut orange macaroons
This recipe will produce a bunch of crackers that can be eaten at any time during your hiking/camping for a quick snack, when you feel the need for food. You need these ingredients to prepare them:
- 1 cup egg whites (on average 8 eggs)
- 3 cups sugar (about 500 g)
- 1 tbsp salt
- 2 tbsp honey or maple syrup
- 5 cups coconut pieces (shredded)
- 1/2 cup flour of your choice
- 2 tbsp orange zest
- vanilla extract (amount to your taste)
Mix the flour, sugar, coconut pieces and vanilla extract until the ingredients are evenly mixed. Then add the ‘wet’ ingredients one by one (or one after the other) and stir until you have a homogenous mixture. Set the whole thing to heat on the stove until you feel the bottom starts to sizzle. Don’t stop stirring or the bottom will stick to the pan and will overburn. Set the oven to preheat at 350 degrees F.

Image credit: miasdailydish.com
While the mixture has reached the ‘sizzle’ milestone, prepare a sheet or two of cooking paper onto the baking pan. Dip with the spoon in the mixture bowl and place one dip at a time onto the baking sheet. They should be bite-size. You can also just use your hand to place them evenly spread onto the baking sheet. To prevent them from sticking to your hand, dampen your hand before you form the cookie.
Baking time – about 20 minutes. When done, let them cool and you’re ready to pack them in your backpack.
Chocolate bread
Where can you go without bread, and what is a meal without bread? Here’s a recipe you can make to have bread slices added to your other meals.
You need:
- 2 cups chocolate chips
- 1 cup melted butter
- 1 cup sugar (brown, raw, muscovado, etc)
- 2 cups apple sauce
- 2 eggs
- 3 cups flour of your choice
- 1 tsp baking soda
- 1 tsp salt
- vanilla extract (1-2 tsp)
- 1/4 cup nuts of your choice, grinded (walnuts, almonds, sunflower seeds, etc.)
Set the oven to preheat at 350 degrees F. In the meantime, melt 1 cup of the chocolate chips and set them aside. Then take the sugar and butter and batter them until you have a nice creamy substance. Add the 2 eggs and the melted chocolate to the sugar-butter mixture.
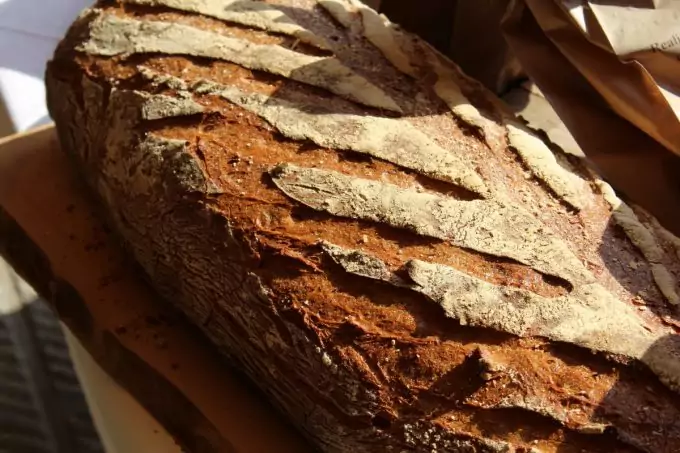
In another small bowl mix the applesauce and vanilla extract. Again, set aside. In a third bowl add and mix the flour, baking soda and the salt (dry ingredients). Take the third bowl and add its content to the butter mixture. Stir the whole thing until the mixture looks homogenous. Finally, add the remaining chocolate chips (not melted) and the nuts of your choice along with the applesauce and vanilla extract.
[the_ad_placement id=”in-text-3-type-r”]Pour the contents of the final bowl into a baking pan. Make sure you grease it with oil before you do that, to prevent the bread from sticking to the pan. Place the baking pan into the oven and bake about 40 to 55 minutes. If you want to prevent the bread from burning on the top you can place an aluminum foil on top, about 10 minutes before you’re ready to turn off the oven.
Let it cool and prepare it for your camping trip. You can either pre-cut it to slices (so you don’t have to do that while camping) or you can just pack the entire loaf and cut on the spot. It is ideal for sandwiches.
Coffee biscotti
If you need an all-purpose breakfast that can hold for days on end while you’re camping or hiking, this one will be a great addition to your recipe ideas. Ingredients:
- 3 cups of flour of your choice
- 1 cup sugar (brown, muscovado, raw, etc)
- 1 tbsp baking soda
- cinnamon to your taste
- 3 eggs
- 1/4 tbsp salt
- 2 tbsp ground coffee
- 1 cup chocolate chips
- 2 tbsp oil (rapeseed, canola, etc.)
- vanilla extract to your taste
Again, preheat the oven to 350 degrees F. Use a baking sheet with a silicone coating (to prevent sticking). If you don’t have such, use an ordinary baking sheet but use a non-stick spray. This is for the preparation.

Mix all the dry ingredients in a large bowl – the flour, sugar, soda, cinnamon, salt, coffee, and chocolate chips. In a second bowl mix the rest of the ingredients – vanilla, oil and eggs.
Next comes the kneading of the bread – you need to mix the dry and wet ingredients and start kneading. It will be dry at first, so have patience. When the dough feels about right, divide it in two pieces and spread them into log-shaped loaves. They are ready to be placed on the prepared baking sheets.
Then place the baking pan into the oven and bake them for about 30-35 minutes. Lower the heat slightly to about 325 degrees. After that, remove from the oven and let them cool for no more than 5 minutes. Sprinkle a bit of water on top (or use a brush to cool the surface) of the loaves. Let it stay for 5 more minutes this way, so the water sinks in the bread.
Here comes the second baking. Using a serrated knife cut the loaves into slices – biscotti. Arrange them onto the baking pan and bake each side for about 10 minutes. Remember to turn them over so both sides get to brown a bit. You’re ready to place them into plastic bags and prepare them for your camping/hiking trip.
Ingredients used for these recipes can vary and you can add, remove or substitute ingredients depending on your taste and your food choices, whether you’re an omnivore, vegetarian or even vegan. These recipes can be adapted to any taste and personal preference. Use your imagination, try them and after you’ve experienced the original taste, you can try other variations. If you need to substitute meat, you can use instead soy products, tofu, etc. Also, you can take a look at our recipes that can be cooked over a camping fire, which will make your trips extremely enjoyable.



The recipes here are all good but I’d be wary about the spicy food as it can lead to stomach cramps during a hike. But that’s just me, I have a weak stomach.
Indeed, spicy food may be a problem for people with sensitive stomachs. But if you know this, you shouldn’t take them on a hike.
I think my friends will look at me in a funny way if I ever bring these foods (the sweets) backpacking. But what do you know, they can actually help sustain a traveler’s appetite without bringing too much or too many. I’ve already tried adding chia seeds and lots of veggies and fiber to our meals before and it worked, but as an added boost I condition myself a few weeks before hiking by drinking lots of water. Makes me feel full and perfectly hydrated.
Thank you for this post!
Backpacking food is a necessary skill for any outdoorsman. You need to have the best backpacking ideas, and there is no better source of information than this article.